
Thingspeak.com. Internet Of Things - ThingSpeak. ESP8266 wifi Part2 - Getting & Sending data via Internet. DIY: Cheap wifi-based temperature/humidity sensor based on ESP8266 & DHT22 - Hardware / Home Automation - openHAB Community. ESP8266 WiFi DS18B20 temperature sensor (Arduino IDE) In this tutorial we will show how to build DS18B20 and ESP8266 temperature sensor without Arduino.
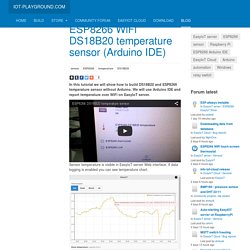
We will use Arduino IDE and report temperature over WiFi on EasyIoT server. Sensor temperature is visible in EasyIoT server Web interface. If data logging is enabled you can see temperature chart. ESP8266 WiFi module DS18B20 temperature sensor 4.7K resistor See buying guide at the end of tutorial. In EasyIoT server add new node in Virtual driver. Program is available at GitHub. In program you will need to change some settings.
#define AP_SSID "your ssid" #define AP_PASSWORD "your AP password" Next change settings related to EasyIoT server like username, password, IP address, port and node address. #define EIOT_USERNAME "admin" #define EIOT_PASSWORD "test" #define EIOT_IP_ADDRESS "192.168.1.5" #define EIOT_PORT 80. Build. We provide EasyIoT Cloud service - no local server installation is needed.
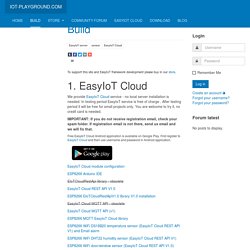
In testing period EasyIoT service is free of charge . After testing period it will be free for small projects only. You are welcome to try it, no credit card is needed. IMPORTANT: If you do not receive registration email, check your spam folder. If registration email is not there, send us email and we will fix that. Free EasyIoT Cloud Android application is available on Google Play. EasyIoT Cloud module configuration. ESP8266 WiFi DS18B20 temperature sensor (ESP8266 Arduino IDE without Arduino) Low cost WIFI temperature (DS18B20) data logger based on ESP8266 with connectivity to thingspeak.com. WiFi Temperature & Humidity Data Logger. The WiFi Temperature & Humidity Data Logger design samples data from a DHT11 temperature and humidity temperature sensor and sends this temperature to two fields of a channel set up on the thingspeak.com site.

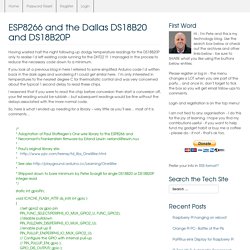
An ESP8266 Serial WIFI Wireless Transceiver Module connects to a local WiFi network, creates a TCP connection to the site and periodically uploads current temperature and humidity data. Here are two windows onto the data being collected remotely by the WiFi Temperature & Humidity Data Logger. The ESP8266 is controlled by an Arduino Nano and powered by a separate and stable 3.3v power supply. In the first version of this design, the Nano sampled the analogue inputs from both a stable reference voltage and the TMP36 temperature sensor. This low power sensor has a linear temperature to voltage characteristic of 10mV / ºC and outputs a voltage of 750mV at 25ºC. Here’s the Arduino code that now includes status LEDs and error recovery: [/codesyntax] Neat huh? Like this: Like Loading... ESP8266 and the Dallas DS18B20 and DS18B20P.
Having wasted half the night following up dodgy temperature readings for the DS18B20P only to realise I’d left existing code running for the DHT22 !!!
I managed in the process to reduce the necessary code down to a minimum. If you look at a previous blog in here I referred to some simplified Arduino code I’d written back in the dark ages and wondering if I could get similar here. I’m only interested in temperatures to the nearest degree C for thermostatic control and was very concerned about the typical 1 second delay to read these chips.
I reasoned that if you were to read the chip before conversion then start a conversion off, your first reading would be rubbish – but subsequent readings would be fine without the delays associated with the more normal code. So, here is what I ended up needing for a library – very little as you’ll see… most of it is comments… static int gpioPin; // Perform the onewire reset function. // // Write a bit. // // Read a bit.
And now for the actual code.. How to Directly Program an Inexpensive ESP8266 WiFi Module. The ESP8266 is the answer to “I want something with Wifi.”
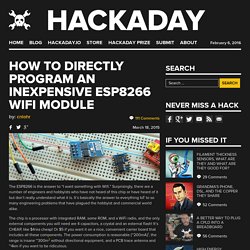
Surprisingly, there are a number of engineers and hobbyists who have not heard of this chip or have heard of it but don’t really understand what it is. It’s basically the answer to everything IoT to so many engineering problems that have plagued the hobbyist and commercial world alike. The chip is a processor with integrated RAM, some ROM, and a WiFi radio, and the only external components you will need are 4 capacitors, a crystal and an external flash! It’s CHEAP, like $4/ea cheap! Or $5 if you want it on a nice, convenient carrier board that includes all these components. One place thing that more people need to know about is how to program directly for this chip. Know thy Hardware First off, some background.
The processor by default runs at 80 MHz but can go up to 160 MHz, it has ~80kB DRAM (Data RAM), and ~35kB of high speed IRAM (Instruction RAM).4 Yes, that means it uses a Harvard architecture. Firmware Background Toolchains. Video Tutorials. Community Forum View forum - ESP8266 Arduino. GitHub - esp8266/source-code-examples: Examples of code for the ESP8266. ESP8266 and Arduino IDE - blink example.