
Construct 2. 5 enero, 2014 por Xmoggo 0 Comentarios Como guardar una partidaGuardar y recuperar información de un juego Me gustaría empezar esta entrada felicitando el 2014 a todos los que visitáis el blog y deseando lo mejor para vuestros proyectos en este nuevo año que empieza.
Bien, ya he traducido al español otro tutoria en la web de Scirra y espero que os sea de utilidad para vuestros juegos. En esta ocasión se explica el sistema que tiene Construct 2 para guardar una partida y recuperarla más tade, esto es, dar la oportunidad al jugador de guardar los avances en el juego y volver al punto exacto donde lo dejó cuando vuelva a encender su ordenador, tablet, móvil… Aprender a hacer esto e incluirlo en nuestro proyectos me parece algo básico para cualquier juego que sea un poco complicado: –> Como guardar una partida <– Como siempre, espero que os sea de utilidady agradezco los comentarios. X.Moggo 26 diciembre, 2013 por Xmoggo 0 Comentarios. Physics in Construct 2: The basics.
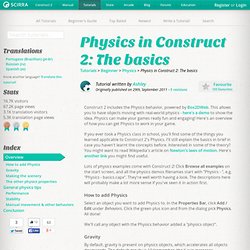
Construct 2 includes the Physics behavior, powered by Box2DWeb.
On Screen Touch Controls For Button Games. If your a newbie to C2 then this will probably be a hard task for you until you read around or post a thread asking about it.
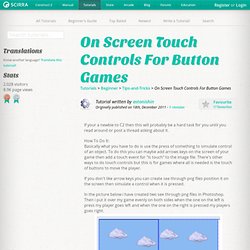
How To Do It:Basically what you have to do is use the press of something to simulate control of an object. To do this you can maybe add arrows keys on the screen of your game then add a touch event for "is touch" to the image file. There's other ways to do touch controls but this is for games where all is needed is the touch of buttons to move the player. Making an iOS web app with Construct 2. Did you know iOS supports web apps - apps that are installed from a web page, rather than from the App Store?
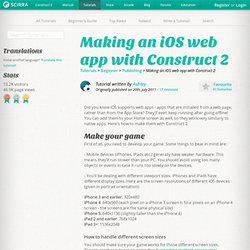
They'll even keep running after going offline! You can add them to your Home screen as well, so they work very similarly to native apps. The Big List Of Pixel Art Tutorials. The Big List Of Pixel Art Tutorials.
Indie Resources. On the 30th July 2014 the site got updated, restrutured and redesigned… however the update is still not finished and thus this new Indie Resources overview page is partly incomplete.
In case you are missing something you can still check out the outdated old Indie Resources page until the update is complete. Thank you for your understanding. (Game Making Tools, Game Design, Postmortems, Programming, Project Management…) (Create/Download Graphics, Hire Graphic Designer…) (Create/Download Sound + Music, Hire Sound Designer/Musician/Voice Actor…) (Distribution of Game via Payment Processor, Digital Store, Free File Hoster…) (Starting & Running A Business, Game Revenue, Postmortems…) (released…but still unfinished. rest of the articles will be added in the next few days.)
Publishing and promoting your Construct 2 game. Construct 2 games run in a browser using HTML5 technology.
This means there are many ways you can publish your games. Here's an overview of the ways to share your games with the world. There are also some other tips and points to consider before publishing your game. Touch controls and a trick to detect input method. These days it's naïve to assume everyone on the web has a mouse and keyboard.
On the modern web, many people are now browsing via touchscreen devices like iPhone, iPad and Android phones. If your game can only be controlled by mouse and/or keyboard, users on these devices will be unable to play your game! However, it's easy to have on-screen touch controls - and there's a clever and simple trick to detect whether the user has a touchscreen device, too. Making a Sword Character. Example Capx: ExampleObs: Adapted from my Little Knight game.

Feel free to use the code as you wish, but please don't steal the assets :D Step 1 Create all animations for your character. Walk, Jump... As you want. You'll separate the char's animations making two sprites: Character and Hands, each with the same animations and with the same names. Step 2 Add an image point called, ex.: SwordGrip for all hands animation frames.Like so: Name it the same for all frames. Making a Fancy Lifebar. Getting Started Here i'll assume you already have the graphics for your lifebar - make it however you want!

But the basic structure is this: The second one is optional. Beginner's Basics For Construct 2. Ok i thought i'd have a go at a tutorial, never done one before, and i'm not an expert at Construct 2 by any means, But i thought i'd share some of the things i've learn't since using Construct 2 that may help some beginners. It may seem a bit random and some ways may be better done differently but it's like a tips section. And the way i do things. TIP: Before you Add any Sprites, Backgrounds etc. In the layers Tab on the right, Add at least 2 more layers so now you have 3 in total, Name them from the bottom up, Background, Objects, GUI.
What this does is allow editing and game play to be better, and nothing will interact incorrectly. TIP: In your Event Sheet get used to creating GROUPS such as Enemy Spawn, Player Controls, Collisions etc, then put your events in the corresponding GROUP as this will make it easier for BUG FINDING. Building a platform game - a beginner's guide. You'll learn how to:- Best use built-in behaviors- Switch animations: standing > running > falling ...- Test for progress and award points Building blocks - the objects to insert Key to a platform game are two types of objects: Solids and Platforms.
Solids are obvious: they form the floors and walls that restrict players' movements. Platforms have a name which might confuse you initially: rather than being the platforms on which players stand and fight and run and jump, they're the objects that do the standing and fighting and running and jumping.