
10 Top Photography Composition Rules. There are no fixed rules in photography, but there are guidelines which can often help you to enhance the impact of your photos.
It may sound clichéd, but the only rule in photography is that there are no rules. However, there are are number of established composition guidelines which can be applied in almost any situation, to enhance the impact of a scene. These guidelines will help you take more compelling photographs, lending them a natural balance, drawing attention to the important parts of the scene, or leading the viewer's eye through the image. Once you are familiar with these composition tips, you'll be surprised at just how universal most of them are.
You'll spot them everywhere, and you'll find it easy to see why some photos "work" while others feel like simple snapshots. Rule of Thirds Imagine that your image is divided into 9 equal segments by 2 vertical and 2 horizontal lines. Doing so will add balance and interest to your photo. Balancing Elements Leading Lines Viewpoint Depth. Nightclub photography: you're doing it wrong. You may be unsurprised to learn that I have opinions about nightlife photography.

I'm not the world's greatest photographer, but I take a lot of photos in nightclubs, and I spend a lot more time than that sifting through other people's photos. This means I see a lot of crappy photos, and I see a lot of different people making the same mistakes over and over again. So here's some advice for those of you shooting inside a nightclub that I believe will dramatically increase the quality of your photos. Most of this is aimed at people using SLRs with real lenses, but some of it will apply to smaller cameras too.
(Let's see if this gets me as much hate mail as the bike thing did...) Stop using your flash. Flash photos taken in nightclubs almost always look terrible. Stop using a zoom lens. You don't need it. Yeah, it'll be a little grainy, but it will look better than the photo you'll get with a flash, because you don't know how to use your flash properly anyway. Stop standing still. Choosing a Camera Lens Filter. Camera lens filters still have many uses in digital photography, and should be an important part of any photographer's camera bag.
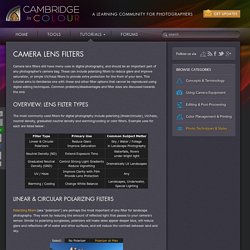
These can include polarizing filters to reduce glare and improve saturation, or simple UV/haze filters to provide extra protection for the front of your lens. This tutorial aims to familiarize one with these and other filter options that cannot be reproduced using digital editing techniques. Common problems/disadvantages and filter sizes are discussed towards the end. The most commonly used filters for digital photography include polarizing (linear/circular), UV/haze, neutral density, graduated neutral density and warming/cooling or color filters. Example uses for each are listed below: Polarizing filters (aka "polarizers") are perhaps the most important of any filter for landscape photography. Two separate handheld photos taken seconds apart Note how the sky becomes a much darker blue, and how the foliage/rocks acquire slightly more color saturation.
DSLR starters' guides: Shutter speed - DSLR Basics - Digital SLR Photography. What is shutter speed? Shutter speed is how long the sensor in your camera is exposed to light. Think of it as a blink. It’s measured in seconds and more commonly as a fraction of a second. Your DSLR has a whole range of shutter speeds but in photographic terms the important ones are: When we talked about doubling or halving exposure with aperture in our Starters' guide to aperture, the same applies to shutter speed. By moving from 1/60 to 1/125 and thus reducing exposure time, you are halving the light entering the camera. By moving from 1/30 to 1/15 and thus increasing exposure time, you are doubling the light entering the camera. You'll also find speed settings longer than a quarter-second, increasing in increments up to 30 seconds of longer.
This New York street scene was taken with a quarter-second (1/4) exposure. The first image of the London Eye was taken at ISO 200 at f/29 for 30 seconds: While the second was taken at ISO 1600 at f/2.5 for 1/6 seconds: Why is shutter speed important? Portrait Photography : Tips and Techniques to getting a better portrait. Focus on the eyes, blurring of the background, lighting to create dimension, texture both smooth and rough…these are but a few of things we can dissect that make a portrait stand out.
**This post was originally on my old blog and has now found it’s way here** I love portrait photography. There’s something about working with another person, having a great dialog with them, and taking memorable photographs that make me a happy camper. I tend to be extremely modest about my work, but can confidently say that portraiture is a strong point in the repertoire. So it’s with great enthusiasm to write this blog about tips and techniques to getting a better portrait. Portraiture can be intimidating. So what gets you over this hump?
The most immediate tool in a photographers possession is his camera.