
Raspberry Pi. The Raspberry Pi is a series of credit card-sized single-board computers developed in the UK by the Raspberry Pi Foundation with the intention of promoting the teaching of basic computer science in schools.[3][4][5] The original Raspberry Pi and Raspberry Pi 2 are manufactured in several board configurations through licensed manufacturing agreements with Newark element14 (Premier Farnell), RS Components and Egoman.
These companies sell the Raspberry Pi online.[6] Egoman produces a version for distribution solely in China and Taiwan, which can be distinguished from other Pis by their red colouring and lack of FCC/CE marks. The hardware is the same across all manufacturers. In 2014, the Raspberry Pi Foundation launched the Compute Module, which packages a BCM2835 with 512 MB RAM and an eMMC flash chip into a module for use as a part of embedded systems.[10] Hardware[edit] Processor[edit] Performance of first generation models[edit] Overclocking[edit] RAM[edit] Networking[edit] Peripherals[edit] Finally an Easy Way to Watch Live TV in XBMC Media Center. Now there is finally an easy way to watch live TV in XBMC media center.

In this start to finish guide, you will learn how to get live TV working on XBMC media center. I am using OpenELEC (Linux / Raspberry Pi) and Raspbmc (Raspberry Pi) operating systems in this article, but once you have setup the backend TV server, you can watch live TV on any operating system or media center that supports Home TV Streaming Protocol (HTSP). This article may look like it is for advanced users only, but don’t be intimidated, the setup is easy for beginners, too. 1. Install Tvheadend service The great thing with OpenELEC and Raspbmc is that they have a pre-installed tvheadend client service. If you are using OpenELEC, just install the hts-tvheadend client from the system menu in XBMC (System – Add-ons – Get Add-ons – OpenELEC.tv Mediacenter OS Add-ons – Services – hts-tvheadend). 2.
Next, we will configure the tvheadend backend server. Check HTPC’s IP address Login to tvheadend with web-browser 3. That’s it! 3 Easy Steps to Install OpenELEC with WiFi on Raspberry Pi. Further to my comprehensive Raspberry Pi XBMC guide, this tutorial will show you how to install Raspberry Pi OpenELEC distribution and configure wireless USB WiFi adapter in 3 easy steps.
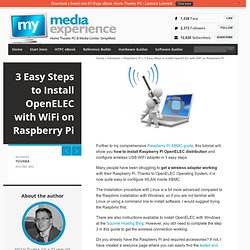
Many people have been struggling to get a wireless adapter working with their Raspberry Pi. Thanks to OpenELEC Operating System, it is now quite easy to configure WLAN inside XBMC. The installation procedure with Linux is a bit more advanced compared to the Raspbmc installation with Windows, so if you are not familiar with Linux or using a command line to install software, I would suggest trying the Raspbmc first.
There are also instructions available to install OpenELEC with Windows at the Squirrel Hosting Blog. However, you still need to complete the step 3 in this guide to get the wireless connection working. The Only Raspberry Pi XBMC Tutorial You Will Ever Need.