
116-43 Jumper with raglan sleeves and multi coloured pattern in ”Karisma” pattern by DROPS design. Cathode pattern by Stefanie Japel. Figure 8 Wristwarmers. Supercute ladies mitts in an amazingly lovely yarn!
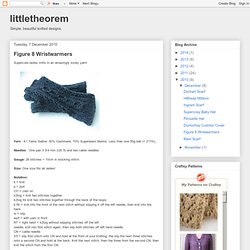
Yarn : K1 Yarns Selkie, 30% Cashmere, 70% Superwash Merino. Less than one 50g ball (= 217m). Needles : One pair 3 3/4 mm (US 5) and two cable needles. Gauge: 26 stitches = 10cm in stocking stitch. Size: One size fits all ladies! Notation: k = knit p = purl CO = cast on k2tog = knit two stitches together k2tog tbl knit two stitches together through the back of the loops k1fb = knit into the front of the next stitch without slipping it off the left needle, then knit into the back sl = slip wyif = with yarn in front RT = right twist = k2tog without slipping stitches off the left needle, knit into first stitch again, then slip both stitches off left hand needle CN = cable needle X5 = slip first stitch onto CN and hold at the front of your knitting, the slip the next three stitches onto a second CN and hold at the back. Directions Fisherman's Rib Row 1: p1 *k1 p1* to end Row 2: k1 * sl 1 wyif k1* to end Cable Pattern: Row 2: RT p2 k1 p2 k2 p1 k2 p2 k1 p2 RT.
Long Overdue Fusing Plastic Bag Tutorial. I realized this afternoon that I basically explain this technique to an Etsy Labs visitor at least once a day, but had never put the instructions online.

So, here it is. Fusing! Plastic! Bags! Do you have one zillion plastic drugstore and grocery bags under your sink, or perhaps smushed into a drawer? What you'll needPlastic bags (thin, flimsy ones work best)Parchment paper, freezer paper or plain old copier paperIron (and your favorite ironing surface) Making it Flatten out the bag and trim the bottom seam and handles off. Turn the bag inside-out if it has printing on it. Next, run a hot iron (we set ours to "Rayon", but you will need to experiment a little to see what works for you) and keep the iron moving constantly. Peel a corner of the paper back to see if the plastic is fused together.
Peel the parchment paper away from the finished plastic sheet. Here are a few more rad examples of what you can do with this stuff, courtesy of Etsy seller Eclipse Alright, y'all. Look to inspire. Under The Table and Dreaming. Refashion. WOO HOO!
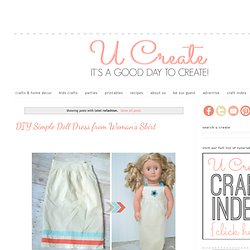
Call me a big nerd but my heart's pounding because i'm so excited and honored to be here!!! My name is Sarah and i keep a blog over at Welcome to the gOOd life. it's a diary written by me (and sometimes by my hilarious husband) of the good and the ugly as a wife, a stay at home mom, raising two kids under three-just a year apart, and also my weekly DIY sewing projects. so should we get on to my DIY project? Inspiration: squeezebox top from anthropologie picture from an anthropologie review blog. i think i literally gasped when i saw this top online. i instantly fell in love and knew i had to have it! I bought 2 white shirts, one in xs which is my size and one in large. i got the large shirt in round neck for more fabric while i got the xs in a scoopneck. you'll need: 2 shirts scissors matching thread pins estimated time: 1-2 hrs. project cost: very reasonable(mine was $8 for both shirts) skill level: advanced beginner to intermediate 3. take one of the piece and begin making the pleates. 4.