
Hint.css - A tooltip library in CSS. Kite. Creating Material Design Ripple Effects with SVG. An in-depth tutorial on how to build the ripple effect outlined under Google Material Design's Radial Action specification and combine it with the powers of SVG and GreenSock.

View demo Download source With the advent of Google’s Material Design came a visual language that set out to create a unified experience across platforms and devices. Google’s examples depicted through their Animation section of the Material Guidelines has become so identifiable in the wild that many have come to know these interactions as part of the Google brand. In this tutorial we’ll show you one way of building the ripple effect specifically outlined under Radial Action of the Google Material Design specification by combining it with the powers of SVG and GreenSock. Responsive Action. Line Menu Styles. Centering in CSS: A Complete Guide. Centering things in CSS is the poster child of CSS complaining. Why does it have to be so hard? They jeer. I think the issue isn't that it's difficult to do, but in that there so many different ways of doing it, depending on the situation, it's hard to know which to reach for.
So let's make it a decision tree and hopefully make it easier. I need to center... Horizontally Is it inline or inline-* elements (like text or links)? You can center inline elements horizontally, within a block-level parent element, with just: This will work for inline, inline-block, inline-table, inline-flex, etc. Is it a block level element? You can center a block-level element by giving it margin-left and margin-right of auto (and it has a set width, otherwise it would be full width and wouldn't need centering). This will work no matter what the width of the block level element you're centering, or the parent. Note that you can't float an element to the center. 50+ Beautiful CSS HTML5 Login Form Templates. In this article we’ll show you some creative css html5 login forms templates using modern design with CSS3 and HTML5.
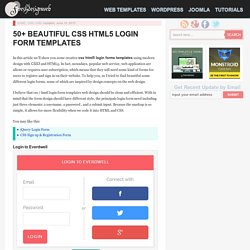
In fact, nowadays, popular web service, web application are allows or requires user subscription, which means that they will need some kind of forms for users to register and sign in on their website. To help you, so I tried to find beautiful some different login forms, some of which are inspired by design concepts on the web design. I believe that css / hmtl login form templates web design should be clean and efficient. With in mind that the form design should have different style, the principals login form need including just three elements: a username, a password , and a submit input. Because the markup is so simple, it allows for more flexibility when we code it into HTML and CSS. You may like this: Login to Everdwell more info. Ajouter un loader pendant le chargement de vos pages web. Il arrive parfois que certaines pages d’un site internet prennent un moment pour se charger complètement.
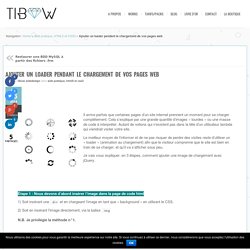
Cela s’explique par une grande quantité d’images « lourdes » ou une masse de code à interpréter. Autant de notions qui n’existent pas dans la tête d’un utilisateur lambda qui viendrait visiter votre site. Le meilleur moyen de l’informer et de ne pas risquer de perdre des visites reste d’utiliser un « loader » (animation au chargement) afin que le visiteur comprenne que le site est bien en train de se charger, et qu’il va s’afficher sous peu. Je vais vous expliquer, en 3 étapes, comment ajouter une image de chargement avec jQuery. Étape 1 : Nous devons d’abord insérer l’image dans la page de code html 1) Soit insérant une div et en chargeant l’image en tant que « background » en utilisant le CSS. 2) Soit en insérant l’image directement, via la balise img N.B.
SLIDER REVOLUTION - The Responsive Slider Plugin. HTML, CSS, & jQuery Menus. CSS3 Generator. Un petit peu de CSS... Pseudo éléments, triangles et z-index - L'équipe front end de Proximity BBDO Paris L'équipe front end de Proximity BBDO Paris. Devenus un des incontournables du CSS, :after et :before sont mes meilleurs alliés pour tous les éléments “décoratifs” : un séparateur, une petite flèche, le revers d’un ruban… Ils évitent de créer un div vide juste pour lui appliquer du CSS, et surtout ils ne sont pas lus par les robots des moteurs de recherche ou les lecteurs d’écrans pour les déficients visuels, ce qui représente déjà un avantage certain.
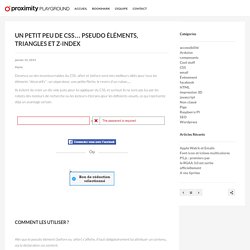
Comment les utiliser ? Afin que le pseudo élément (:before ou :after) s’affiche, il faut obligatoirement lui attribuer un contenu, via la déclaration css content. Puisqu’ici nous parlons de créer d’éléments décoratifs, pas besoin de contenus. Un contenu vide fonctionne aussi. Je ne conseille pas d’utiliser les pseudo-éléments pour des éléments ayant un contenu texte, ce sera notamment ingérable pour les gros sites qui sont localisés. En général, on utilise beaucoup la position absolute pour placer les pseudo éléments. Les pseudo éléments sont compatibles tout navigateurs, à partir d’IE8.