
How To: WiFi your Raspberry PI. The Raspberry Pi has many great features straight out of the box, unfortunately WiFi is not one of them, in this guide I’ll show you how I WiFi equipped my Raspberry PI for only a fiver.
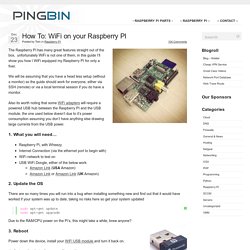
We will be assuming that you have a head less setup (without a monitor) so the guide should work for everyone, either via SSH (remote) or via a local terminal session if you do have a monitor. Also its worth noting that some WiFi adapters will require a powered USB hub between the Raspberry PI and the USB module, the one used below doesn’t due to it’s power consumption assuming you don’t have anything else drawing large currents from the USB power. 1.
Topic: How to configure a controller on RetroPie? Quit Emulationstation by pressing your menu button (on the controller), going to quit, then select “Exit Emulationstation”.
Then type the following (CASE SENSITIVE!). Press Enter after each line. sudo chown pi /opt/retropie/configs/all/retroarch.cfg cd /opt/retropie/emulators/RetroArch/installdir/bin sudo . The last command will launch a controller configuration tool. Once you’re happy with the setup, reboot, or type: Share your Raspberry Pi's files and folders across a network. You can share your Raspberry Pi's files and folders across a network using a piece of software called Samba, a Linux implementation of the Server Message Block protocol.
You'll need to install this software: $ sudo apt-get install samba samba-common-bin Samba contains the SMB protocol, support for the Windows naming service (WINS), and support for joining Windows workgroups. Emulator Files - Emulation General Wiki. You are reading a book about Samba, a software suite that networks Windows, Unix, and other operating systems using Windows' native networking protocol.
Samba allows Unix servers to offer Windows networking services by matching the filesystem and networking models of Unix to those of Windows. Samba acts as a bridge between the two systems, connecting the corresponding parts of their architectures and providing a translation wherever necessary. Bridging the gap between systems as dissimilar as Windows and Unix is a complex task, which Samba handles surprisingly well.
To be a good Samba administrator, your abilities must parallel Samba's. For starters, you need to know basic Unix system and network administration and have a good understanding of Windows filesystems and networking fundamentals. Learning System. Learning System. Key-Based SSH Logins With PuTTY. Version 1.0 Author: Falko Timme Last edited 12/05/2006 This guide describes how to generate and use a private/public key pair to log in to a remote system with SSH using PuTTY.
PuTTY is an SSH client that is available for Windows and Linux (although it is more common on Windows systems). Using key-based SSH logins, you can disable the normal username/password login procedure which means that only people with a valid private/public key pair can log in. That way, there is no way for brute-force attacks to be successful, so your system is more secure. I do not issue any guarantee that this will work for you! 1 Preliminary Note In this tutorial I use a Windows desktop to connect to a Linux SSH server (Debian Sarge, IP address: 192.168.0.100). 2 Install PuTTY, PuTTYgen, And Pageant On The Windows System First we need to install PuTTY, PuTTYgen, and Pageant on our Windows system. Download the following files from the PuTTY download page and save them on your Windows system, e.g. on the desktop: Arc Software Consultancy using the Raspberry Pi. The goal of this article is to configure the Raspberry Pi so that it can integrate into an existing Windows Networking environment without needing to make changes to any of the other, perhaps numerous, Windows PCs.

I know that there are numerous other ways to achieve networking like this though so please don’t feel the need to tell me about them in the comments below. Please note that I will be doing a version of this article for the Apple Macintosh too. A good way to do some programming on the Pi is to access the Pi file system over the network. The advantage this gives you is that you can speedily browse the web for snippets of code under Windows and then copy / paste them directly into a file on the Pi. This method works really well for me and it also allows me to easily back up my source code onto my main Windows machine.
So this guide is intended for someone who is familiar with Windows Networking already. Where am I going with this? Sudo apt-get update ls /media sudo nano smb.conf. How to Change Your Raspberry Pi (or Other Linux Device’s) Hostname. The default hostname for the Raspberry Pi is, creatively enough, “raspberrypi“.
Raspberry Pi Documentation. Tutorial - How to give your Raspberry Pi a Static IP Address. Tutorial - How to Give your Raspberry Pi a Static IP Address To log in to your Raspberry Pi remotely, you'll need the IP of the Raspberry Pi – this is basically like your house address and tells the host computer where to look for it on the network.
By default, the Raspberry Pi will be given an IP automatically by the router (called Dynamic IP and denoted by DHCP) when you connect to a network. However, this can change whenever you remove the Pi from the network e.g. turn it off. Having a static IP isn't essential, however it will make repeated access to the Raspberry Pi via SSH much simpler, as you'll always know that the Raspberry Pi has the same address. Imagine how much trouble your postman would have if your house constantly changed location :) This task assumes that you have the official Raspian OS release installed.
A. Boot into Raspian and log in (Username. pi, Password. raspberry), this will all be command line stuff, so no need to log in to the GUI.