
Skymedias - Blog Content. Glass Rendering Tutorial with Vray in 3dsmax Author: Jan Rybar Software: 3dsmax, VRay Author Website: ImagesFX Our work is primarily artistically oriented – we are given plans and sketches, and we are entrusted with the task of making great imagery and movies.
Occasionally however, based on the evolution of our software (renderers), clients are requesting for more realism-based images. Architecture in particular, is always about the use of correct materials and while lots of new buildings, mainly offices and public spaces, have large glass facades, you need to deal with creating realistic glass. Just recently, we wrapped up a huge reconstruction project for a skyscraper in NYC and the client asked us to simulate several versions of their facade design.
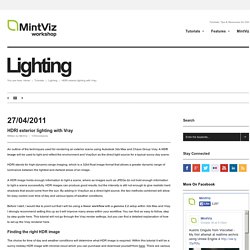
Most modern glass panels are built from several sheets of glass and each sheet has different properties. In the image above, you can see the basic material of my glass sheet. Skymedias - Blog Content. Exponential and linear colour mapping in Vray. Within Vray there are various processes and tools that we use to generate what we would consider to be a realistic rendered image.
Options such as tone mapping, light intensity and camera exposure are fully configurable and can be moulded into what a 3D visualiser would name as their workflow. There are no right or wrong processes as they all lead to the same goal, to produce a high quality render. If you choose not to use a linear workflow, it may not be physically correct in terms of light intensity but it might look correct and is therefore acceptable. If you are using a linear workflow, then it is not just the lighting that needs to be accurate, you must also apply the same method to your materials. If you set up everything as linear and render using correct camera exposure but you don’t know how to create a glossy plastic, you are not physically correct.
Blown out lights are caused by the camera settings. Exponential – This mode will saturate the colours based on their brightness. VRay Training Manual for RHINO. Vray material creation - V-ray 2.0 tutorial - free lessons. So we loaded a hdri map in the vray reflection environment slot.
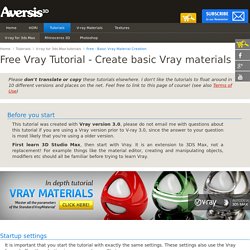
Hit render and look at the result. The reflections look very strong! Actually the material didn't become more reflective, it just got a complete environment to reflect in so the reflections are simply more prominent now! The material has a medium grey reflection color, which means about 50% reflection strength, this is actually a lot. Glass and liquid rendering in V-ray - Free vray tutorial. Another thing we will be changing, is the max depth setting for both reflections and refractions.
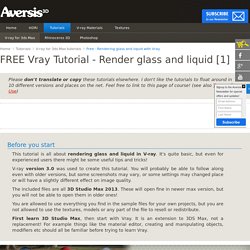
To speed up rendering, this is set to 5 by default. So vray will by default stop tracing rays when they effectively passed 5 surfaces. For example in our scene, when you look through the upper part of the wineglass, you pass 4 surfaces (the glass has thickness, so there are 2 surfaces on each side of the glass). It's the same for reflections, when a reflection is reflected, and that one is again reflected and so on, this can go on forever. It's like when you're in between 2 mirrors facing each other, your reflection will be reflected in infinity. So to speed up calculations, you can control the depth of reflections and refractions that will be calculated by Vray. Note that the difference is subtle... Render elements. HDRI exterior lighting with Vray. An outline of the techniques used for rendering an exterior scene using Autodesk 3ds Max and Chaos Group Vray.
A HDR image will be used to light and reflect the environment and VraySun as the direct light source for a typical sunny day scene. HDRI stands for high-dynamic-range imaging, which is a 32bit float image format that allows a greater dynamic range of luminance between the lightest and darkest areas of an image. A HDR image holds enough information to light a scene, where as images such as JPEGs do not hold enough information to light a scene successfully.
HDR images can produce good results, but the intensity is still not enough to give realistic hard shadows that would come from the sun. Free CG: Vray SSS Tutorial (Sub Surface Scattering) Making sense of VRay Settings. Recently Ryan Lintott and I went to a VRay training seminar by the man himself Vladimir Koylazo (one of the makers of VRay) who went through a number of facets of VRay including a step by step way of breaking down your render settings into logical steps to get the best combination of quality and speed.
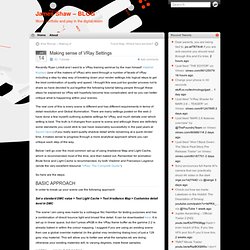
I thought this was just too gooder process not to share so have decided to put together the following tutorial taking people through these steps he explained so VRay will hopefully become less complicated, and so you can better critique what is happening within your scenes. The real core of this is every scene is different and has different requirements in terms of detail resolution and Global Illumination. There are many settings posted on the web (I have done a few myself) outlining suitable settings for VRay, and much debate over which setting is best.
So here are the steps: In order to break up your scene use the following approach: NOTES on WHOLE PROCESS. Vray Displacement. Vray - Supernova-Wiki. Vray-materials.de - Your ultimate V-Ray material resource. Your ultimate V-Ray material resource. We have recently discovered that some of the latest material-uploads did not include a material file but an infected pif file instead.
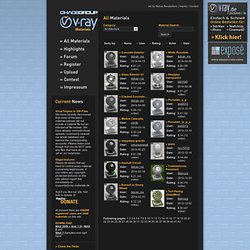
We have already removed those uploads, scanned & cleaned our whole database and banned the corresponding accounts. Please make sure though that you do NOT open any files that have an .exe, .pif or .scr extension.Please be aware that we have to control every material concerning legal issues. Vray 2.0 materials guide. An in depth look at each setting within a V-Ray material.

You can jump to a specific section using the links below. DiffuseReflectionRefractionTranslucencyBRDFOptionsMapsReflect/Refract interpolation Diffuse Diffuse This is the actual colour of the surface, reflection and refraction colours can affect the visual appearance of this colour. Roughness Can be used to simulate dust on a surface by controlling the way the surface reflects direct light. Vray Edge Fillet Tutorial. This is a quick tutorial to show how I add extra details to the edges of surfaces.
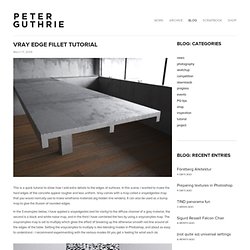
In this scene, I wanted to make the hard edges of the concrete appear rougher and less uniform. Compositing V-ray Render Layers in Photoshop. In this tutorial Ahmed Fathi takes a look at how to composite together V-ray render layers using blending-modes and masks in Photoshop.
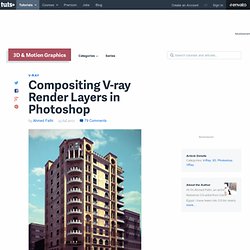
Once completed, this process allows you to change or tweak any aspect of your image in seconds without having to re-render a thing! Ahmed also covers a few extra post production techniques such as Chromatic Aberration and Depth Of Field, as well as how to emulate a Cross-processed look. Republished Tutorial Every few weeks, we revisit some of our reader's favorite posts from throughout the history of the site. This tutorial was first published in July of 2010. Additional Files/ Plugins:Download the Project Files for this tutorial Step 1.
Shadow Matte with V-Ray. Ever wondered how to create a proper ‘Shadow Matte’ material when working with the V-Ray rendering system in 3ds Max? There’s a simple, straight-forward solution: First, launch the Material Editor (M), select a material slot and click on the “Get Material” icon.Choose VRayMtlWrapper, change ‘Base material’ to ‘Standard’, enable ‘Matte surface’, change ‘Alpha contribution to’ -1.0.Then enable ‘Shadows’ and double check if ‘Affect alpha’ is off. 3ds Max 2011 introduced the Slate Material editor which offers a slightly different workflow: