
Theremin. Objective Our goal in this project was to design a feature-packed digital theremin using a Raspberry Pi 3 Model B+.
This entailed concurrently polling two distance sensors over an I2C connection, interpreting user controls, and generating and modulating sound waves without noticeable delay. The final product had to combine all these tasks into an expressive and responsive system that would be a joy to play. For a sneak peek of the theremin in action, here's a remake of Blinding Lights we programmatically played. Note: this was not played live, we manually sequenced all notes to be played in Python because we couldn't play the theremin well enough. Introduction For our final project, we decided to build a unique musical device that can be played without physical contact: a theremin. Design and Testing We split the design of the project into three parts: sensor selection and processing, user interface design, and audio synthesis.
Sensor Selection Above is an image of the sensor we used. Tuning. Getting started with the Sense HAT - Detecting movement. What you will make The Sense HAT, which is a fundamental part of the Astro Pi mission, allows your Raspberry Pi to sense the world around it.
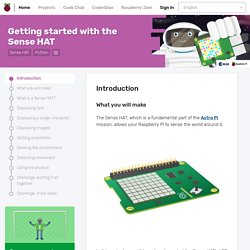
In this project, you will learn how to control the Sense HAT’s LED matrix and collect sensor data, and you will combine these ideas in a number of small projects. The possibilities of the Sense HAT. Did you realise the Sense HAT has been available for over two years now?
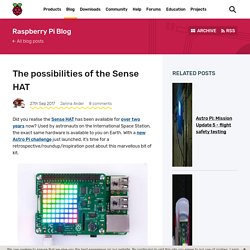
Used by astronauts on the International Space Station, the exact same hardware is available to you on Earth. With a new Astro Pi challenge just launched, it’s time for a retrospective/roundup/inspiration post about this marvellous bit of kit. The Sense HAT on a Pi in full glory The Sense HAT explained. Get started: Linux ALSA and JACK. Before we dive into specific music applications, I need to provide a little background information about audio and MIDI support on Linux.
If you’re coming from Mac OS X or Windows, you may not have heard very much about the Linux way of doing audio and MIDI. Seems like the “mainstream media” don’t want to have much to do with Linux. Linux has a very well-developed infrastructure for audio and MIDI. Linux audio is a “stack” (a layer cake) with audio/MIDI applications on top: Audio applications JACK (Jack Audio Connection Kit) ALSA (Advanced Linux Sound Architecture) Linux kernel You probably haven’t heard about JACK and ALSA before, so a little explaining is in order. The Advanced Linux Sound Architecture (ALSA) uses the kernel to implement low-level — but extremely powerful — audio and MIDI features.
Platforms RaspberryPi. Python 3.0 alsaaudio. Raspberry PI – getting audio working - CAGE Web Design. How to get the audio working on your Raspberry PI?
You have to install three packages: The ALSA utilities:sudo apt-get install alsa-utilsMP3 tools: sudo apt-get install mpg321WAV to MP3 conversion tool:sudo apt-get install lame Load the sound driver: sudo modprobe snd-bcm2835 To check if the driver is loaded you can type: sudo lsmod | grep 2835 Select the output device for sound (0=auto, 1=analog, 2=HDMI): sudo amixer cset numid=2 Test the installation: Raspberry Pi 4 Model B and Raspbian Buster: How to set up your board. Before diving into my hands-on dialog, here are a couple of links that contain interesting and useful information about the new Raspberry Pi 4 and Raspbian Buster operating system: From these three references you should be able to find all the technical and commercial details about the Raspberry Pi 4.
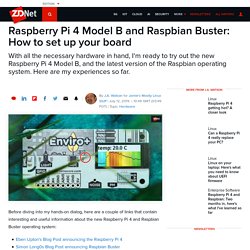
The Raspberry Pi 4 Starter Kit that I ordered arrived Thursday afternoon, as promised. The contents are pretty basic, but enough to at least get going: Raspberry Pi 4 Model B, with 2GB memory15W USB-C power supplyRaspberry Pi 4 Case16MB micro-USB class 10 SD card, preloaded with NOOBS software The glaring omission here is any kind of micro-HDMI cable or adapter. There is a limitation when using the micro-HDMI adapter, which is perhaps not obvious from just looking at these pictures. Debian 10 (Buster) Installation Steps with Screenshots. Debian Project has released its latest and stable operating system as Debian 10, code name for Debian 10 is “Buster“, this release will get 5 years of support.
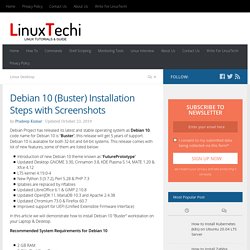
Debian 10 is available for both 32-bit and 64-bit systems. This release comes with lot of new features, some of them are listed below: Introduction of new Debian 10 theme known as “FuturePrototype”Updated Desktop GNOME 3.30, Cinnamon 3.8, KDE Plasma 5.14, MATE 1.20 & Xfce 4.12LTS kernel 4.19.0-4New Python 3 (3.7.2), Perl 5.28 & PHP 7.3Iptables are replaced by nftablesUpdated LibreOffice 6.1 & GIMP 2.10.8Updated OpenJDK 11, MariaDB 10.3 and Apache 2.4.38Updated Chromium 73.0 & Firefox 60.7Improved support for UEFI (Unified Extensible Firmware Interface)
Installing Python 3.6 on Raspbian. As of January 2018, Raspbian does not yet include the latest Python release, Python 3.6.
This means we will have to build it ourselves, and here is how to do it. There is also an ansible role attached that automates it all for you. Install the required build-tools (some might already be installed on your system).$ sudo apt-get update $ sudo apt-get install build-essential tk-dev libncurses5-dev libncursesw5-dev libreadline6-dev libdb5.3-dev libgdbm-dev libsqlite3-dev libssl-dev libbz2-dev libexpat1-dev liblzma-dev zlib1g-devIf one of the packages cannot be found, try a newer version number (e.g. libdb5.4-dev instead of libdb5.3-dev).Download and install Python 3.6. When downloading the source code, select the most recent release of Python 3.6, available on the official site. GPIO - Raspberry Pi Documentation. Python Programming Tutorials. Welcome to part 3 of the Raspberry Pi tutorial series.
In this part, we're going to cover how we can remotely access our Raspberry Pi, both with SSH and with a remote desktop client. We want to eventually be able to remotely access our Raspberry Pi because much of the "value" of the Raspberry Pi is its size, and that it can be put in a variety of places that we might not want to have a keyboard, mouse, and monitor attached to it at all times and we probably don't want to have to carry over all of this stuff when we do want to access it. First, let's connect via shell (SSH). Open the terminal on the Raspberry Pi (control+alt+t), and type ifconfig. If you're connected via wifi, then go under the wlan section, and look for your inet address. Alien language - Introduction. In this project, you will train the computer to understand an alien language.
12 Raspberry Pi Music Projects You Need to Know About. The Raspberry Pi is a remarkable little gizmo. You can turn it into almost anything digital you can think of. And so several of our musically inclined tinkerers did. 5 Musical Instruments You Can Build With a Raspberry Pi. Your Raspberry Pi makes a superb media center Install Kodi to Turn Your Raspberry Pi Into a Home Media Center If you have a Raspberry Pi, you can turn it into a cheap but effective home media center just by installing Kodi. Read More . It can go to into orbit. You might even have used it to develop some music based projects 12 Raspberry Pi Music Projects You Need to Know About From a fantastic music player to a full-fledged audio workstation, these Pi Music projects will blow your mind.
Read More in the past. After all, it’s the perfect size, and has ideal connectivity, to stream music to, and output through a loudspeaker Turn An Old Amp Into A Smart Streaming Speaker With Raspberry Pi The ultimate self-contained music streaming speaker, with support for Spotify, Google Music, SoundCloud and Airplay. Advertisement. Python Programming Tutorials. Welcome to a series on the Raspberry Pi. One of the most common questions I see about the Raspberry Pi is "What do I do with this?
" The Raspberry Pi is a fully-fledged mini computer, capable of doing whatever you might do with a computer. It comes with 4x USB, HDMI, LAN, built-in Bluetooth/WiFi support, 1GB RAM, 1.2GHz quad-core ARM CPU, 40 GPIO (General Purpose Input Output) pins, audio and composite video output, and more. Rather than not having many choices, instead, your options are staggeringly large! For some examples, I have personally used Raspberry Pis to: GPIO music box - Play sounds at the press of a button. In this project, you will build a button-controlled “music box” that plays different sounds when different buttons are pressed.
You can find a shortened version of this project on YouTube What you will make What you will learn Play sounds in Python with pygame Use the Python gpiozero library to connect button presses to function calls Use the dictionary data structure in Python.