
Etel Interiores Locomotiva bedside 3d model. 3dsMax Monday Movie #13: UVW Channels.
Ostatnie. Vray 2.0 materials guide. An in depth look at each setting within a V-Ray material.
You can jump to a specific section using the links below. DiffuseReflectionRefractionTranslucencyBRDFOptionsMapsReflect/Refract interpolation Diffuse Diffuse This is the actual colour of the surface, reflection and refraction colours can affect the visual appearance of this colour. Plaster. V-Ray DMC Sampler. Introduction In this tutorial I will focuse on giving you the basic technical background of DMC sampler, but before we go into any technical details about DMC sampler, we will go over alternative sampler integrated in VRay, Adaptive Subdivision sampler.
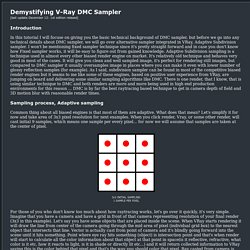
I won't be mentioning fixed sampler technique since it's pretty straight forward and in case you don't know how Fixed sampler works, it will be easy to figure out from gained knowledge. Adaptive Subdivision sampling is a technique used in almost every other biased render engine on market. Adrian Bienias. Tribeca Loft. Another use of noise (this is something I use all the time) is to break the repetitiveness of tile-able textures.
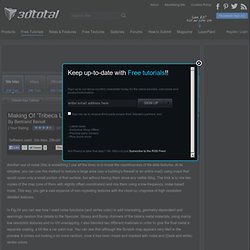
At its simplest, you can use this method to texture a large area (say a building's firewall or an entire road) using maps that would cover only a small portion of that surface, but without having them show any visible tiling. The trick is to mix two copies of the map (one of them with slightly offset coordinates) and mix them using a low-frequency, noise-based mask. This way, you get a vast expanse of non-repeating textures with the close-up crispness of high resolution detailed textures. In Fig.04 you can see how I used noise functions (and vertex color) to add interesting, geometry-dependent and seemingly random fine details to the Specular, Glossy and Bump channels of the table's metal materials, using mainly low resolution textures and no UV unwrapping.
Fig.04. White Balance setup with V-Ray Physical Camera and 3ds Max. Here is a detailed tutorial on how to adjust the white balance of a render in V-Ray using features of the Physical Camera.
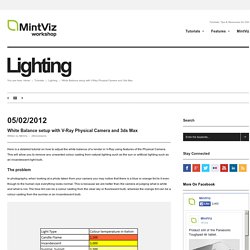
This will allow you to remove any unwanted colour casting from natural lighting such as the sun or artificial lighting such as an incandescent light bulb. The problem In photography, when looking at a photo taken from your camera you may notice that there is a blue or orange tint to it even though to the human eye everything looks normal.
Camera. Matrail. Compositing V-Ray Render Elements by James Cutler. The purpose of rendering out multiple passes is that it allows you to tweak all aspects of an image such as global illumination, direct light, diffuse, reflection, specular etc.
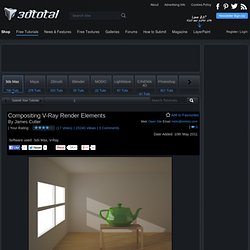
These passes can then be compiled together in Adobe Photoshop (Fig.01). Fig. 01 The whole process of saving out the different render passes may seem like an extra task within your workflow, but it will save you a lot of time, especially if you wish to reduce the reflection of a material or change the color of an object. Crazy Bump Tutorial: Understanding Settings for Better Normal Maps. Crazybump is a quick and easy tool for creating normal maps from a texture.
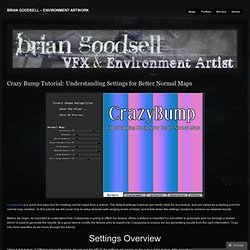
The default settings however are hardly ideal for any texture, and are meant as a starting point for normal map creation. In this tutorial we will cover how to setup textures with ranging levels of detail, and break down the settings needed to achieve our desired results. V-Ray Sun and Sky. The VRaySun is located in the (Create - Lights - VRay) panel.
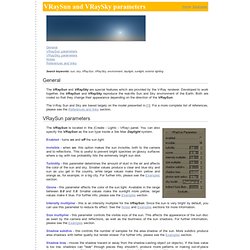
You can also specify the VRaySun as the sun type inside a 3ds Max Daylight system. Enabled - turns on and off the sun light. Invisible - when on, this option makes the sun invisible, both to the camera and to reflections. This is useful to prevent bright speckles on glossy surfaces where a ray with low probability hits the extremely bright sun disk. Turbidity - this parameter determines the amount of dust in the air and affects the color of the sun and sky.
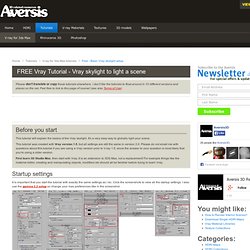
VRaySun and VRaySky examples. FREE Vray Tutorial - Using the Vray skylight to light a scene. In the vray environment rollout, turn on the skylight, and give it a light blue color.
Render again, still black... Vray materials. Vray Materials Tutorial by ~Merraton on deviantART. V-Ray Material tutorial dla początkujących. Getting Started with Vray – Creating Basic Vray Materials. Well i will making a short tips of tutorials about getting started with vray, i will cover materials, lights, camera, render and other topics related. In this post i will show you how to create a diffuse color, adding reflections, and refraction and setting up a basic render. 1. -Before to start we need to setup Gamma Correction in 3ds max, for to do that make, go to the Bar Menu and make click in Rendering>Gamma/Lut Setup and make this changes: 2.- Create a basic diffuse color with vray, first you need to set up vray like your default render engine, make click and F10 for open the render setup dialog, and go to Assign Renderer>Production>Select Vray (i do not know the version that you have, but it is the same, just choose the vray version installed) and press OK.
Tips For Improve Your Renders. Many people write me emails asking how they can improve their renders, visually and by reducing the render time, it has to do with good optimization of geometry, materials and textures, then I will give some basic tips to help optimize your renders. 1 .- 3D Geometry: We must try every model has the minimum number of polygons, because if the 3d model has a lot of unnecessary poligons the render time will increase.
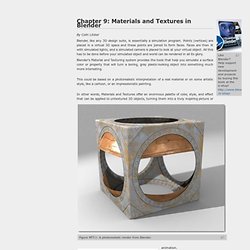
We need to avoid errors in our gemetry, like opened edges, overlapping polygons, try to keep your models as clean as possible with regard to modeling. Tips For Improve Your Renders. Books/Essential Blender/09.1.Materials and Textures in Blender: Hands on. From BlenderWiki By Colin Litster Blender, like any 3D design suite, is essentially a simulation program.
The Secrets of Realistic Texturing. In this tutorial you will discover: The fundamentals of texturingHow to use CrazyBump to generate texture mapsHow to make a realistic cobblestone material I realized that there aren’t too many tutorials out there that explain the different texture types.
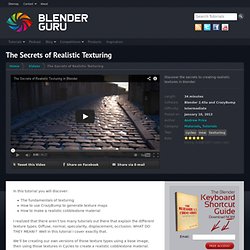
Diffuse, normal, specularity, displacement, occlusion. WHAT DO THEY MEAN!? Well in this tutorial I cover exactly that. Image sampler examples. Example 1: What is antialiasing? Example 2: Image samplers comparison Example 3: Another image samplers comparison Example 4: Yet another image samplers comparison Example 5: Texture antialiasing Example 6: G-Buffer based antialiasing Example 7: Randomized antialiasing Example 8: Antialiasing filters Example 9: Antialiasing filters and moire effects Example 1: What is antialiasing?
The following example shows the basic difference between an image with antialiasing, and one without: The left images are jagged around the edges of the sphere, while the right are smooth. Here are close-ups of the two images: Example 2: Image samplers comparison Here are some examples demonstrating the quality vs speed of the image samplers. 3d model interior scene. This is a legally binding agreement between licensee ("you"), and TurboSquid regarding your rights to use Stock Media Products from the Site under this license. "You" refers to the purchasing entity, whether that is a natural person who must be at least 18 years of age, or a corporate entity. The rights granted in this agreement are granted to the purchasing entity, its parent company, and its majority owned affiliates on a "royalty free" basis, which means that after a Purchase, there are no future royalties or payments that are required.
Collectively, these rights are considered "extended uses", and are granted to you, subject to applicable Editorial Use Restrictions described below. The license granted is wholly transferable to other parties so long it is in force and not terminated, otherwise violated, or extinguished, as set forth herein. This agreement incorporates by reference the Terms of Use as well as the Site's policies and procedures as such are made available at I.
DeviantART: where ART meets application! Renderer parameters. V-Ray is a renderer plugin for 3ds Max. In order to use V-Ray, you must first select it as your current renderer. You can do that by clicking on the Assign... button in the Current renderers rollout of the Render Scene dialog: In 3ds Max 9 and later, the V-Ray parameters are divided into several tabs in the render scene dialog; additionally each tab is divided into several rollouts: For a more detailed description of each rollout, check out the sections below: Free high resolution textures for professionals. Designconnected: 3d models for interior design. FREE Vray Tutorial - Gamma 2.2 setup or linear workflow - page 1. Free texture maps for 3D materials. Fine wood Vray material collection: ash, birch, ebony, mahogany, oak, wenge,...
FREE Vray Tutorial - Gamma 2.2 setup or linear workflow - page 2. Instead of a green color, I now add a texture map to the diffuse slot. Your ultimate V-Ray material resource. [CG Textures] - Recolouring a wood texture with `Blend If` (Before reading this tutorial you should read the 'Blend If' tutorial. [CG Textures] - (Back to tutorials index) Match Color. [CG Textures] - Photoshop Advanced Blending : `Blend If` 3D Tutorials for 3Dsmax and Vray users. Vray render settings for interior visualisation. An advanced guide to the interior rendering of still images within Chaos Group Vray and Autodesk 3ds Max. Render seting 1. Ustawiena gama .... Zapisywanie zdjec do potoshopa. 3ds Max tutorial: Get accurate colour with linear workflow. 3D World is the best-selling international magazine for CG artists, covering the fields of animation, VFX, games, illustration and architecture.
Our team of CG artists and professionals provide analysis of latest trends in the market, artistic and technical advice, impartial product reviews, and exclusive behind-the-scenes articles on the making of key projects in this fast-paced industry. Vray: Material Settings (Part One) Vray es una muy buena opción para reemplazar el motor de render mental ray y el estándar en Autodesk 3ds Max. Si bien los efectos que se logran son muy superiores a los que se obtienen con otros motores de render, es importante tener en cuenta que para trabajar con Vray es necesario hacerlo en una computadora poderosa, dado su consumo de recursos. Los materiales y la iluminación son la esencia del render. VRay: Introduction to using HDRI images. 3ds Max Help: Slate Material Editor Toolbar. 3ds Max Lighting - CGWiki.
Vray speed tips for 3d visualisation. V-Ray frame buffer. VRayLight Material. Linear Workflow in 3DSMax and VRay - Page 1 - Free Rendering Tutorials for 3dsmax.