
3dsMax Monday Movie #73: VRay Displacement. VRay Tutorial: Using VRayDisplacementMod to Displace Objects Based on their Material. How to make wallpaper with blend material in 3ds max with vray. Creating a realistic wood material with V-Ray. Introduction We are going to look at some real world photos of antique wood, analyze the main features and use some advanced material creation techniques to re-create that look with V-Ray.
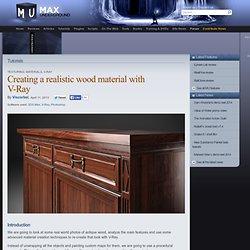
Instead of unwrapping all the objects and painting custom maps for them, we are going to use a procedural approach. This method is quicker and the resulting material can be re-used in other projects. The result is also very flexible – since I’ll be using a layered approach, I can turn off or modify features like worn edges or dust. Creating a rusty painted metal material with VRay. Vray Materials Tutorial - VISCORBEL. To begin creating beautiful materials, we must first understand how the VRay material works.
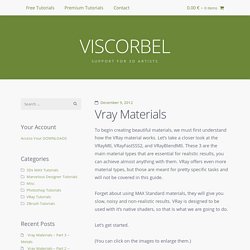
Let’s take a closer look at the VRayMtl, VRayFastSSS2, and VRayBlendMtl. These 3 are the main material types that are essential for realistic results, you can achieve almost anything with them. VRay offers even more material types, but those are meant for pretty specific tasks and will not be covered in this guide. Forget about using MAX Standard materials, they will give you slow, noisy and non-realistic results. VRay is designed to be used with it’s native shaders, so that is what we are going to do. Let’s get started. (You can click on the images to enlarge them.)
VRayMtl is the basic, most used, universal material that VRay offers. This how the basic, unchanged material looks. Now let’s look at the first section – Diffuse. Think of Diffuse as the base color of the object. VRayMtl allows you to choose a simple color as the Diffuse or use a Map. Here is an example. Materialism (1) As promised, I wanted to follow up on my Eames series with a few pointers about the materials created for the chairs.
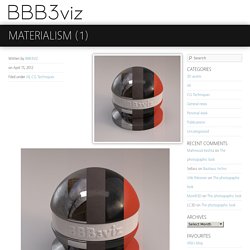
This is the first in a series of mini how-to tuts about materials. The Eames chairs are a good place to start. Improve your shaders with Reflection maps - vray tutorial. Vray Material basics. Creating V-Ray Materials Vol 1. Evaluate gamma compensation at a glance! Share with your friends!
We can evaluate “at a glance” if gamma compensation is correctly applied ? When working with the visual disciplines (and others) we constantly tune the shot based on what we see during the process. It’s a continuous action-reaction and in the end much of the success comes from the ability to react correctly to stimuli.
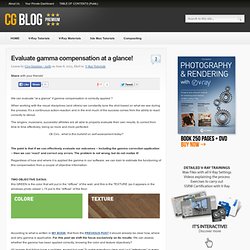
The singers, musicians, successful athletes are all able to properly evaluate their own results, to correct from time to time effectively, being so more and more perfected. Ok Ciro.. what is this bullshit on self-assessment today? The point is that if we can effectively evaluate our outcomes – including the gamma correction application – then we can ‘react’ and correct any errors. Regardless of how and where it is applied the gamma in our software, we can train to estimate the functioning of this compensation from a couple of objective information.
All images that follow have a problem, except but one! No matter how cases 1,2,3 and 4 were generated. Seamless Texture. Folout map1. Where 3d product visualization is concerned, one of the most important techniques for achieving realistic high quality images, is your ability to create studio renders.
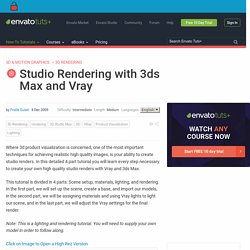
In this detailed 4 part tutorial you will learn every step necessary to create your own high quality studio renders with Vray and 3ds Max. This tutorial is divided in 4 parts: Scene setup, materials, lighting, and rendering. Rendering Tutorial: August 2011. James Cutler written this tutorial for Mintviz Diffuse Diffuse This is the actual colour of the surface, reflection and refraction colours can affect the visual appearance of this colour.
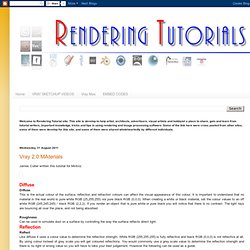
It is important to understand that no material in the real world is pure white RGB (25,255,255) nor pure black RGB (0,0,0). When creating a white or black material, set the colour values to an off white RGB (245,245,245) / black RGB (2,2,2). Roughness Can be used to simulate dust on a surface by controlling the way the surface reflects direct light. Proper tiling by Matt Vainio. Photorealistic VRay Materials. Zasady mapy odbicia siwtala. Introduction I originally made this tutorial for a lecture I gave at CCAA, a school in Brazil where I help to run the Post-Graduation course in Game Art.
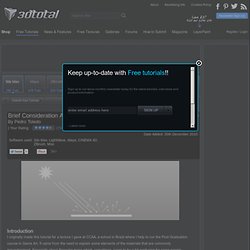
It came from the need to explain some elements of the materials that are commonly misunderstood. Especially about Specular maps which, sometimes, seem to be a bit confusing for some people. Most artists, in general, have a pretty good understanding of Diffuse, Normal and Alpha maps, but it's often on the Specular map that they will get lost and sometimes even ruin a pretty good asset. I hope you enjoy this tutorial.
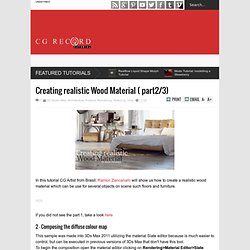
Textures & Shaders If the shape of an object, in 3D, is the result of its geometry, the material from which this object is made of is the result of its shader and textures. Fig. 01. Creating realistic Wood Material ( part1/3) In this tutorial CG Artist from Brasil: Ramon Zancanaro will show us how to create a realistic wood material which can be use for several objects on scene such floors and furniture.
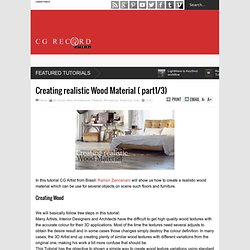
Creating Wood We will basically follow tree steps in this tutorial: Many Artists, Interior Designers and Architects have the difficult to get high quality wood textures with the accurate colour for their 3D applications. Most of the time the textures need several adjusts to obtain the desire result and in some cases those changes simply destroy the colour definition.
In many cases, the 3D Artist end up creating plenty of similar wood textures with different variations from the original one, making his work a bit more confuse that should be. Creating realistic Wood Material ( part2/3) If you did not see the part 1, take a look here 2 - Composing the diffuse colour map.
Creating Bump and Specular Maps in Photoshop & 3ds Max. 3 years ago In this tutorial you will learn how to create your bump and specular maps with Photoshop and also you will see how to setup the material inside of 3ds max, creating bump and specular maps can be easy of hard depending of the textures that you are working and how many details you want to add, but in the majority of case can be really easy for a basic bump and specular map, check the video tutorial and share yours thoughts. Photorealistic VRay Materials.
3d max tutorials : Building a multi sub-object material. How to create a displacement map? - PhotoSculpt creates 3D models and textures from 2 photos. Download our software PhotoSculpt Textures and create high resolution displacement maps easily from just two photos Sample Displacement map of a tree barkSample displacement maps and textures.
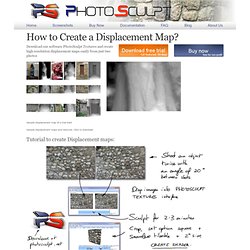
Click to download.