
10 Things to Do After Installing Ubuntu 20.10. A new Ubuntu release means a new rundown of the most important post-install procedures you should perform.

This guide is (as always) aimed at those who are new to – or less experienced with – Ubuntu. Each item aims to enhance or improve the default Ubuntu 20.10 experience, not rip it out or remould it I write a new “things to do…” list for each Ubuntu release rather than just update the old one. Why do I do that? Because the steps often change. Plus, there’s always something new to recommend. 1. Each version of Ubuntu is different to the last, and the latest offering is no exception. If you like the video above and want us to make more please do subscribe to our YouTube channel, and drop your video ideas down in the comments. 2. Tweaks can be thought of as a Swiss-army knife for the Ubuntu desktop. This handy utility gives you options to: The app is free, open source software.
Install GNOME Tweaks on Ubuntu 3. How To Edit PDF Files In Linux In The Easiest Way Possible. How to Fix a Corrupted PS3 Hard Drive. Like any computer device, your PlayStation 3's hard drive can occasionally develop corrupted areas.

Your PS3 will run a check for and correct corrupted data automatically if it shuts down improperly and is restarted. You can, however, initiate a correction cycle yourself using the PS3's Safe Mode, a diagnostic mode designed to correct issues that can't be addressed from within the system menu. Entering Safe Mode To enter the PS3's Safe Mode, start by pressing and holding the power button until the PS3 shuts down. Press and hold the power button again for about 10 seconds, at which point you'll hear a series of three beeps. Restoring the File System The "Restore File System" option in the Safe Mode menu is the tool for scanning and repairing corrupted data.
Factory Resetting Your PS3 The "Restore PS3 System" option is the Safe Mode menu's factory reset option. Preventing Hard Drive Corruption. Make Your Own Yoga Bolster and Mat-Carrying Strap. No matter how relaxed and centered you are, it’s still a hassle to lug a bulky bolster and mat to yoga classes.

A yoga bag seems like the perfect solution—but those can run upwards of $80 at boutique retailers. Take a deep breath; this simple DIY details how to sew your own yoga bolster and strap. The bolster—outfitted with a handle—allows bodies to ease into supported chest- and back-opening poses. The strap serves as a tool for carrying a mat around town, and for holding particularly difficult poses in class.
The price tag puts wallets at ease, too, as you can get all the components for about $25. Homemade Bandages. You may need to make a homemade bandage in an emergency situation when you have no ready-made first aid materials available.
Some people also like to make their own bandages for cost or environmental reasons. Homemade bandages are much cheaper than over-the-counter alternatives, and allow you to use materials that would otherwise be thrown away. Making an Emergency Bandage Find some gauze to use as a dressing for the wound. How to Make a Broom - DIY. You can make your own brooms!
If you have a green thumb, you can start by growing your own broomcorn. But even if you can't grow broomcorn, you can order it from a supplier (see Resources at the end of this article). Photos for each step of the broom-making process are available in the Image Gallery; see link above. Broomcorn One of the most common questions I hear when I am demonstrating my craft is, “What plant material is used for the broom bristles?” To make a hearth broom, 28 heads of broomcorn are used for the inside layers of bristles and 17 heads for the outside layer. The broomcorn is prepared by cutting the stalks differently for each layer.
DIY Lampshade - Painting & DIY - Decor Tricks. Looking for a bright idea?
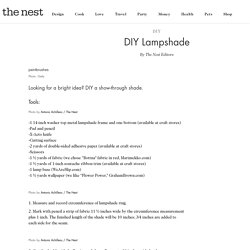
DIY a show-through shade. Tools: Photo by Antonis Achilleos / The Nest -1 14-inch washer top metal lampshade frame and one bottom (available at craft stores) -Pad and pencil -X-Acto knife -Cutting surface -2 yards of double-sided adhesive paper (available at craft stores) -Scissors -1 ½ yards of fabric (we chose “Bottna" fabric in red, Marimekko.com) -1 ½ yards of 1-inch soutache ribbon trim (available at craft stores) -1 lamp base (WeAreSlip.com) -1 ½ yards wallpaper (we like “Flower Power," GrahamBrown.com) Photo by Antonis Achilleos / The Nest 1.
Measure and record circumference of lampshade ring. 2. Mark with pencil a strip of fabric 11 ½ inches wide by the circumference measurement plus 1 inch. The finished length of the shade will be 10 inches; 3/4 inches are added to each side for the seam. How to Fix a Separated Zipper: 11 Steps (with Pictures) Picture Frame Hanging Tip - The Scrap Shoppe. Ha! Pretty smart! DIY trash can liner. To throw away those non-plastic waste items you might still have ☺ in any case, saves a plastic bag! - Travel Image. DIY Project: 3 ring binder – Lemon and Raspberry. I’ve been wanting to try this binding method for awhile – I am a bit enamored of book rings.
And I kind of eat a lot of crackers (they keep well in my cubicle drawer at the ‘day job’) Here's How to Clean, Oil, and Maintain Your Sewing Machine. Step 3 Once the lower part of the machine is cleaned, it is time to oil your machine.
Instructables. How to Make Soap from Ashes - Modern Homesteading. If it hadn't been for the help we got from the native old-timers . . . my friend, Dennis, and I would have starved or just plain quit the winter we settled into that abandoned miner's cabin in Alaska.

The sourdoughs came to our rescue, though, and soon taught us how to survive on less than $10 a month cash money by trapping, tanning, foraging food and dipping candles from our own tallow and lard. With their generous assistance, we also quickly mastered the fine and easy art of recycling hardwood ashes and left-over kitchen fats into clean, all purpose soap. Soap Making Is Almost Automatic Now, soap making in the woods can be an almost automatic thing.
Anyone who's done much camping knows that — if you throw some white ashes from a hardwood fire into your frying pan after dinner — the lye in the ash will combine with the fat from the cooking to make a crude soap.