
Sleeping Arduino - Part 5 Wake Up Via The Watchdog Timer. OverviewWelcome to the fifth and final part of the "Sleeping Arduino" series, where we will cover how to wake the Arduino from sleep mode using the Watchdog Timer (WDT).
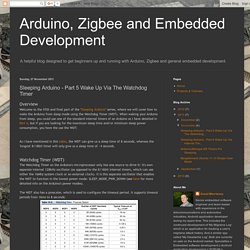
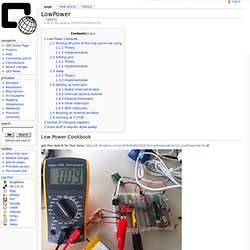
When waking your Arduino from sleep, you could use one of the standard internal timers of an Arduino as I have detailed in Part 4, but if you are looking for the maximum sleep time and/or minimum sleep power consumption, you have the use the WDT;As I have mentioned in this table, the WDT can give us a sleep time of 8 seconds, whereas the 'longest' 8/18bit timer will only give us a sleep time of ~4 seconds.Watchdog Timer (WDT)The Watchdog Timer on the Arduino's microprocessor only has one source to drive it: it's own separate internal 128kHz oscillator (as opposed to the 8/16bit internal timers, which can use either the 16Mhz system clock or an external clock). <avr/power.h>: Power Reduction Management. LowPower - QED. From QED < CEE474(Link to this page as CEE474/LowPower) Low Power Cookbook get the sketch for this here: This page is all about reducing power consuption of the AVR microcontrollers.
The information contained on this page draws from the following sources: Atmel resources, such as datasheets and application notes and picoPower videos The AVR libc library reference, specifically on avr/power.h, avr/sleep.h and avr/interrupt.h Dean Camera's great guides to Timers and Interrupts. No one of these is my favorite, they all give some great details. Turning off parts of the chip you're not using Theory The datasheet offers the following Power Reduction Register: from avr/power.h, a variety of functions you can use if you #include avr/power.h to manipulate the bits in PRR: Note that because the timers may be used in defining interrupts (see below), only turn off the timers that won't be used!
In addition, there remain some other ADC functions you can turn off that are not accessed in power.h. Setting pins.
Electronics : Microprocessors : Power saving techniques for microprocessors. Summary In this thread I show various power-saving techniques for the Atmega328P processor.

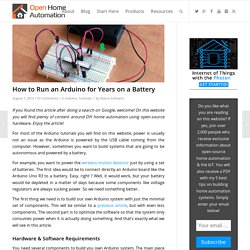
They include sleep modes, use of power-reduction registers, and other techniques. Applying all of them can result in a current draw as low as approximately 100 nano-amps (100 nA), well below the self-discharge rate of most batteries. Proof from the datasheet for the Atmega328P (page 405 of my copy): That is 100 nA at at 25°C running at 3v. These techniques would be useful for battery-powered devices where the full power of the processor was only required intermittently, for example a TV remote, calculator, doorbell, or some sort of environmental monitor where you only needed to check things from time to time. Introduction I am going to explore various power-saving options for running your project, presumably from battery power. These examples are specifically for the Atmega328P processor, but the techniques are pretty general.
Summary of methods Baseline - Arduino Uno Sketch A Sketch B Bare-bones board. How to Run an Arduino for Years on a Battery. If you found this article after doing a search on Google, welcome!
On this website you will find plenty of content around DIY home automation using open-source hardware. Enjoy the article! For most of the Arduino tutorials you will find on this website, power is usually not an issue as the Arduino is powered by the USB cable coming from the computer. However, sometimes you want to build systems that are going to be autonomous and powered by a battery. For example, you want to power the wireless motion detector just by using a set of batteries. The first thing we need is to build our own Arduino system with just the minimal set of components. Hardware & Software Requirements You need several components to build you own Arduino system.
Low power ATmega/tiny with watchdog timer. At work recently, the pranks have been escalating.

I’ve decided that for my next salvo, I’m going to build the most annoying beeping device I can. I’m using an ATtiny45/85 chip, programmed using the Arduino development environment. The clone army grows The device is intended to be planted somewhere near the target’s desk, and will just beep (or make some other annoying sound), every 5-8 minutes. In that respect, it’s very similar to the Annoy-a-tron that ThinkGeek sells. Three primary factors influenced the design of this, in this order: Low power consumptionInexpensiveSmall size It’s likely to take the subject days, if not weeks, to find it at that rate, so the battery needs to last for at least a few weeks. As I intend to make around 10 of these devices, keeping the cost down was important. Making this as small as possible was quite a challenge, but in the end, the largest parts were the battery and battery holder.
Putting the chip to sleep when it’s idle. 1. 2. 3. 4.