
Photo Effect - PSD Vault - Page 2. How To Create A Vibrant Image Using Photoshop. In this tutorial, we’ll explore how to add more energy and dynamism to a photo.

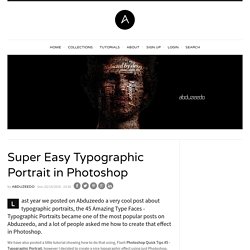
The effects can be extended and used on a multitude of photos to create a feeling of motion and vibrancy to a static image. The tutorial was created and written by renowned artist Mike Harrison (a.k.a. destill) and this is his first tutorial for a blog. His work has been featured in Computer Arts and Advanced Photoshop magazines. OK, enough of an introduction, and on with the tutorial… Step 1 Start by choosing an image similar to this one of someone jumping in the air (original image). Step 2 Drag your image into the new document and grab the pen tool, carefully start adding point by point until you’ve drawn around the entire body of the girl. Yet Another Colorization Tutorial. Super Easy Typographic Portrait in Photoshop. Last year we posted on Abduzeedo a very cool post about typographic portraits, the 45 Amazing Type Faces - Typographic Portraits became one of the most popular posts on Abduzeedo, and a lot of people asked me how to create that effect in Photoshop.

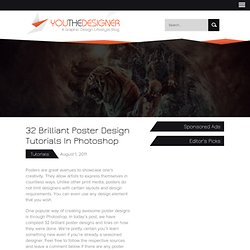
32 Brilliant Poster Design Tutorials In Photoshop. Tutorials August 1, 2011 Posters are great avenues to showcase one’s creativity.

They allow artists to express themselves in countless ways. Unlike other print media, posters do not limit designers with certain layouts and design requirements. You can even use any design element that you wish. One popular way of creating awesome poster designs is through Photoshop. Inspiration, Technique, Great Design. How to Create a One-of-a-Kind Twitter Background in Photoshop. If you're on twitter and reading this blog, chances are you've already customized your profile with a cool twitter background.

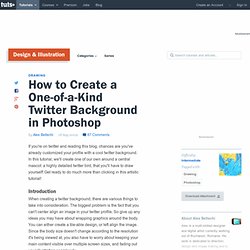
In this tutorial, we'll create one of our own around a central mascot: a highly detailed twitter bird, that you'll have to draw yourself! Get ready to do much more than clicking in this artistic tutorial! Introduction When creating a twitter background, there are various things to take into consideration. The biggest problem is the fact that you can't center align an image in your twitter profile. If your text goes too far to the right, many people may not be able to read it. To cope with all these requirements, we'll create a relatively small background that will align to the left side and fade out toward the bottom and right. My own background does not have these, because I feel that the profile bio is visible anyway on the right and you also get to chose one link that people can use.
Final Image Preview Take a look at the image we'll be creating. Mix 3D with fashion illustration. Tutorials. Adobe Illustrator can be a little tricky to get your hands around, particularly after getting used to the workflow of applications like Photoshop.

The differences between layer use and the creation of objects and shapes can be really strange at first hand. In this tutorial you will learn how to... Doing anything in Adobe Illustrator really does take two times longer as it can be a little tricky to get your hands around. In the following tutorial you will learn how to create a zippo lighter in Adobe Illustrator. For starters you will use basic tools (Rectangle, Ellipse, Pen tools)... Design Spartan : Art digital, digital painting, webdesign, illustration et inspiration… 100+ Outstanding Photoshop Actions to Enhance your Photography. Create a Cinemagraph (or Cinegraph) Using Photoshop CS6. Video tutorial: Match tone and colour in Photoshop.
Software: Photoshop CS3 or above Project time: 5 minutes Skills: Split an image into its luminosity, colour and saturation components, use Curves to balance tone, use a non-destructive workflow to compare and analyse images This is a simple, layered workflow for matching one image to another.

The first thing you’ll need to do is load your unprocessed image and the image you’re trying to match it to into Photoshop (or any version back to 3), then set up a workspace where you can compare them side by side on separate layers. It doesn’t matter if we have to resize the images to make them fit, because we’re really just finding the settings that will work. Curves layers are particularly powerful for controlling tone and colour. In fact, there’s very little you can’t do with them, apart from Selective Color processing. Step 01 The first thing you need to do is set up your workspace. Step 02 To match the tonality, make both images appear black and white. Step 03 Step 04 Step 05. 77 Excellent Photoshop Tutorials For Designing Posters. When it comes to Image editing or photo enhancement, Adobe Photoshop is usually the primary option to consider.

However, the software package itself is a quite hard to learn — and extremely hard to master. Display beautiful images is a potent element in web and graphic design, where there is less concern for readability and more potential for using images in an artistic manner. Photoshop is useful for both creating and editing images to be used in print or online. Not too easy to use, but full of high-quality features, Photoshop is the best choice for any image manipulation job. Below, you’ll find some of the Best Adobe Photoshop Tutorials For Designing Posters Art which might help you to get inspired and learned a tip or two by the end of this presentation. For those, who don’t know what is Adobe Photoshop? The next generation, representing two decades of excellence. You may be interested in the following related articles as well.
Excellent Photoshop Tutorials For Designing Posters 01. 2D/3D with Photoshop CS3 Extended and After Effects. Without a doubt, the best new feature in After Effects CS3 is the Vanishing Point Exchange with Adobe Photoshop CS3 Extended.

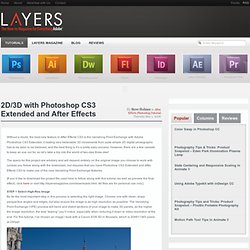
Creating very believable 3D movements from quite simple 2D digital photographs has to be seen to be believed, and the best thing is it’s a pretty easy process. However, there are a few caveats to keep an eye out for, so let’s take a trip into the world of two-dee three-dee! The specs for this project are arbitrary and will depend entirely on the original image you choose to work with (unless you follow along with the download), but requires that you have Photoshop CS3 Extended and After Effects CS3 to make use of the new Vanishing Point Exchange features.
[If you’d like to download the project file used here to follow along with this tutorial (as well as preview the final effect), click here or visit All files are for personal use only.] STEP 1 Select High-Res Image By far the most important step in this process is selecting the right image. Tutorials.