
A Tutorial: Fabulous Ric Rac Flowers » Matilda Jane Clothing Rocks. Tutorials. Hola there!
Here you can find an organized list of all my tutorials, projects and printables. I want to point out that I am no sewing expert and have no formal education in either sewing or English (Spanish is my native language) So I might not always use the correct terminology or best technique, I am always learning too! It might not always be perfect, but it’s sure a lot of fun!
All of my tutorials and printables for personal use only, if you want to sell items made with these tutorials please purchase a Limited Production License. If you blog them, please do not share the complete post and share a link crediting back to the post and DO NOT link directly to downloads, please read my Site Policy and Contact me if you have questions, hope you all enjoy! Flowers & Jewelry.
Knitting. Shuriken USB. Flax & twine: Day 6: A Pearl Cuff - a diy pearl and felt bracelet. This is one of my favorites of the entire collection.
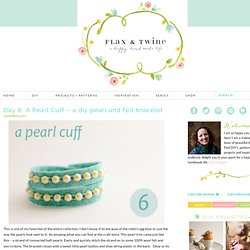
I don’t know if its because of the robin’s egg blue or just the way the pearls look next to it. Its amazing what you can find at the craft store. This pearl trim came just like this – a strand of connected half-pearls. Easily and quickly stitch the strand on to some 100% wool felt and you’re done. The bracelet closes with a sweet little pearl button and shoe string elastic in the back. For a menu of all the other glammy, fun, jewelry tutorials, check out this page. Make Your Own Gifts LIGHT BULB TERRARIUM – Green Holiday Gift Guide.
Dyi woven top. How to turn "water" into marbles - StumbleUpon. Refashion Tutorial - Long Sleeves to Bow Sleeve T-shirt. If you've ever checked out my blog you'll know I love to change things up, my Hand-Me-Down Horror series has been all about buying yucky or just plain boring clothes and making them into something I'd be proud to wear.

Hack off those sleeves, raise that hemline and bob's your uncle a cute custom piece, for pittence. This project is no different except I'm using a top that fits me and nothing goes to waste in this tutorial. So without further ado get your sewing needles and thread out and sharpen up those scissors!
Before, a plain long sleeve Tee from Old Navy, that cost me a wopping $2.60 1. 2. This is what you'll end up with, don't throw anything out, nothing goes to waste on this project. Next you'll be making the bows, out of the sleeves (I know, genius right!) 3. Whole sleeve pinched together 4. 5. 6. 7. 8. The finished neck edge, it looks great doesn't it and to think it's just a piece of t-shirt scrap!
9. Sewing Tutorial: Piggy Pillow. As promised, I have completed the tutorial and the pattern for the “Be My Valentine – Piggy Pillow”, which was published 3 weeks ago.
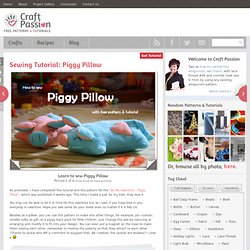
This time I made a pair for my kids, they love it. You may not be able to do it in time for this valentine but as I said, if you have love in you, everyday is valentine. Hope you sew some for your loved ones no matter if it is Feb 14. Besides as a pillow, you can use this pattern to make into other things, for example, pin cushion, smaller softy as gift, or a piggy back pack for little children.
Just change the size by reducing or enlarging and modify it to fit into your design. Material you need:1. Print out the PDF pattern of the piggy pillow. Use a pencil and trace the pattern onto the cotton fabric. Sandwich the towels in between 2 fabrics. Crayon Hearts. Night School News, Videos, Reviews and Gossip - Lifehacker.
Out of Order: DIY Tutorial - Full Skirt. 12 sided calendar. Download a 12 sided calendar Download a dodecahedral calendar.
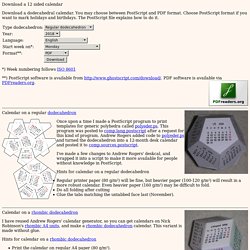
You may choose between PostScript and PDF format. Choose PostScript format if you want to mark holidays and birthdays. The PostScript file explains how to do it. *) Week numbering follows ISO 8601 **) PostScript software is available from PDF software is available via PDFreaders.org. Autumn leaf bouquet. I don’t know what it’s like in your neighborhood, but when I step outside here in Oakland, I sense it right away: Fall is in the air!

I’m lucky enough to have a few turning trees on my street, so I don’t miss out entirely on the brilliant autumn colors I remember from growing up in NH. Speaking of brilliant autumn colors, I’m thrilled to share this stunning maple leaf rose bouquet DIY from a fellow Kate — clay, fiber and paper artist Kate Hust. Kate first learned how to make these a few years ago from a retired art teacher in her community, and now they’ve become an annual tradition when fall rolls around. Her instructor taught her to wrap the leaves really tight, so they looked like rose buds, but Kate has modified the technique a bit to suit her own tastes: She likes to find the really big leaves and make them with large open “petals.” She’s clearly perfected the craft, and I’m so happy that she’s decided to pass the tradition on to us. Read the full how-to after the jump! Materials 1. DIY Faux Curled Rosewood Wreath {Made From Rolled Recycled Book Pages}
I have seen various versions of Faux Rosewood Wreaths in just about every store and catalog for the upcoming season; most with a price tag running upwards of $40 or more.

Some are crafted of paper and other of real wood shavings. Last year I made a few rolled flower gift toppers from recycled book pages and they remind me so much of the curled wood roses I thought they would make a good substitute. {with a much lower price tag} Materials Needed:Foam Wreath FormRecycled Book PagesLots of Hot GlueRibbon to Hang. Do-it-Yourself DIY String Wedding Lanterns Yarn Chandeliers. Jessica of Wednesday Inc shows us how to make those gorgeous twine chandeliers from the inspiration shoot she shared with us this morning.

Using balloons, glue and twine, you can also make these lanterns for your wedding – and then bring it home and use it as your very own mid century lampshade. What you will need are: balloons, glue, yarn, tray for glue, corn starch 1/2 cup of Corn starch, 1/4 cup of Warm water, clear fast drying spray paint, hanging lamp cord or fishing line (depending on your desired final product), and a lighting kit if you’re looking for a fully functional lantern. Jessica recommends using a sharpie to mark on the inflated balloon how much room you need to leave for the lighting cord. She also recommends coating the balloon with vaseline prior to wrapping the yarn coated with glue so it doesn’t stick on the balloon once it’s dry. You can see all the details on Jessica’s blog. Tutorial » Whipperberry.