
Retroleum - Basic info required to read and write MMC cards. Electronics » experimenting with MMC cards..
Card basics: Cheap flash-memory devices, used for digital cameras etc.Supply voltage: 3.3 volts.Seven contacts.Serial transfer protocols.Hot pluggable.Normally pre-formatted to the FAT12 or FAT16 standard (FAT32 for cards 2GB and above)(Edit) And now pretty much obsolete, replaced by SD Cards. MMC cards contain a microcontroller which allows the card to present itself to whatever its connected to much like a hard drive. IE: the host just sees lots of addressable sectors it can read/write to. ELM - How to Use MMC/SDC. Update: February 18, 2013 The Secure Digital Memory Card (SDC below) is the de facto standard memory card for mobile equipments.

The SDC was developped as upper-compatible to Multi Media Card (MMC below). » Blog Archive » SD Cards (Part 1) Other posts on same subject Part 1, 2, 3, 4, 5, 6 SD card are really convenient electronic devices for storing huge amounts of data.
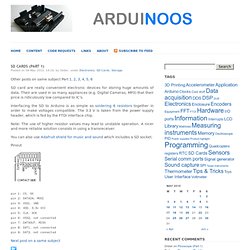
Their are used in so many appliances (e.g. Digital Cameras, MP3) that their price is ridiculously low compared to IC’s. Interfacing the SD to Arduino is as simple as soldering 6 resistors together in order to make voltages compatible. The 3.3 V is taken from the power supply header, which is fed by the FTDI interface chip. SD-card on Arduino « Arduino. There are Arduino shields (like the modern Ethernet shield) that allow you to attach an SD card to your arduino.

However if you are building a project that just needs a way to store data, then such a shield might be overkill. It is possible to directly attacht an SD card to an Arduino and even then there is a cheap way and a more expensive elegant way. The elegant way is to buy an SD card holder to solder on a circuitboard. These however come at a price. SD/MMC From the ground up. A number of people have asked if the information in the thread "SD card read/write with Arduino" be summarised for newcomers.
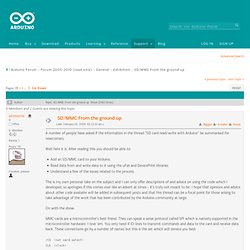
Well here it is. After reading this you should be able to: Add an SD/MMC card to your Arduino.Read data from and write data to it using the uFat and DevicePrint libraries.Understand a few of the issues related to the process.This is my own personal take on the subject and I can only offer descriptions of and advice on using the code which I developed, so apologies if this comes over like an advert at times - it's truly not meant to be. I hope that opinions and advice about other code available will be added in subsequent posts and that this thread can be a focal point for those wising to take advantage of the work that has been contributed by the Arduino community at large.
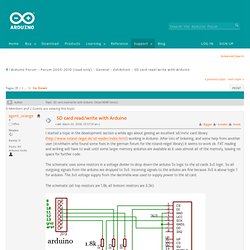
On with the show. SD_layout.jpg (JPEG Image, 800 × 600 pixels) SD card read/write with Arduino. #include <sd-reader_config.h>#include <sd_raw.h>#include <sd_raw_config.h> int print_disk_info();int sample();int readDisk(); byte incomingByte;void printWelcome();long int address;byte tempBytes[2]; void setup(){ Serial.begin(9600); delay(1000); printWelcome(); if(!
Sd_raw_init()) { Serial.println("MMC/SD initialization failed"); } print_disk_info();} int sample(){ int i,j; int temp; byte low; byte high; byte inByte; Serial.println(); Serial.println(); Serial.println("Sampling.. "); for(i=0;i<500;i=i+2) { if(Serial.available()>0) { inByte=Serial.read(); if(inByte==113) return 0; } temp=analogRead(0); Serial.print(temp,DEC); Serial.print(" "); //Convert int to 2 bytes low=temp&0xFF; high=temp>>8; // Serial.print(temp,DEC); //Serial.print(low,DEC); //Serial.print(high,DEC); tempBytes[0]=low; tempBytes[1]=high; if(!
Int print_disk_info(){ aJson – an Arduino JSON Library — Interactive Matter. What is JSON Exchanging data with other computers can be a daunting task with Arduino.
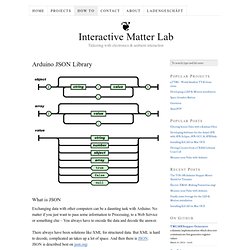
No matter if you just want to pass some information to Processing, to a Web Service or something else – You always have to encode the data and decode the answer. There always have been solutions like XML for structured data. Apps Platform. The Google Sheets API v3 (formerly called the Google Spreadsheets API) lets you develop client applications that read and modify worksheets and data in Google Sheets.

What can this API do? This API is useful for: How send data from Arduino to Google Docs Spreadsheet. A very interesting feature of Arduino is the great avalaibility of library that make the developer work very simple and fast.
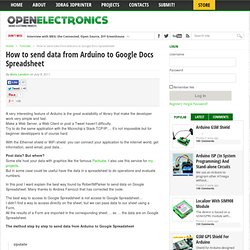
Make a Web Server, a Web Client or post a Tweet haven’t difficulty. Try to do the same application with the Microchip’s Stack TCP/IP…. It’s not impossible but for beginner developpers is of course hard. With the Ethernet shield or WiFi shield you can connect your application to the internet world, get information, send email, post data… Post data? In this post I want explain the best way found by RobertMParker to send data on Google Spreadsheet. Transfert files between arduino/ethernet and pc. Hello PaulS, The first one, you'e right.
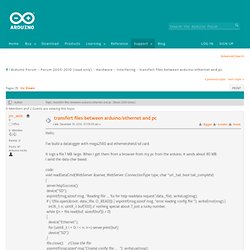
But for the second one, I use sdfatlib And the file.read function works:/** * Read data from a file starting at the current position. * * \param[out] buf Pointer to the location that will receive the data. * * \param[in] nbyte Maximum number of bytes to read. * * \return For success read() returns the number of bytes read. * A value less than \a nbyte, including zero, will be returned * if end of file is reached. * If an error occurs, read() returns -1. Pin Control Over the Internet – Arduino + Ethernet. In a previous article we showed you how to control digital pins over over serial, and showed how such a simple thing can be so powerful. One major downfall with that is you need to be nearby to send commands… So today we are going to look at doing the same thing, but this time we will be doing it over the internet using the Arduino Ethernet Shield.
As per our usual style, I am going to make this as simple as possible so it is easier to extend. So if you you are looking for something with an HTML interface, this article will not be covering that. The Arduino Ethernet Shield is capable of being both a client (like a web browser), and a server, and with the onboard SD card-slot can be quite powerful by hosting up full websites, but for this article we are just looking at using the Arduino as a server and you will control it simply by going to a specific URL.
Getting It On The Net We also left the code in there to do a manual setup if you prefer doing it that way. Hooking It Up Code Video. WebServer. Learning Examples | Foundations | Hacking | Links. Using the Arduino Ethernet shield as a server. Luca shows how to turn your Arduino with an Ethernet shield into a server. He goes over how to code your Arduino to handle HTML and HTTP protocols using strings. I’m going to show you a simple program that prints on serial connection browser‘s requests and answers with a simple HTML page. This program is useful to understand how to use HTTP functions and also to find out which informations a browser sends within the request (you’ll learn how to use those informations in a coming post).
At the bottom of the page he showed an example of page icon usage, for which he used our site. Thanks Luca! ServDuino - Build Your Own Arduino Web server. The Arduino Ethernet Shield is a sweet toy!!! Everybody, from the beginner who got their Arduino yesterday and hasn't slept since, to the hard core pro who learned c as a second language, can learn how to use the Ethernet Shield and have lots of fun with it. Its that awesome! Arduino Tutorials - Ethernet+SD. Whatsit? We just got the latest version of the Arduino Ethernet shield with a MicroSD card slot and I promised Bill Greiman I'd try out the latest version of his SdFatLib library so I decided to code up a simple Webified file browser. Its a quicky project and demonstrates what you can do, but it isn't 100% perfect so you should be ready to modify it if you'd like to do other stuff, 'K? This is a good beginning to a logging web-monitor, or remote storage system.
Get familiar.