
Photoshop tutorials and Graphic Design. S Techniques 81: The Octagonal Rings of the Underworld. Submitted by deke on 24 July 2012 - 12:15am.
Last week, as if to demonstrate what you can do---even at the last minute---by way of a video tutorial, I dropped everything I was doing and recorded a Deke's Techniques in which I showed you how to create the interlocking Olympic rings in my dearly beloved Adobe Illustrator. They used to look like this:
Photoshop Mama's Bunch o' Stuff. Mama Shan's Digital. Create a Retro Chrome Automobile Emblem in Photoshop. By combining certain fonts and styles, you can create graphics reminiscent of the automobile emblems of the 1950's, also known as Brightwork.
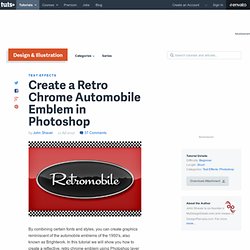
In this tutorial we will show you how to create a reflective, retro chrome emblem using Photoshop layer styles and a few selection tricks. Let's get started. This tutorial was sponsored by our friends at Fontbros. Tutorial Assets. Retro Lighting – Ford Mustang. Retro Lighting – Ford Mustang September 2nd, 2007 by ART-D Posted in Adobe Photoshop, Photo Editing I love to draw cars. I get inspired by retro magazines and 70′s lifestyle. My works are powerful, stylish and full of bright colours. I love to work with vectors, I think vectors can create amazing images with a clear and modern look.
Final Image Preview Begin by creating a new file (File>New) that would have 1024×768 px and 72 dpi. Using the Custom Shape Tool (U), it’s possible to select the next shape as it is demonstrated below. The shape must be changed a little with the Free Transform selection by stretching it, as it is shown next picture. We need also to apply for the shape the Blending Options>Gradient Overlay Gradient’s parameters: The new processed layer should have Opacity of 29%. Choosing the Polygonal Lasso Tool (L) now, we need to represent 5 rays, filling each of them with the appropriate color, applying in this case the Paint Bucket Tool (G).
Post Pages: 1 2 3. Photoshop CS5 – Text Art – make an image out of lines of text ‹ RoboCobra. This tutorial will show you how to turn an image into text art. we will be using 3 colors which utilize highlights, midtones, and shadows to give depth to your text art. Follow along and watch magic take place. Open an image you want to turn into text art. Lets make it black and white by going to Select the type tool and change your font color to white. Click and drag to make a text box the same size as your image. Type a line of the word or words you wish to use. select the line you just made and hit Ctrl C to copy, Click at the end of the line and press enter to move to the next line Hit Ctrl V to paste. Right click (or Ctrl Click on Mac) on your text layer and select . Select the first copy layer, and with the text tool select all the text by clicking in the text and hitting (Select All). change your font color to a medium Grey.
Create Pop Art a la Roy Lichtenstein. Photoshop: How to Make a Pop Art Portrait! Create Roy Lichtenstein Style Pop Art - Colouring [Photoshop CS5] Create a Retro Pop Art in Photoshop. Adobe Photoshop Tutorials. Hey welcome to my tutorial page!
Below are whole lot of tutorials (mostly Photoshop ). I hope you find these tutorials helpful. If you have any questions regarding any of these tutorials please contact me via my contact page… Vector Art with Photoshop Learn how to use Photoshop to create OUTSTANDING vector art. Digital Candy This fast, easy tutorial will teach you how to use several filters to create your own digital candy. Photoshop Training - Smooth Skin tutorial (part 1/2) We're going to use the following image for this Photoshop tutorial: Download this image to your hard drive by right clicking on it and selecting (when you use Windows) Save Picture As...

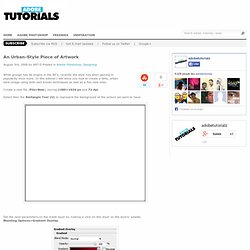
The first thing we're going to do is removing blemishes in the face. In the following image I've marked which areas I considered needed a correction: The reason why we're going to remove blemishes first is because we will have better results when we soften the skin in our next step. Wrap a texture or pattern around an object - Photoshop Week 30. An Urban-Style Piece of Artwork. August 3rd, 2008 by ART-D Posted in Adobe Photoshop, Designing While grunge has its origins in the 90′s, recently the style has been gaining in popularity once more.
Eroded fashion portraits. How To Create A Halftone Photo Effect Using Photoshop. Keeping the details, Skin smoothing the smart way. How many times have you seen beauty retouching that has gone too far? You know the kind where the model is left with skin like Barbie? Well this technique allows you to retouch and soften the skin without losing the fine details and texture. First of all I would like the say, this is a technique I have stumbled upon from Lee Veris over in Hollywood. I’ve added my own little twist to the technique to make it a little more useable. This technique does take a few twists and turns along the way, so hold on and enjoy the ride.
The girl in today’s tutorial has great skin, but the details revealed with today’s cameras means that skin can look over detailed and distracting. As we can see in the image above, there is quite a lot of texture in the skin and also a little too much detail for beauty retouching. How to split an image into Polaroid photos. Deke McClelland Colour Line Art.
Photoshop Tips: Create Pop Art (#2) Pop Art Inspired by Lichtenstein -Photoshop Tutorial. Tutorial Links: Page 1 | Page 2 | Page 3 Pop Art Recommended for Beginner to Intermediate Level Photoshop Users If you are a fan of pop art then you’re probably already well acquainted with the work Roy Lichtenstein.
Roy Lichtenstein became one of the leading pop artists of the sixties with his comic-strip paintings. Drowning Girl 1963, shown left, is one of his better known works and is a good example of the design features in his most famous pieces. Notice the thick lines, bold colors, and thought bubble.