
Logic's Master Blasters. Part 1: Use Logic’s EQ and SubBass plug-ins to give some mastering polish to your mixes.

This is the first article in a two-part series. Read Part 2. Mike Watkinson As a Logic Pro user, and a keen reader of this column, you should know by now that recording and mixing can be carried out completely ‘inside the box’, but what about mastering? The mastering process has always had a magic aura from the days of magnetic tape and vinyl, when transferring your recordings to a single spiral scratch in a lump of plastic was (and still is) a highly regarded skill. 1. 2. This month, we’ll be talking about the first of these, turning to the second in part two. Crucial Questions As long as you can trust your own listening environment, the majority of the tools you can apply in Logic will be equivalent to those applied in professional mastering houses. How does it stack up against everything else out there? Recording Techniques.
Mixing Drums. Get a great sound from your acoustic drums.

Your drum sound is one of the most important aspects of your mix. Mixing drums is therefore a number one priority for laying that solid foundation to your tracks, guaranteeing you a solid rhythm section. Drums can be one of the most problematic instruments to get right in a mix. The complexity of recording drums is equally complex when it comes time to mix them. If you find it easier to learn about recording and mixing drums via video, check out the ReThink Drums series here. If you did a great job recording the drum kit, then mixing your drums can only be a pleasurable experience. But where to start? Kick Drum Sound Mixing drums starts with the foundation of the kick drum.
It's important to emphasize the low end of the kick with EQ. Comparing overhead drum miking techniques. You have two microphones and two hours.

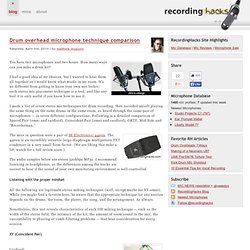
How many ways can you mike a drum kit? I had a good idea of my choices, but I wanted to hear them all together so I would know what works in my room. It’s no different from getting to know your own mic locker; each stereo mic placement technique is a tool, and like any tool it is only useful if you know how to use it. I made a list of seven stereo mic techniques for drum recording, then recorded myself playing the same thing on the same drums in the same room, as heard through the same pair of microphones — in seven different configurations. Following is a detailed comparison of Spaced Pair (omni and cardioid), Coincident Pair (omni and cardioid), ORTF, Mid-Side and “Recorderman.”
The mics in question were a pair of SE Electronics’ 4400a. The audio samples below are stereo 320kbps MP3s. Listening with the proper mindset All the following are legitimate stereo miking techniques (well, except maybe for XY-omni). XY (Coincident Pair) Cardioid: Omni: Narrow: - Mastering for Vinyl. LPs are staging a big comeback, which means there’s a lot to know before you send your music off for pressing.

There’s something of a small renaissance in LP production these days, and we’re starting to see a lot of people in small studios producing material for issue on LP for the first time. It’s not just in one sector of the industry, either. The guys producing dance music for DJ use have never really given up on vinyl because their customers like the ability to mix and scratch the stuff, but the techno music explosion has also brought in a lot of people intending to cut vinyl. There is an increasing amount of jazz being released on vinyl, and a number of small audiophile labels cropping up that release primarily on vinyl. This is a bit of a problem, though, for people who want to get into this growth. How LPs are made Now, this stuff is actually more important than you think. This is not at all the case with LPs, and you need to involve yourself in the process a lot more.
Online Audio Converter (MP3, WAV, Ogg, WMA, M4A, AAC) – media.io. Top 10 2009 Tutorials About Mixing and Mastering - StumbleUpon. Mastering Elements Part 1: The Buss Compressor. Mastering is a pretty big subject, so instead of tackling it in one tutorial I thought it might be easier, for those new to the subject, if I split it up into bite sized pieces.

Each tutorial will look at a separate process used in a typical mastering set up, why we use it and what it achieves. One of the first processors used in any mastering chain is a buss compressor, this is really just a name for compressor used to treat an entire mix (i.e. the master buss). Let's take a closer look at how the compressor is used in mastering and the different processors used for the task. 1. The Mastering Compressor's Job When we use any compressor whether it's in our mix, live on stage or in our mastering chain, we tend to have one aim and thats to reduce dynamic range. Without delving too far into the loudness/dynamics argument (there will a tutorial on this later), it's safe to say that the key to using any dynamics processor on your master output is restraint. 2.
Ableton's stock compressor. 3. 4.