
Ninjatoes' papercraft webpage. Paper gems (+ templates) How to make gift bags from newspaper. When I bought something at a store recently, the clerk handed me my purchase in a bag made from a newspaper.
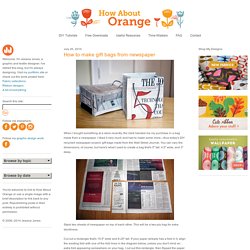
I liked it very much and had to make some more—thus today's DIY recycled newspaper project: gift bags made from the Wall Street Journal. You can vary the dimensions, of course, but here's what I used to create a bag that's 5" tall, 4.5" wide, and 3" deep. Canon CREATIVE PARK. DIY Cup Cake Liners. We went to a beautiful little island to pick raspberries last weekend and I wanted to make a bunch of lemon-raspberry cupcakes.
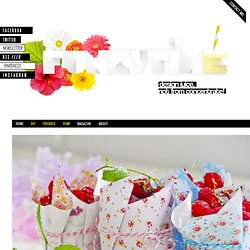
To pimp them up a little, I made these cute, super easy cupcake liners . There were featured in Woman’s Day Magazine June 2012! Just download and print out the patterns on letter sized paper, cut out one big square, take a glass and wrap your paper around it. For the oil of the baked cupcakes not to zip through, take a little bit of wax paper, cut a smaller square and insert it in between your cupcake and the big printed square. Wrap some Bakers Twine around it. How To Make an Eight Page Book Out of a Single Sheet of Paper. Here are eight panels of artwork printed on one side of a single sheet of paper.
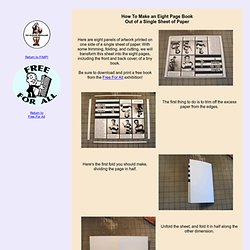
With some trimming, folding, and cutting, we will transform this sheet into the eight pages, including the front and back cover, of a tiny book. Be sure to download and print a free book from the Free For All exhibition! The first thing to do is to trim off the excess paper from the edges. Here's the first fold you should make, dividing the page in half.
Unfold the sheet, and fold it in half along the other dimension. Unfold it again, and then fold the page into quarters. Snowflake Cards. Origami Nut. How to Draw Graffiti Letters. Diamond Window Cube (Modular Origami) Free truetype fonts - downloadable fonts for windows and mac at fonts101.com. Tunnel Vision. I know you are invited to at least one wedding this summer.
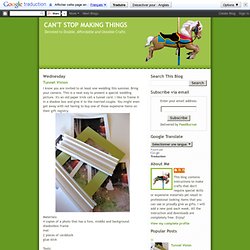
Bring your camera. Clover USA » Make It » Project Sheets. Opc5a.jpg 604×1,939 pixels. Tutorial: How to Make a Pomander Flower Ball. Quilling - Turning Paper Strips into Intricate Artworks. Quilling has been around for hundreds of years, but it’s still as impressive and popular now as it was during the Renaissance.
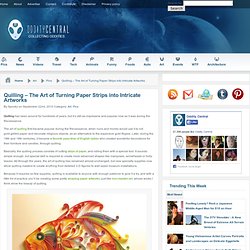
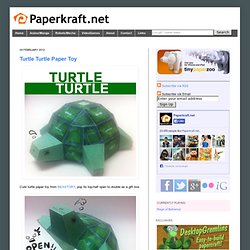
The art of quilling first became popular during the Renaissance, when nuns and monks would use it to roll gold-gilded paper and decorate religious objects, as an alternative to the expensive gold filigree. Later, during the 18th and 19th centuries, it became a favorite pass-time of English ladies who created wonderful decorations for their furniture and candles, through quilling. Basically, the quilling process consists of cutting strips of paper, and rolling them with a special tool. It sounds simple enough, but special skill is required to create more advanced shapes like marquises, arrowheads or holly leaves. Turtle Turtle Paper Toy. Cute turtle paper toy from BEASTORY, pop its top-half open to double as a gift box.
A great doodle and all doodle drawings allow us to make art while daydreaming. S. I love a great doodle!
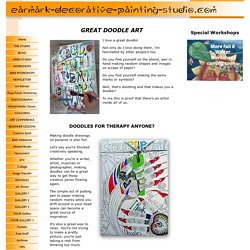
Not only do I love doing them, I’m fascinated by other people’s too. Do you find yourself on the phone, pen in hand making random shapes and images on scraps of paper? Do you find yourself making the same marks or symbols? How To Make Paper Roses. What Origami Can Be! Origami Nut. Magic wallet. You will need: Card in three different colours Ruler Pencil Scissors Glue What to do 1.

For the main body of the wallet, cut two rectangles 18cm x 9cm (7 x 3½ in) from one piece of coloured card. Marbleizing Paper « Skip To My Lou. To make this fun and easy marbleized paper you will need: 1/2 tsp alum (helps paint adhere to the paper), 2 cups liquid starch, liquid acrylic paints, a long wooden skewer , a 9 X 13 pan and white copy paper cut to fit the inside your pan.
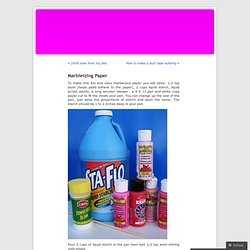
You can change up the size of the pan, just keep the proportions of starch and alum the same. The starch should be 1 to 2 inches deep in your pan. Window Star tutorial Duo Fiberworks. I made some Waldorf-style window stars to decorate our big living room windows.
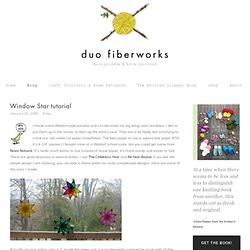
I like to put them up in the winter, to liven up the wintry view. No-Carve Stamps. By Jeromina Juan Ever wonder about the possibilities of designing your own stamps without having to carve anything? There is a simple way! You’ll need one ordinary household object – silicone caulking. Yes, the one you use on your bathtub, sinks, and windows! With no carving to do at all, this task cannot be simpler. Moneywallet.org. Craft DIY Projects, Patterns, How-tos, Fashion, Recipes @ Craftzine.com - Felting, Sewing, Knitting, Crocheting, Home & More. » Blog Archive » Stamp Carving tutorial- Tutorial Sellos de goma. English I love to carve stamps! Is one of my favorite crafts.
I love the endless posibilities it offers and the wonderful results I get. Create a Home Made Wax Seal (16 Pics. How About Orange. My 2014 Oscar ballot and bingo game are done! Get set to enjoy Sunday's Academy Awards with friends. It doesn't matter if they watch movies or know who the actors are; anyone can play bingo and it's a good excuse for a party. Download the Oscar ballot PDFDownload the Oscar bingo PDF Save the PDFs to your computer, open them in Adobe Reader, and print. Kusudama Tutorial part 1. The Japanese kusudama is a paper ball made out of multiple identical origami shapes glued together. Mini Book Made From Scratch {Paper Craft Ideas. 8 Cute DIY Bookmark Ideas.
Bookmarks | 26 comments I don’t really use real bookmarks. Tutorial: Making tissue paper balls. Step 1: Start with 10 sheets of tissue paper in the color of your choice and according fold it across the pile. The folds should be about 1 1/2 to 2 inches wide. The Technique Zone: Acrylic Paint Transfer. Supplies needed: Acrylic dabbers, photocopy of an image, water spritzer bottle, paintbrush, card stock, craft sheet and heat tool (optional) Take the lid off the dabbers and brush the paint onto the card stock, ensure you get a good coverage. Dr. Seuss Activity Blocks Tutorial. Check out these awesome Dr. Seuss Activity Blocks - way fun!! Leaves & stems papercut. I arrived at my studio on Saturday morning, wanting to make something large and filled with different kinds of leaves and stems. In the back of my mind was this sketch by Arounna, and this ink drawing by Etsy seller, Karen Gathany.
After looking at lots of flowers and plants in my books and magazines, I drew a 45 x 45cm composition of botanical specimens onto some thin white paper, and stuck it to black paper with a couple of pieces of sticky tape. Folding Trees Tutorials. Easy Origami Envelope. Letterfolds, envelope fold:s ways to fold a letter giving it a touch of class. Letter Folds Letterfolds are the folds you make so that the contents of a letter cannot be seen. Envelope-free letter sending (Snail-Mail origami) How to fold an origami envelope that closes with a diamond shaped pocket. Paper gems (+ templates) Furoshiki Projects - Traditional Japanese Wrapping Cloth - Illustrated instructions.
Origami Jumping Frog - Simple Instructions for Making. Carlton Hibbert's pattern blog. Gave That: Origami Star Ornaments : Gift Of Giving. These are addictive to make... these Origami star ornaments are the blue Damask velum version of my previous ones (see here). The translucent velum really comes to life when lit from behind via the tree lights. Quilled Snowflake Ornament - Reese Dixon. Hey jen renee: folded notes + love notes, junior-high style. Paper heart Extreme Cards. {Valentines day} pixelated popup card. Simple Pop-Ups You Can Make! - StumbleUpon. Paper flowers-recycled materials. Paper mâché yarn bowl. Woven Ribbon Heart Card - Tip Junkie Creative Community. Lucky Wishing Stars Tutorial.
Rolled Paper Bowl - Tutorial. How to Make a Magazine Reed Box.