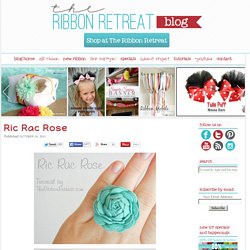

46 Ideas For DIY Jewelry You'll Actually Want To Wear. 46 Ideas For DIY Jewelry You'll Actually Want To Wear. Ric Rac Rose - The Ribbon Retreat Blog. I love these easy-to-make Ric Rac Roses!

Isn’t it beautiful? You can make these and use them in hair, on jewelry, on clothing, as embellishments on anything! And with The Ribbon Retreat’s large selection of Ric Rac, your possibilities are endless! They are also sold at an awesome price for $.65 a yard! – Supplies – Ric Rac (I used 3/4″) Hot Glue Accessory to attach it to The first thing to know about this Ric Rac Rose is that the wider the Ric Rac, the taller the rose. I started out by cutting two pieces of Ric Rac at 21 inches.
I ended up using a bit less than 21 inches… probably 16 or 17 inches. Now we are going to “braid” the two pieces of Ric Rac together. Keep going until you get to the end. Take the end and curl the Ric Rac in. Continue rolling the Ric Rac. You can put a little hot glue on the sides as you are rolling it. DIY Chan Luu Bracelet. My goal this holiday season was to really try my best to make some homemade gifts.

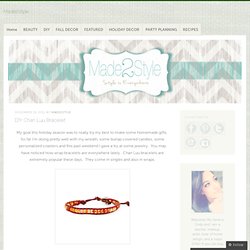
So far I’m doing pretty well with my wreath, some burlap covered candles, some personalized coasters and this past weekend I gave a try at some jewelry. You may have noticed how wrap bracelets are everywhere lately. Chan Luu bracelets are extremely popular these days. They come in singles and also in wraps. I love love the look of these bracelets. I did the top bracelet by simply following this tutorial. 1. 2.Bring your needle up under the right cord through the center and pull the thread through. 3.
Make Your Own DIY Green Holiday Gifts TERRARIUM NECKLACE - Green Holiday Gift Guide. Arrow bracelet - #2 Friendship Bracelet Tutorial. After you've done a few successful strip bracelets (pattern 1), you're ready to do the arrow one (chevron, #2).

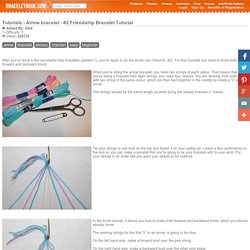
For this bracelet you need to know both forward and backward knots. When you're doing the arrow bracelet, you need two strings of each colour. That means that when you're doing a bracelet from eight strings, you need four colours. You are working from both sides with two string of the same colour, which are then tied together in the middle to create a 'V' or an arrow. The strings should be the same length as while doing the striped bracelet (1 metre). Tie your strings in one knot on the top and fasten it on your safety pin.
In the knots tutorial, it shows you how to make both forward and backward knots, which you should already know. The working strings for the first 'V' or an arrow, is going to be blue. On the left hand side, make a forward knot over the pink string. On the right hand side, make a backward knot over the other pink string. Colored Pencil Jewelry - StumbleUpon. Note from Design Mom: I asked Kate of Mini Eco to create a Back to School themed project for us to try.

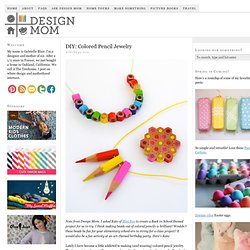
I think making beads out of colored pencils is brilliant! Wouldn’t these beads be fun for your elementary school-ers to string for a class project? It would also be a fun activity at an art-themed birthday party. Here’s Kate: Lately I have become a little addicted to making (and wearing) colored pencil jewelry. I think the results look great and you, or your child, will definitely stand out from the crowd wearing them! You will need Colored PencilsJunior hacksawFine sandpaperDrill and small drill bitThread (for the necklace)Superglue (for the brooch and earrings)Brooch back (for the brooch) How to: Basic Bead Necklace.
Easy Button Earrings Tutorial - StumbleUpon. Did you know...that you can make new earrings with a button and a paperclip?

True story! I've been trying to think of a way for us to make some earrings without having to buy supplies. Buying the beads and all the findings can really add up. :o( Sad. But-oh, what? That still leaves the findings. Clip the top of the paperclip off with wire cutters: Snap off the button shanks: Glue the paperclip to the back of the button. Open the loop at the bottom of your earring hook by bending it outward and hook it onto your paper clip. And...pretty new earrings! Walmart was out of gold sparkly ones (I like gold.) but here are some cute ones I found on Walmart.com(about $1-$2): And some cute ones on Etsy: This Etsy shop has infinity cute buttons, you have to see it. (click photos to see where to buy them!) Of course, you may have some on hand just waiting to use! Hope you enjoy. Have a great Sunday! Have a great Monday!! Love you, Disney.