
Une table spéciale apéro. Jolis pots de fleurs. Le serviettage de nafeuse. Pages. DIY: Drawer Pull Wine Stopper. DIY Baby Blocks. Step 1 Get prints of your favorite pictures. Ateliers créatifs : BOITE TI' KADOS - Papier / Carton - Posca. Button Craft Ideas. What to do with old puzzles that are missing pieces. - Le liège. Un cadre en bouchons de liège Ce cadre réalisé avec des bouchons de liège trouvera sa place dans votre cuisine. Voilà une façon d'associer récupération et esprit convivial. Retrouvez ce cadre disponible à la vente sur Etsy. Un dessous de plat en bouchons Une idée simple à réaliser et originale comme on les aime : créer un dessous de plat en assemblant des bouchons de liège avec un collier de serrage.
Comment recycler de vieux objets pour décorer son intérieur ? - Environnement - Quotidien - Pratique. Comment recycler de vieux objets pour décorer son intérieur ?
Fiche imprimable | images Objectif Sur le principe de la "récup", la décoratrice Brigitte Sallier vous explique comment ses trouvailles au marché aux puces ont été transformées en objets de décoration dans son propre intérieur. 1000 & 1 TRUCS. Flashback: Woven Map Basket. Maps can be amazing design elements, with all their intricately drawn lines and minute details.
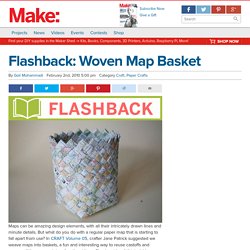
But what do you do with a regular paper map that is starting to fall apart from use? In CRAFT Volume 05, crafter Jane Patrick suggested we weave maps into baskets, a fun and interesting way to reuse castoffs and weave a little memory into a functional item. Check out her full tutorial here and pick up a back issue of CRAFT Volume 05, the Paper issue, in the Maker Shed.Woven Memory Basket Weave your vacation road maps into an attractive souvenir. By Jane Patrick Think of basketry as three-dimensional weaving. If you ever wove paper as a child, that’s the basis for this plaited basket. Bygg ditt eget kakfat - Faites votre propre stand gâteau. I lördags roade jag mig med att bygga kakfat med de kakfatsdelar vi precis börjat sälja på Make & Create.
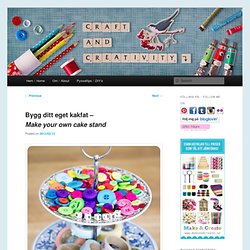
Hur kul som helst! Dock glömde jag kameran på kontoret så steg-för-steg bilderna nedan är tagna med mobilen. Ni som följer mig på Instagram kanske såg dem redan i lördags. ——-Last Saturday, I amused myself by building cake stands. I used cake stand kits from Make & Create. {DIY} Aimants masking tape. Pour certains c’est les sushis, moi j’adore le masking tape (oui je l’assume, je suis une fille qui fait parfois des introductions à ces posts un peu nulles !)
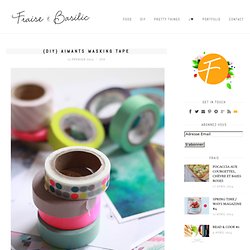
Bref le masking tape a été une de mes découvertes 2012 et j’adore ces jolis rouleaux de scotchs colorés qui ont envahis les rayons. Mais plus que le masking tape, ce que j’♥ ce sont les jolies images (d’ailleurs Pinterest est devenu mon meilleur ami dans ce domaine !) Que parfois j’imprime, je découpe pour finir par en décorer mon frigo au grès des saison et de mon humeur du moment. Sauf que le scotch sur le frigo c’était pas super pratique alors je vous propose un petit DIY super simple pour réaliser des aimants masking tape (on arrête pas le progrès !) Projet de mariage simple - Blog de mariage pour la mariée Annapolis Maryland. Fourchettes & cuillères : les couverts détournés pour la déco. Pondu par Flo le 5 juillet 2012 Vos couverts non plus ne sont pas ceux que vous croyez.
Non seulement fourchettes et cuillères peuvent vous servir à manger vos tupperwares de la pause déjeuner, mais ils peuvent aussi servir de déco ! Fourchette niveau facile : à coller et à clouer. 15 DIY crafts you need to make right now. It's cold, it's raining and quite frankly, it's utterly miserable outside at the moment.

So stay in! But then it hits you. It's not that great inside either. Easy DIY Wall Art For Your Home - iVillage. Gift Ideas for Poor Creative Souls (12) Posted by: Cathy on Jun 03, 2012 Tagged in: Untagged Summer Lights Garland.
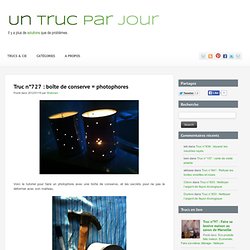
Boîte de conserve = photophores. Posté dans 2012/01/19 par Shabnam Voici le tutoriel pour faire un photophore avec une boîte de conserve, et les secrets pour ne pas le déformer avec son marteau.
Lined Canvas Diaper Box. You can find almost anything on Pinterest…it’s true.

Upon wasting my time searching the other day, I found a fantastic tutorial on upcycling diaper boxes. Hmmm…what could I do with this? Oh, yes – toys scattered all about our living room floor: check, a desire to get said toys put away when not in use: check, cute fabric laying there staring at me: check! Si tu as 3 sacs plastique et 10 min, tu peux faire ce diy "poubelle de star"!!!!! et on ne jette surtout rien... - atelier T E Z U K U R I.
Tout est dans le titre... - maman je voudrais une jolie poubelle à côté de mon joli bureau...
Make A Perpetual Button Calendar. By Diane Gilleland I know calendars (and clocks and address books) are quickly becoming computer-centric tools, but I like the old-school charm of this desk calendar. Make it once, and you can use it forever – just move the numbers to their correct location each month, and change the nameplate! Materials Picture frame, 11″x14″ or 16″x20″, see belowSheet of foam board or 1/2″-thick corkRuler Craft knife Piece of woven fabric, about 24″x30″ Spray adhesive Masking tape Scissors 42 large buttons, 3/4″ to 1″ in diameter 42 flat-head thumb tacks 5 sheets card stock, for numbers and nameplatesDownloadable name/number template 3/4″ circle punch, optional E-6000, or similarly strong glue Water-soluble fabric marker Fine-point Sharpie 2 squares of wool or acrylic felt 1 sheet of Friendly Felt, or lightweight chipboard Sewing machine and thread 2 sets Velcro dots plus 22 “loop” style dots (the softer half of a Velcro pair)Greeting card envelope Directions Step 1: First, prepare the background.
DIY: Necklace Holder. I found this genius idea to get my necklaces organized from and I thought I'd give it a go. 1. You will need a flat board to attach your knobs unto. You can be creative with this. Literary Clock. Memorable Gifts for Mother's Day. By poppytalk | I’ve been loving photo-inspired products lately from big wall murals, images on pillows to a dresser IKEA hack I just posted yesterday; the mediums are endless and inspiring.
Coincidentally I’ve come across a few really good photo project ideas that would be perfect for Mother’s Day recently and thought I’d share some of my finds with you to make your mom something memorable this year. These are perfect to customize using your own photos and transferring on anything from ceramics to fabric. Above: A ceramic vase DIY idea using Lazertran paper and a photo from bhg.com. Check out the slideshow below for nine more ideas. Une chaise pour enfant en scoubidou avec un écureuil.
Lined Canvas Diaper Box. DIY: Necklace Holder. 25 DIY Home Organization Ideas. Oh my gosh, have you seen all the cool DIY home organization ideas on Pinterest? Could you use a little organization like me? 5 tutoriels pour cocooner...