background preloader

Photography

Facebook Twitter

Tiny Polaroid Magnets | { Ambrosia Creative } Hi there! 
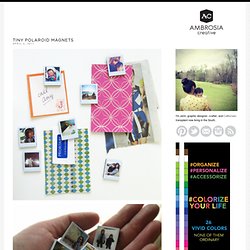
It’s felt like forever since I’ve last blogged, and has felt like an eternity since I’ve done anything crafty and nifty. Since my morning sickness has gone into full speed (yes, we’re expecting our third this fall!) I haven’t felt like myself. But nothing like inspiration to wake one out of a reverie — or nightmare, in my constantly sick state. I came across these DIY Pantone chip magnets on How About Orange and wanted to do something similar.

You will need: Cardboard (mine was the backing of a sketchbook — much thicker than the back of a regular spiral bound notebook) or 2-3 sheets of white cardstock or poster board spray-mounted together to use as a sturdy backing to the magnetsOpaque white marker (necessary only if your cardboard is not white) Craft knife Metal straight edge/ruler Clear packing tape or frisk film. Step 1: Download a Photoshop file of the Polaroid frames below. Step 2: Print out photos onto photo paper. Step 4: Trim out photos with craft knife. 487 Comments. Amazingly Creative Drawing Vs Photography. This wonderful work has done by a very talented Belgian painter, illustrator, portraitist, caricaturist and photographer Ben Heine. 
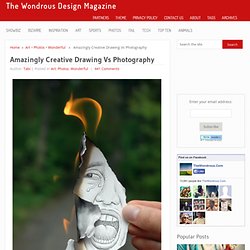
This creative artist was born in Abidjan, Ivory Coast. He Studied graphic arts and sculpture and I also have a degree in journalism. Lets take a look at some of his awesome works that he calls “Drawing Vs Photography” or “Imagination Vs Reality”.

Craft Ideas - Easy Crafts for Kids, DIY Crafts and Knitting Patterns. Turn Photo Negatives Into Artsy, Personalized Lamps. Photo Tile Coasters {Using Resin} Last Christmas I almost had a breakdown... We had just moved in to our home the month before, but I didn't want to let that prevent us from having the holliest jolliest Christmas. My intentions were good.

I wanted to make Christmas special for everyone, but I learned the hard way that I should have been planning ahead!! And that's how it happened. I created a monster. Well, with this project I created an anniversary gift AND a Christmas gift. While I was in Utah, my sweet cousin Michelle showed me a couple of projects using resin. Here's how I made these photo coasters...

I started out with a trip to Home Depot. Next, I ordered some photos. Only 13 cents a print at Costco! I used a regular old Elmer's glue stick to paste each picture onto the tiles. I won't give a full tutorial on using resin because each product is a little different. After mixing the resin with the hardener, I just poured it on!

Then it took them a full 24 hours to harden up! All done! Now these are stinkin' cute!!