
HandmadebyIs: Colgante nido. Buscando cosas para hacer las pulseras enrrolladas me encontré alambre dorado y plateado así que aproveché para hacer estos colgantes que quedan tan chulos.
No he hecho el tutorial porque en Internet hay un montón, incluso vídeos! El plateado lo he probado con un cordón de cuero y con una cadena de plata pero todavía no he decidido como me gusta más... y a vosotr@s? I Spy DIY. Peter Pan Collar1. DIY Craft Project: How to Make a Boy's Bowtie (in time for Easter) New DIY Craft Project: How to Make the Cutest Boy’s Bowtie (in time for Easter)by Brittni | 59 comments A guest post tutorial from Jessica of Living the Swell Life.
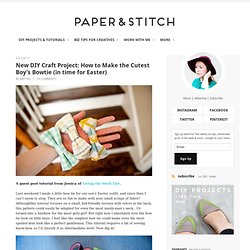
Last weekend I made a little bow tie for our son’s Easter outfit, and since then I can’t seem to stop. They are so fun to make with your small scraps of fabric! Althoughthis tutorial focuses on a small, kid-friendly version with velcro in the back, this pattern could easily be adapted for even the most manly-man’s neck…Or turned into a hairbow for the most girly-girl! But right now I absolutely love the bow tie look on little boys. Supplies (must haves): fabric (6×20″ strip), interfacing (medium/heavy) (4×15″ strip) although not 100% vital, this provides great structure to the bow tie, Velcro (1″), scissors, sewing machine, needle + thread, iron, measuring tape (nice to haves): pins, pencil, fabric marker, rotary cutter + mat.
Drilled Natural Stone Jewelry Tutorial. Guest post tutorial by Jenny Hoople of Authentic Arts.

Want to learn how to drill holes in beach stones? Well, I’ve got good news for you: it’s pretty easy and I’d love to tell you how it’s done. I’ve been making this natural stone jewelry for several months with pre-drilled pebbles that I purchased from fellow Etsy artisans. It took a little bit of internet research and guessing to figure out the best way to go about drilling my own, indigenous Wisconsin stones. Some sites said one thing, some said another. Choosing the Right Stone for Drilling Almost any stone that you find CAN be drilled, but I really recommend starting with softer sedimentary rocks (sandstone, mudstone, limestone, etc).
Equipment You Need to Drill Your Own Beach Stones 1. 2. 3. 4. 5. 6. 7. Lets Start Drilling! 1. 2. Boat People's vintage and DIY fashion blog - your daily source of OMG. DIY Accessory - Coral Charm Necklace. Get in touch with nature and your inner accessory guru by turning a fire red piece of coral into a wire wrapped charm necklace! This easy do-it-yourself gift idea is a great rainy day project. Adding a natural element such as coral into your accessory collection will make you a true force of nature. Just follow these simple steps! Step 1 - Take the coral branch and string the wire through hole, making a loop at the top to create an opening for your chain. Step 2 - Continue to wrap the wire tightly around the top end of the coral branch till forms a thick setting. Step 3 - Clip the end of the wire and secure it by tucking it beneath the layered setting you€™ve just created.
DIY Friendship Necklace. As soon as Lauren and I saw this editorial in Flare Magazine, we knew we had to recreate these awesome, friendship bracelet-like necklaces.
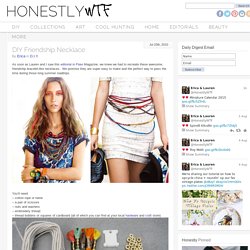
We promise they are super easy to make and the perfect way to pass the time during those long summer roadtrips. To make a 2-tone necklace, cut a long piece of rope and wrap two different colors of embroidery thread around its own bobbin. Tie a starter knot along with the two colored threads you are using, leaving at least 3 inches of slack, Tape down the slack to a flat surface or safety pin it something that will help keep it in place (feeling nostalgic yet?). Lay the color that isn’t being used (shown here in purple) in your left hand, along with the rope, and hold them taut.
Take the active color (shown here in red) in your right hand, pass it over the rope, loop it under and back through the opening. To alternate colors, simply put the inactive color (red) in your left hand and the new active color (purple) in your right. How To Make a Bow Tie. In our local shop we sell tons of vintage bow ties.

We could never keep them in stock, so we started making them! Clip on bow ties are easy to make. DIY Pearl Collar Necklace. Pearls have always been a symbol of wisdom and class. Wearing them can instantly transform a look from casual to sophisticated, and when you combine that with a peter pan collar you get a major fashion breakthrough. We're updating two classic looks to create one modern piece of neck candy. Not to mention the insane amount of pearls seen on the Chanel runway yesterday. DIY Miu Miu Collar. Miu miu stand-alone collar The Miu Miu stand-alone collar has been talked about on countless blogs and covered in a plethora of fashion editorials.
The entire collection was filled with jewels, pristine color palettes and catchy, girly prints – it’s one of my all time favorite collections and even the smallest piece from it can define an entire outfit. DIY Badass Bow Necklace. Hardware stores are my FAVORITE.
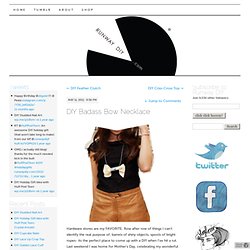
Row after row of things I can’t identify the real purpose of, barrels of shiny objects, spools of bright ropes- its the perfect place to come up with a DIY when I’ve hit a rut. DIY Bullet Necklace. My long lost west coast friend Emma is coming to visit from LA this weekend and this post is dedicated to her.

Emma introduced me to UNEARTHEN, sneakily hinted my boyfriend into buying me one for my birthday, and also dutifully collected these bullet casings for me at a real shooting range. That’s a real friend. If you don’t have a friend to collect casings for you, you can also buy them here. Follow the easy tutorial below to make bullets into bling. DIY Peter Pan Collar. Making your own peter pan collar is pretty simple – it requires just a few steps.
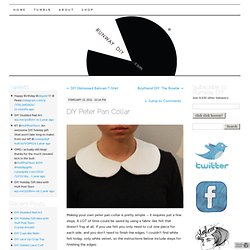
A LOT of time could be saved by using a fabric like felt that doesn’t fray at all. If you use felt you only need to cut one piece for each side, and you don’t need to finish the edges. I couldn’t find white felt today, only white velvet, so the instructions below include steps for finishing the edges. Use a piece of string the measure the circumference around your neck. Just when I thought I’d never use geometry terms again! Draw a circle this size on the back side of the fabric you’re using. Cut out this shape, leaving an extra .5 inches on each side when you do this (unless you use felt and then just cut along the line you drew.)
Iron the collar, sew the one section of the snap on one side of the back of the collar, and the other section on the other side for your closure.