

D.I.Y. Oversized Fabric Garland Chandelier. Make a statement piece in your home out of supplies you already have on hand!
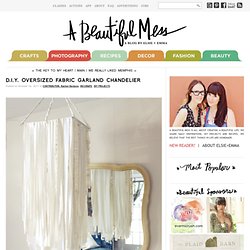
I designed my oversized fabric garland chandelier to fit over our table but you could also use it in a corner that needs a little more excitement, above a reading nook in a child's bedroom, or as the backdrop for your next holiday party. You'll need: 1 wire cooling rack, 2-3 yards of fabric in different shades, 1 strand of twinkle lights, 1 white extension cord, lace, chenille, embroidery thread, a needle, two hooks that screw into a wall, a drill. 1. cut strips of fabric in varying widths (1/2" - 2") for depth. 2. create texture with strips by stitching loosely through them with embroidery thread and then bunching them up before tying a knot.
Spread them out evenly along your thread and leave enough string at the end to tie it to the cooling rack. 3. 5. 7. 9. DIY Fabric Garland. My niece’s first birthday is quickly approaching and I’ve decided to try out a few projects for her upcoming party.
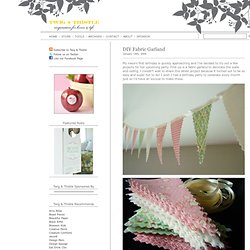
First up is a fabric garland to decorate the walls and ceiling. I couldn’t wait to share this latest project because it turned out to be so easy and super fun to do! I wish I had a birthday party to celebrate every month just so I’d have an excuse to make these. More pics and step-by-step instructions after the break! Materials Needed: Sewing Machine Fabric Pellon / Interfacing Iron Rotary Pinking Cutter Scissors Satin Ribbon Coordinating Thread Instructions: 1. 2. 3. How To Mix Chalkboard Paint in Any Color. We love using chalkboards as backdrops for displays and parties (like this one here!).
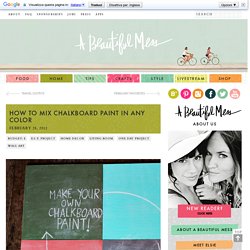
So we were super excited to learn that you can create your own custom colors-and it's really easy! We first learned how from Martha Stewart whose tutorial you can read here. She recommends that you use latex paint, but we tried it out with acrylic paints with much success. Here's how you too can create your own chalkboard paint... Supplies: 1/2 cup acrylic paint (choose any color you like, or mix colors together to make the perfect shade!) 1. 2. Once your chalkboard has fully dried be sure to slate the surface before using it for the first time. Have fun creating any color combination you like!! Resolution Subway Art – Tutorial. This was my submission from the SYTYC “New Year’s” Challenge….I finally won a challenge!
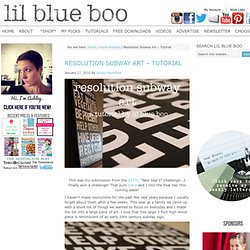
That puts Dana and I into the final two this coming week! I haven’t made resolutions for the past few new years because I usually forget about them after a few weeks. This year as a family we came up with a short list of things we wanted to focus on everyday and I made the list into a large piece of art. I love that this large 3 foot high wood piece is reminiscent of an early 20th century subway sign. DIY Aluminum Lanterns using Upcycled Radiator Perforated Metal Sheets. I originally came up with this idea as a good way to practice before I made a pendant lamp for our home, using the cloverleaf pattern below, and I just had to share them with you.
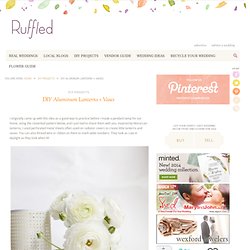
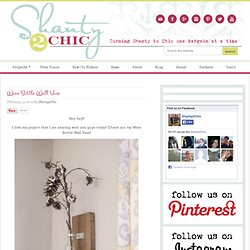
Inspired by Moroccan lanterns, I used perforated metal sheets often used on radiator covers to create little lanterns and vases. You can also thread wire or ribbon on them to mark table numbers. They look as cute in daylight as they look when lit! - perforated metal sheets or upcycle them from used radiator covers (found in places like here) - tin snips + fine sand paper for metal - 20 or 22 gauge wire - flat pliers - spray paint Create templates on a piece of paper to play with the proportions before you begin cutting the metal sheet. Thread both ends of your cylinder using 20 or 22 gauge wire and twist tight using pliers. Wine Bottle Wall Vase. Hey hey!!
How to Make Chalkboard Paint In Any Color {A Beautiful Mess} DIY: Light Clouds. Wednes-diy. I’ve got lots of great diy inspiration for you all today so lets get right to it!
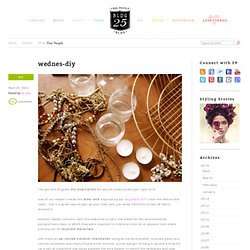
One of our readers made this bike lock inspired by our dog leash DIY! I love the fabrics she used…this is a great way to jazz up your bike lock, just wrap different scraps of fabric around it! Another reader, autumn, sent this awesome project she made for her environmental perspectives class, in which they were required to create an interior or apparel item made entirely out of recycled materials. DIY Platform Bed. DIY: Ikea Rug Pillow. A Painted Spoon : DIY. Glass jars turned vintage. Lately I've been intrigued by those lovely vintage blue glass jars you see on the tables of chic outdoor weddings.
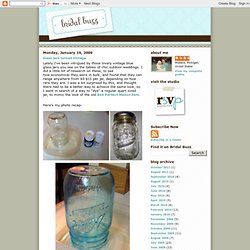
I did a little bit of research on these, to see how economical they were in bulk, and found that they can range anywhere from $5-$15 per jar, depending on how rare they are. DIY: Painted Porcelain. Say YES! to hoboken: DIY: Big Bow Pillow. This is the big bow pillow I made yesterday.
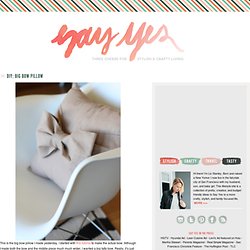
I started with this tutorial to make the actual bow. Although I made both the bow and the middle piece much much wider. I wanted a big fatty bow. Really, it’s just a big tube with a small tube wrapped around it. Super simple. Ta dah! Copyright 2014 liz stanley // all rights reserved. DIY: Book Page Jars. DIY: Succulent Tea Cups.