
A Study of Drawing Robot Pen Holders and Design Considerations. MakerBlock’s Cardboard Gondola, Annotated The pen holder for a drawing robot is one of the most deceptively simple aspects of the entire machine.
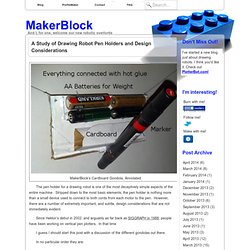
Stripped down to the most basic elements, the pen holder is nothing more than a small device used to connect to both cords from each motor to the pen. However, there are a number of extremely important, and subtle, design considerations that are not immediately evident. Since Hektor’s debut in 2002, and arguably as far back as SIGGRAPH in 1988, people have been working on vertical pen plotters. In that time I guess I should start this post with a discussion of the different gondolas out there. In no particular order they are: Binder clip. Stuart Childs’ DRBO Pen HolderDrawBot Quick Change Pen Holder by UechiMike.
Frankly, my crappy gondola is a testament to the how forgiving DrawBot setups are. Posts in the DrawBot Adventure Series. Pleasant Hardware. The SphereBot can plot images on spherical objects like table tennis balls, golf balls, eggs etc. It is inspired by the original EggBot by EvilMadScientist, but built from 2 old stepper motors and some steel rods (all cannibalized from old flatbed scanners), some MDF and plywood and a few 3d printed parts (printed with my MakerBot Cupcake). The electronics are simply an Arduino and two Polulu A4983 stepper motor drivers (on the bread board). The custom Arduino firmware directly interprets GCode sent over the serial port. Sphere-Bot Article. Sphere-Bot™ is an egg marking and decorating robot, just in time for Easter.
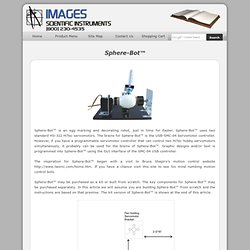
Sphere-Bot™ uses two standard HS-322 HiTec servomotors. Smart USB-controlled pixel. MSP430 Launchpad Projekte und Code Beispiele - xdec. Introduction to Microcontrollers - Beginnings. Posted by Michael Silva on Aug 20 2013 under Tutorials | Microcontroller Welcome to this Introduction to Microcontroller Programming tutorial series.
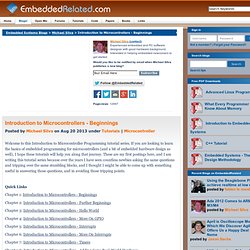
If you are looking to learn the basics of embedded programming for microcontrollers (and a bit of embedded hardware design as well), I hope these tutorials will help you along that journey. These are my first postings here, and I am writing this tutorial series because over the years I have seen countless newbies asking the same questions and tripping over the same stumbling blocks, and I thought I might be able to come up with something useful in answering those questions, and in avoiding those tripping points.
Quick Links Chapter 1: Introduction to Microcontrollers - Beginnings Chapter 2: Introduction to Microcontrollers - Further Beginnings. 8×8 Dotmatrix Scrolling LED display using atmega8515 microcontroller. Here’s an another project, which makes an Scrolling LED display.
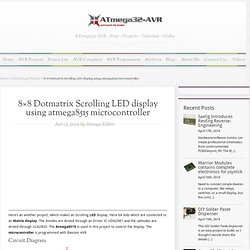
Here 64 leds which are connected to an Matrix display. The Anodes are drived through an Driver IC UDN2981 and the cathodes are drived through ULN2803. The Atmega8515 is used in this project to control the display. The microcontroller is programmed with Bascom AVR. Circuit Diagram Designing Software You can also download an software which is used to give digital data for any design with 8x8matrix, please check the screen shots. It gives 9 bytes of data, in which 8 bytes are the values of the columns. Demo For example, look the below image. This free embedded project also found using: Vojťákovy stránky. OverviewImplemented games and toolsHack a Day Easter EggDownloads Overview The main inspiration for creating this retro-style handheld gaming console was one of the puzzles in this year's TMOU puzzlehunt game.
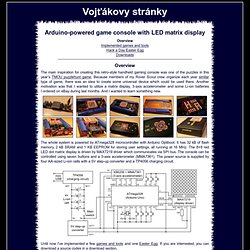
Because members of my Rover Scout crew organize each year similar type of game, there was an idea to create some universal device which could be used there. Another motivation was that I wanted to utilize a matrix display, 3-axis accelerometer and some Li-ion batteries I ordered on eBay during last months. And I wanted to learn something new. Code from an English Coffee Drinker. The HangBot Project. The Hangbot Project was originally the focus of my research, An Exploration of Mechatronic Devices for Physical Displays of Data Streams and Environment Interaction , in the Wisconsin Institute for Discovery during my senior year as an undergraduate.
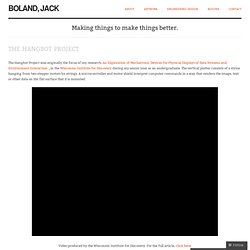
The vertical plotter consists of a stylus hanging from two stepper motors by strings. A microcontroller and motor shield interpret computer commands in a way that renders the image, text or other data on the flat surface that it is mounted. Video produced by the Wisconsin Institute for Discovery. For the full article, click here. Joining forces with chemical engineer, Ian Anderson, and MFA candidate, Paul Lorenz, the Hangbot sits in between engineering and art. In this age of paperless records and LCD displays, the days of physical data records and tangible graphics seem to be becoming a thing of the past. The Device The project originated from a small open source CNC mill that my boss gave me one summer. Early Drawings Image Processing. STM32F3Discovery: ARM GCC Environment on Windows – Part-1. After trying and trying and spending more than double the original price I finally got hold of a couple of STM32F3Discovery (Dev) Boards.
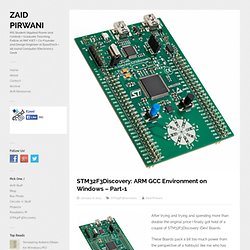
These Boards pack a bit too much power from the perspective of a hobbyist like me who has used only 8-bit stuff till now and though I don’t have any specific plans for using the extra processing power, I wanted these boards cause of the 9-Axis IMU that comes on it all ready to be used. To avoid repetition of explaining the board and what it has and what not, am just going to put in a couple of links. A few links which introduce the board better: I found out after getting the board that ST does not provide ready support for free-tools and the official supported IDEs/Debuggers are expensive and out of range for hobby work, so I set out to find open-source and free solutions. I found quite a few but most were either Linux based or targeted some other STM32 Board and not this specific one. First Steps. (temporary working title) AVR Stick PROTOTYPE. Infopage Some boards as also assembled avrsticks are still available at ebay News!
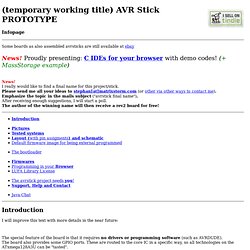
Proudly presenting: C IDEs for your browser with demo codes! (+ MassStorage example) News! Introduction I will improve this text with more details in the near future: The special feature of the board is that it requires no drivers or programming software (such as AVRDUDE). A bootloader is installed by default, which enumerates the board as an USB stick. So for example the board (without having any driver software installed on the computer) can a be programmed directly in the browser. TinyUSBboard. Arduino compatible without extra programmer and/or FTDI chip (USB<->serial) needed!
Plus exchangeable bootloader! New! Precompiled usbasp programmer firmwares, now also for all the other AVRs supported, available !