
Tie-dye. This is a video about how to tie dye Tie-dye is a modern term coined in the mid-1960s in the United States for a set of ancient resist-dyeing techniques, and for the products of these processes.

The process of tie-dye typically consists of folding, twisting, pleating, or crumpling fabric or a garment and binding with string or rubber bands, followed by application of dye(s). The manipulations of the fabric prior to application of dye are called resists, as they partially or completely prevent the applied dye from coloring the fabric. More sophisticated tie-dyes involve additional steps, including an initial application of dye prior to the resist, multiple sequential dye and resist steps, and the use of other types of resists (stitching, stencils) and discharge.
Unlike traditional resist-dyeing techniques, tie-dye is characterized by the use of bright, saturated primary colors and bold patterns. Dyes, fabrics, and discharge agents[edit] Designs and patterns[edit] Random Tutorial Generator. DIY Solar Lamp: Make Your Own Eco-Friendly Sun Jars.
The principle is simple and seductively clever: solar lights that store energy during the day and release light at night.

These can be purchased ready-made in a variety of colors (yellow, blue and red) but they can also be built at home. A simple, less-technical approach involves buying a conventional solar-powered yard lamp and then essentially harvesting it for key pieces to put in a jar. This is simply a way of taking an existing solar lamp design and appropriating its parts to make something more attractive for display around a house or home. A more electronically-savvy individual can take the more complex route and built a solar lamp from the ground up using small solar panels – though the aesthetic result may not be as impressive. Whatever route you choose to go, these are fun and sustainable gadgets that make it easy to go green, automate the process of turning on lights at night and can add some color to your porch, patio, garden or windowsill. Wrap Your Headphones with a Binder Clip for Easy, Tangle-Free Storage.
Survivalbiz.com. Step 7.

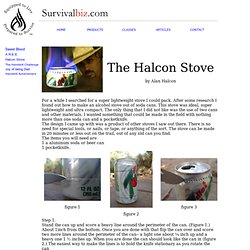
Take the bottom piece of the can and start to ruffle the perimeter of the can with your thumb. (Figure 10.) You don’t want creases, just ruffles. These ruffles are to allow the top portion of the can to fit over the bottom portion easily. Step 8. . · Isopropyl alcohol works well with the stove but it does not burn as clean as denatured. · You will notice the aluminum strip creates an inner wall to the stove. . · You can set your cooking pot right on top of the stove and cook. . · Although, no amount of blowing will extinguish the flame. . · Please! Most Popular Repurposing Tricks of 2011.