
Cool and Beautiful Bald Presidents Art on Dollar Bills. Cool Amazing Arts Search Cool Arts images from here @import url( Custom Search Wednesday, July 15, 2009 Cool and Beautiful Bald Presidents Art on Dollar Bills Posted by M D at 2:53 PM Russian LiveJournal user tebe_interesno shows us how United States dollar bills would look like if all of the presidents were bald.

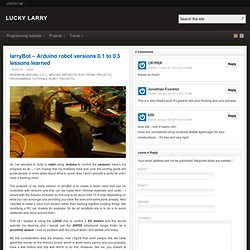
ArduinoPower. (Power Switching devices for Arduino) Left-Right: A "relay electronic brick", a 4-relay board, an 8-relay board, a 4-Power-FET "brick" Having your Arduino control higher-power devices like lights, motors, pumps, doors, and many more is one of the most interesting and useful applications you may get involved with.
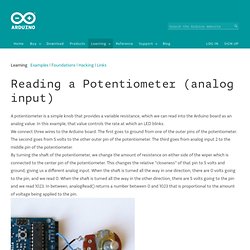
But it can be a little difficult and possibly dangerous when power line voltages are being controlled. There are significant differences in controlling AC power compared to DC. And there are considerations about different kinds of loads and so forth. LarryBot – Arduino robot versions 0.1 to 0.5 lessons learned. So I’ve decided to build a robot using Arduino to control the sensors.
Here’s my progress so far – I am hoping that my mistakes here and over the coming posts will guide people in more detail about what to avoid. Also I won’t provide a parts list until I have a working robot… The purpose of my early version of larryBot is to create a basic robot that can be controlled with Arduino and that can be made from minimal materials and costs – I aimed with the Arduino included for this cost to be about £60-70 in total depending on what you can scrounge and providing you have the tools and some parts already. Also I wanted to make a robot from scratch rather than hacking together existing things, like modifying a RC car chassis for example. So far all larryBots aim is to do is to avoid obstacles and move around them. First off I looked at using the L293D chip to control 2 DC motors and this would operate my steering and I would use the SRF05 ultrasound range finder as a proximity sensor. Tutorial : Make a easy obstacle avoidance robot.
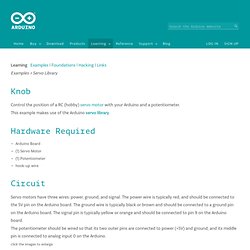
Potentiometer. Learning Examples | Foundations | Hacking | Links A potentiometer is a simple knob that provides a variable resistance, which we can read into the Arduino board as an analog value.
In this example, that value controls the rate at which an LED blinks. We connect three wires to the Arduino board. The first goes to ground from one of the outer pins of the potentiometer. The second goes from 5 volts to the other outer pin of the potentiometer. By turning the shaft of the potentiometer, we change the amount of resistence on either side of the wiper which is connected to the center pin of the potentiometer. Arduino Tutorial Bundle .:Arduino Experimentation Kit:. (ARDX) : .:Twisting:. (Potentiometers) - CIRC08. What We're Doing:Along with the digital pins the Arduino has it also has 6 pins which can be used for analog input.

These inputs take a voltage (from 0 to 5 volts) and convert it to a digital number between 0 (0 volts) and 1024 (5 volts) (10 bits of resolution). A very useful device that exploits these inputs is a potentiometer (also called a variable resistor). When it is connected with 5 volts across its outer pins the middle pin will read some value between 0 and 5 volts dependent on the angle to which it is turned (ie. 2.5 volts in the middle). We can then use the returned values as a variable in our program. (you can also download the breadboard layout sheet from the bottom of this step) The Parts:
AnalogReadSerial. Knob. Learning Examples | Foundations | Hacking | Links Examples > Servo Library.
UltrasonicSensor. Better library: NewPing The example below is a simple implementation that is easy to understand and great for simple testing.
However, it is slow, is not meant to be run from interrupt code, and does not bound the pulseIn call by adding ", 38000" or whatever the appropriate maximum timeout (in microseconds) is for your sensor. In other words this code can introduce up to a 1 second delay as the worst case timeout to pulseIn. If you need more efficient code that can be run from interrupts and can be used to talk to multiple sensors at the same time, look at NewPing from Simple example to play with // * Copyleft 2007 Jason Ch This code returns the distance in Inches... Unsigned long echo = 0; int ultraSoundSignal = 9; // Ultrasound signal pin unsigned long ultrasoundValue = 0; void setup() { Serial.begin(9600); pinMode(ultraSoundSignal,OUTPUT); } void loop() { int x = 0; x = ping(); Serial.println(x); delay(250); //delay 1/4 seconds. } Arduino - 6 Ultrasonic Sensors rotating a Servo Motor. HC-SR04 Ultrasonic Sensor. Distance sensing with ultrasonic sensor and Arduino - Tautvidas Sipavičius.
I’ve always wanted to play around with Arduino Ultrasound sensor, but the idea of spending 30$ + shipping on a device that I may not use always sounded not that great.
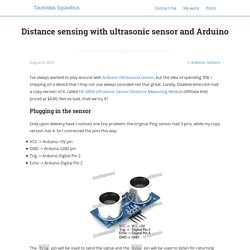
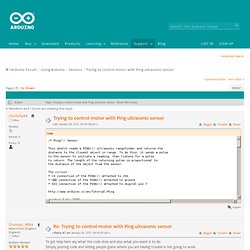
Luckily, Dealextreme.com had a copy version of it, called HC-SR04 Ultrasonic Sensor Distance Measuring Module (Affiliate link) priced at $4.60. Not so bad, shall we try it? Plugging in the sensor Only upon delivery have I noticed one tiny problem: the original Ping sensor had 3 pins, while my copy version has 4. Trying to control motor with Ping ultrasonic sensor. /* Ping))) Sensor This sketch reads a PING))) ultrasonic rangefinder and returns thedistance to the closest object in range.
Ping. (redirected from Tutorial.UltrasoundSensor) Learning Examples | Foundations | Hacking | Links Examples > Sensors Ping Ultrasonic Range Finder The Ping))) is an ultrasonic range finder from Parallax.
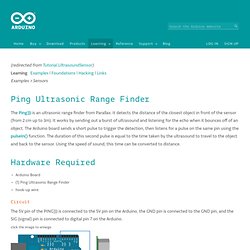
It detects the distance of the closest object in front of the sensor (from 2 cm up to 3m). Hardware Required. Homemade Spin Art Machine. 1. Box Fan - any size (16", 20", etc) : 2. Corrugated Cardboard - I used the cardboard from a Husky air compressor cardboard box. Should be stiff 3. 4. 5. 6.