

HandBrake. Best Practices to Organize Your Digital Media Library. It is given that your digital media library will grow bigger and bigger over time.

You may have started out with a 160 gigabyte laptop hard drive and then moved to a 500 gigabyte desktop hard drive and finally transferred your collection into two 2 terabyte hard drives on a network attached storage (NAS). In this post, I will share my best practices to organize the digital media library. When I moved my media library to a NAS server (Synology DiskStation), I spend some time in planning on how my media library would look like on the network hard drive. Here is an example folder structure for media collections: Music I’m using iTunes to organize my music collection, but if you are a serious music collector, then you should definitely check out a software called MediaMonkey. Pictures Some people like to store photos based on event names. In my opinion the best photo organizer is Google Picasa (although I’m using iPhoto and Aperture at the moment due to various other reasons).
Videos. How to Customize XBMC 12 Frodo with All the Bells and Whistles. Kodi (formerly known as XBMC) is a great entertainment center software.
But, here’s the deal: Like many other open source projects, it is driven by a very technical community, and it is not necessarily user-friendly enough for the average person to use and customize. Fortunately, with a bit of time and the right skin, you can set things up properly and make Kodi (XBMC) very user-friendly and rock solid.
I have spent countless hours crawling forums and websites, trying to get the live TV setup, premium online content, automatic light control, and all the other settings right. Note: These step-by-step instructions have been tested with Kodi v15, but they should also be compatible with v16 (codename Jarvis). In this extensive and updated guide, I will walk you through the relevant customization tips and tricks needed to take your Kodi installation to the next level. Forum - Topic: Raspberry Pi USB boot/storage - THE RIGHT WAY! (1/2) All the instructions I've seen for booting a Raspberry Pi from USB are wrong and it's time to clear some things up.
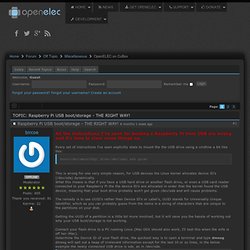
Every set of instructions I've seen explicitly state to mount the the USB drive using a cmdline a bit like this: boot=/dev/mmcblk0p1 disk=/dev/sda1 ssh quiet This is wrong for one very simple reason, for USB devices the Linux kernel allocates device ID's (/dev/sda) dynamically. What this means is that if you have a USB hard drive or another flash drive, or even a USB card reader connected to your Raspberry Pi the the device ID's are allocated in order that the kernel found the USB device, meaning that your boot drive probably won't get given /dev/sda and will cause problems. The remedy is to use UUID's rather than Device ID's or Label's, UUID stands for Universally Unique Identifier, which as you can probably guess from the name is a string of characters that are unique to the partitions on your disk.
Now in the terminal run the below command: Raspberry Pi XBMC Solutions Compared: Raspbmc vs OpenELEC vs XBian. Watch and record live TV on your Raspberry Pi. Many of those set-top boxes hidden under televisions are already running Linux.
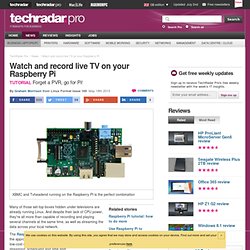
And despite their lack of CPU power, they're all more than capable of recording and playing several channels at the same time, as well as streaming the data across your local network. The Raspberry Pi is perfectly suited to this, too, and with the appropriate hardware it can be turned into a powerful low-cost digital video recorder, complete with media streaming, scheduling and time shift. 8 great Raspberry Pi projects created by kids The appropriate hardware is the key phrase in the previous paragraph, because a painless installation is mostly dependent on your television-grabbing hardware 'just working'.
Fortunately, Linux has support for a great many such devices built in to the kernel, so many will work without modification. And while these instructions start from the command line, we've split the entire tutorial into 10 different steps, hopefully making the project as easy to follow as possible. 1. 2. 3. How to install openELEC to a HD or USB. How to Rip a DVD to Your Computer. How to set up a Raspberry Pi media centre. As a pre-packaged, all-in-one media-centre solution for the Raspberry Pi, the XMBC bundle from element14 might seem a bit of an odd notion.
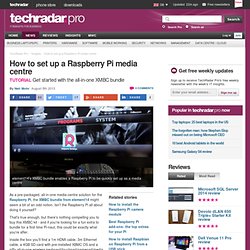
Isn't the Raspberry Pi all about doing it yourself? XBMC Accessories. Forum - Topic: Hard disk? (1/3) Well, now I've been running into one problem after another.
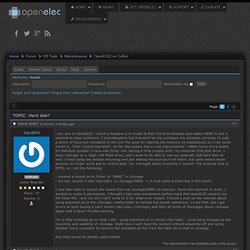
I named the disk, which seemed to help. But at boot I got messages about unable to mount //dev/sda1 - which makes me think that how the ports on my USB hub are scanned at boot, and therefore which device is seen first, makes a difference. Forum - Topic: Speed up Rasb Pi by running Openelec on USB stick? (1/21) Turn a Raspberry Pi Into an XBMC Media Center in Under 30 Minutes. Turn a Raspberry Pi Into an XBMC Media Center in Under 30 Minutes. The Only Raspberry Pi XBMC Tutorial You Will Ever Need.