
Free Circuit Design and Simulation? What happens when a bunch of makers and hackers decide that they need multiplatform schematic capture, spice simulation and PCB layout and don't like the idea of having to pay lots of money to buy a huge software suite and then spend weeks learning how to use it?
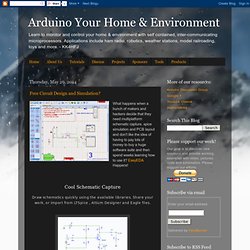
EasyEDA Happens! Cool Schematic Capture Draw schematics quickly using the available libraries. Share your work, or import from LTSpice , Altium Designer and Eagle files. Clever Spice Simulation Verify analog, digital and mixed signal circuits with spice subcircuits and models. Powerful PCB Layout Export your PCB files to Gerber files, or order your PCBs from EasyEDA directly.
Design, Simulate & Fabricate Your Arduino Project & PCBs. Arduino controlled reflow oven. If you are doing many PCB prototyping, probably faced that soldering takes quite some time and effort.
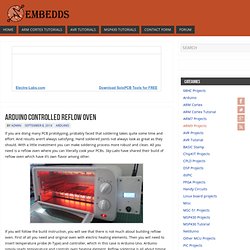
And results aren’t always satisfying. Hand soldered joints not always look as great as they should. With a little investment you can make soldering process more robust and clean. All you need is a reflow oven where you can literally cook your PCBs. Sky-Labs have shared their build of reflow oven which have it’s own flavor among other. If you will follow the build instruction, you will see that there is not much about building reflow oven. Read. Making Printed circuit Boards at or Near Home: A Comprehensive Overview, Almost a Guide.
Produce a file(s) describing the board to the next step in the chain, this could be a set of gerber files, an image file, or perhaps some other file(s).
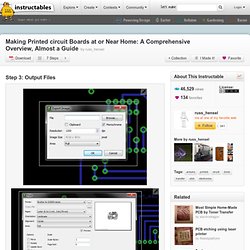
Sometimes the image goes direct to the printer. Eagle has several different ways to proceed at this step, the simplest may be to print the board for the toner transfer method. This involves hiding/viewing some of the layers, and selecting other printing options some in eagle some in your printer preferences. You can also export your board as a graphic file. This is similar to printing, but has its own set of options, Since it produces a file you can also manipulate this file for board optimization, or convert the file format if needed.
If you need gerber files eagle has ulp () to produce these. Instructable Links: Automating Eagle export and preparing it for printing.
Direct to PCB InkJet Resist Printing Modifications for Epson Stylus C84 by Stefen Trethan. Epson Stylus C84 by Stefen Trethan Stripping down First all plastic is removed around the C84 that is not required for printing.
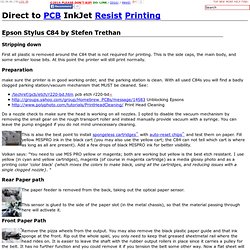
This is the side caps, the main body, and some smaller loose bits. At this point the printer will still print normally. Preparation make sure the printer is in good working order, and the parking station is clean. Do a nozzle check to make sure the head is working on all nozzles. This is also the best point to install spongeless cartridges^ with auto-reset chips^ and test them on paper. Volkan says: "You need to use MIS PRO yellow or magenta; both are working but yellow is the best etch resistant. Rear Paper path.
Slowing 93.184.35.39&c=1&t=41478.5479409722. In CD/DVD printing trays Some inkjet printers are designed to print on materials about the thickness of a PCB and even have a carrier to hold the stock: CD/DVD printers!
The Epson 260/280 will even print over the hole in the middle if you set the paper source to "Sheet" but insert the CD tray anyway. It's possible to use the 260/280 driver with the T50 by simply ignoring (repeatedly) the warnings that you have the wrong device. The CD Tray can be modified to remove the spindle holder and even to "square" out the cd shape to hold up to a 3" long PCB as long as you don't change the small holes around the CD area in the tray which the printer uses to sense the tray position. rdheiliger says: Myc says: I followed up on Richard's post using a unmodified EPSON R220 for the "Toner Dusting" process.
When setting up the R280 to print in the CD/DVD tray, under Paper Options do the following: Choose Sheet as the paper source, even if you are using the CD tray. My method, 1. See also: