
Day by Day: Nikon D700 - DIY GPS Project. I built a GPS unit for my Nikon D700 over the last couple of weeks.
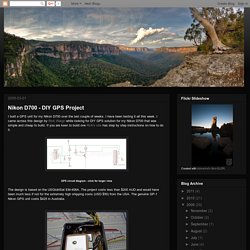
I have been testing it all this week. Cnet. With more people packing smartphones and mobile hot spots, a camera with Wi-Fi gives you the control, flexibility, and quality of a dedicated camera with the capability to back up to a cloud service, computer, or mobile device while you shoot, or share shots online without offloading to a computer first.
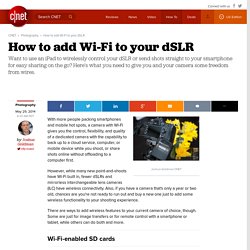
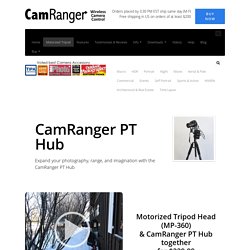
However, while many new point-and-shoots have Wi-Fi built in, fewer dSLRs and mirrorless interchangeable lens cameras (ILC) have wireless connectivity. Wireless Remote Control Motorized Pan Tilt Tripod Head. Pole Setup with CamRanger, CamRanger PT Hub, and MP-360 Captured Image iPhone view.
Triggering a Camera’s Flash with Sound and Light. Update: Check out my latest Camera Axe project for a much more robust device that handles this or my store where I sell the Camera Axe.

For those just wanting to see the pretty pictures, click here. This article focuses on making the sensors used to trigger a camera’s flash using a microphone or a cheap laser pointer. Since I’ve already described how to do the actual firing of a camera’s flash here I won’t focus on that part of this project today. There are a lot of places on the web that describe how to trigger a flash with an electrical circuit, but I feel that using a microcontroller like Arduino offers big benefits.
For instance you can easily add new sensors, or even run multiple sensors at once. Now let’s talk about why we’re triggering the flash. Nikon Hacker. HiViz.com: Learn High Speed Photography. How To DIY An Uber High Speed Trigger. Michael Ross is not only a talented photographer, he is also somewhat of a maker.
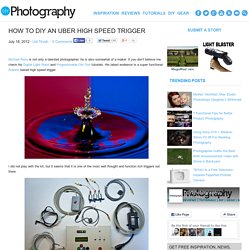
If you don’t believe me check his Digital Light Wand and Programmable Orb Tool tutorials. His latest endeavor is a super functional Arduino based high speed trigger. I did not play with the kit, but it seems that it is one of the most well thought and function rich triggers out there. In the video below you can see some footage of the testing phase where Michael uses the trigger to execute the following sequence: Turn out a lampFire the strobe to make sure it is not in sleep modeOpen the ShutterRelease two drops of waterFire the strobes to freeze the actionClose the ShutterTurn the Lamp back on That is actually not a real stress test for the unit as the specs shows it can do so much more: As with his previous creations, Michael made a tutorial explaining how to build the trigger. Time Lapse Photography Equipment - Rail - Follow Focus - DIY.
Micro-Manager. Download the most recent version (1.4) from our website.
Also check out our ScreenCast for a quick tour on getting started. You have a choice of many commercial packages available, too many, perhaps. Some are produced by microscope or camera manufacturers, others by third parties but they all suffer from the same problems: lack of flexibility and proprietary drivers... Digital camera control using Arduino USB Host Shield. Part 2 – Canon EOS Cameras.
By Oleg Mazurov New version of PTP Library for Arduino USB Host Shield has been posted on GitHub.
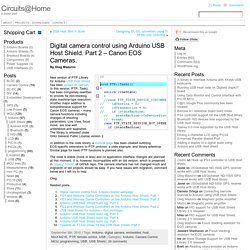
In this version, PTP::Task() has been completely rewritten to provide for non-blocking state machine-type execution. Another major addition is comprehensive support for Canon EOS cameras – many camera functions including changes of shooting parameters, Live View, focus move, are now well understood and supported. The library is released under GNU General Public License version 2. In addition to the code library, a manual page has been created outlining EOS-specific extensions to PTP protocol, a code example, and library reference. The code is stable (more or less) and no application interface changes are planned at this moment. Oleg. Arduino and Experimental Photography. Continuing the last post on Arduino with visual aesthetics in general we can look a bit more carefully what could be achieved with it when applied to photograph The very first and “natural” step for a DAQ-like Arduino is to take over various remote control tasks when permitted by the camera firmware of your given camera.
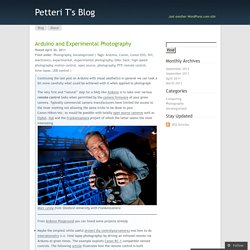
Typically commercial camera manufacturers have limited the access to the inner working not allowing the same tricks to be done to your Canon/Nikon/etc. as would be possible with totally open source cameras such as Elphel, Xué and the Frankencamera project of which the latter seems the most interesting. Marc Levoy from Stanford University with Frankencamera From Arduino Playground you can found some projects already Maybe the simplest while useful project (by controlyourcamera) was how to do intervalometry (i.e. time lapse photography) by driving an infrared remote via Arduino at given times.
Photography – Electronic still picture imaging - Picture Transfer Protocol (PTP) Problem loading page. Sensors - CameraAxe. You can buy these sensors at the Camera Axe store.
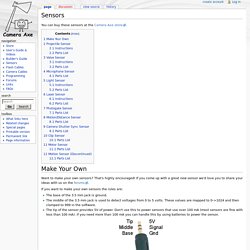
Want to make your own sensors? That's highly encouraged! If you come up with a great new sensor we'd love you to share your ideas with us on the forums. If you want to make your own sensors the rules are: The base of the 3.5 mm jack is ground. [Circuit Diagram] [Eagle Files] Instructions An article about the projectile sensor Parts List [Circuit Diagram] [Eagle Files] Tutorial for the Valve Sensor.