
24 Cute And Incredibly Useful Gift Wrap DIYs. 46 Ideas For DIY Jewelry You'll Actually Want To Wear. Wind-up paper butterflies are my fave (guest post from amelia) I had a baby so I’ve invited some fave guests to take over for me while I spend time with the little guy.
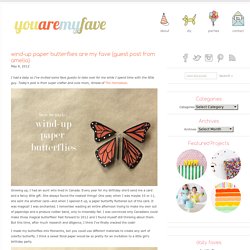
Today’s post is from super crafter and cute mom, Amelia of The Homebook. Growing up, I had an aunt who lived in Canada. Every year for my birthday she’d send me a card and a fancy little gift. She always found the neatest things! One year, when I was maybe 10 or 11, she sent me another card—and when I opened it up, a paper butterfly fluttered out of the card. I made my butterflies into Monarchs, but you could use different materials to create any sort of colorful butterfly. Materials: You’ll need heavy cardstock, 24 gauge wire, silicone rubber bands (I found mine in the hair aisle at Walgreens) needle-nose pliers, scissors, tape, a paintbrush, a black marker, and a white ink pen.
Step 1: Measure and cut your wire. Step 2: Find the center of the longer wire. Step 5: Find the center of the shorter wire, and wrap it around the base of the paintbrush. Dollar Store Plastic Animal Bookends. 41 Easy Things To Do With Mason Jars. Rolled paper flowers {tutorial} Welcome to flower week – five days of simple and delightful flower projects.

I could probably do three weeks of flowers because there are so many different ways to create them, but I’ve limited it to five of my current favorites. Before we get started, let me make a few disclaimers: 1. I find inspiration for projects all over the place {online, in shops, in magazines}, then figure out how to re-create them on my own. Each of these projects are my adaptation of something I’ve seen elsewhere. 2. 3. Okay, so let’s begin. DIY Friendship Bracelet.
For several months now, we’ve been receiving emails requesting a friendship bracelet DIY.
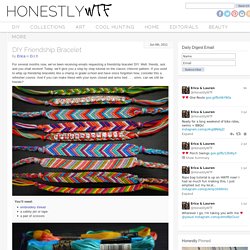
Well, friends, ask and you shall receive! Today, we’ll give you a step by step tutorial on the classic chevron pattern. If you used to whip up friendship bracelets like a champ in grade school and have since forgotten how, consider this a refresher course. And if you can make these with your eyes closed and arms tied . . . umm, can we still be friends? You’ll need:embroidery threada safety pin or tapea pair of scissors Start by cutting several strands of embroidery thread at about 24 inches each. Start on the left side with the outermost color (shown here in red) and make a forward knot by creating a 4-shape over the 2nd color, loop it under and back through the opening. Pull up and to the right to tighten. Now pick up the outermost color on the right side (show here in red) and make a backward knot, creating a reverse 4-shape over the 2nd color, loop it under and back through the opening.
How to Make Paper Pencils (tutorial) I have always wanted to make my own pencils, but the thought of shaping two pieces of wood to allow a piece of lead to sit perfectly inside made me think it wasn’t worth the effort.
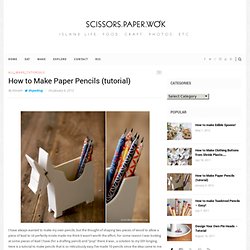
For some reason I was looking at some pieces of lead I have (for a drafting pencil) and “pop” there it was.. a solution to my DIY longing. Here is a tutorial to make pencils that is so ridiculously easy I’ve made 10 pencils since the idea came to me yesterday! Enjoy. 35 Lifechanging Ways To Use Everyday Objects. 31 Insanely Easy And Clever DIY Projects. How to make gift bags from envelopes. 7710_32da.jpeg (JPEG Image, 435 × 3307 pixels) 25 Handmade Gifts Under $5. Art 1. Optical Design. Tutorial: Homemade Sidewalk Chalk. By Michelle Vackar, Modern Handmade Child One of our favorite outside activities at our home is drawing with chalk on the driveway.

You can play hopscotch, four-square, and of course draw and create silly stories. Do-it-Yourself DIY String Wedding Lanterns Yarn Chandeliers. Jessica of Wednesday Inc shows us how to make those gorgeous twine chandeliers from the inspiration shoot she shared with us this morning.

Using balloons, glue and twine, you can also make these lanterns for your wedding – and then bring it home and use it as your very own mid century lampshade. What you will need are: balloons, glue, yarn, tray for glue, corn starch 1/2 cup of Corn starch, 1/4 cup of Warm water, clear fast drying spray paint, hanging lamp cord or fishing line (depending on your desired final product), and a lighting kit if you’re looking for a fully functional lantern.
Jessica recommends using a sharpie to mark on the inflated balloon how much room you need to leave for the lighting cord. She also recommends coating the balloon with vaseline prior to wrapping the yarn coated with glue so it doesn’t stick on the balloon once it’s dry. Giant Paper Rose Flower. If you loved the beautiful DIY wedding this morning and Nata’s gorgeous paper flower bouquets, you are in luck as Nata is sharing how she crafted them with us!
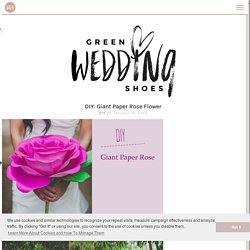
She was inspired by a template created by Morgan Levine on Martha Stewart (as was I in the flowers I created for this styled shoot). I just love that this basic idea has inspired different brides to create their own version of giant paper flowers – you might remember these equally awesome giant paper flowers from this wedding I shared last year. :) Thanks so much Nata for sharing how you created your giant pink paper rose + special thanks to Studio Castillero for the photos of the DIY + her wedding!
Materials (to make one giant rose) Step 1: Cut the petals Cut 5-6 teardrop petals and 15-6 heart-shaped petals from the petal colored crepe paper.