
Chronodot RTC for Viobot » GregRob: Large Format Photography. Chronodot RTC for Viobot Viobot is being designed to send output, such as the webcam stream back to a tablet or other network connected device.

She is also going to take input suggestions on what to do/say from the same device. So all this required network connectivity. At the moment she simply logs into my home network and away we go, but this will need to change if she is away from home. So in the future she will be her own WiFi hotspot, and instead of logging into my home network other devices will log into her. But if she is the network, then this means she will not have access to NTP (Network Time Protocol), and the Raspberry Pi, which is her brain, doesn’t come with a real time clock(RTC). Image from flickr user macetech The actual wiring of the Chronodot to the Raspberry Pi was simple. Getting this clock to work with the Raspberry Pi was pretty simple, but did take a big of digging around different sites for all the right information. Gregrob@rPI-a3d79a ~ $ uname -r 3.2.27+ Rock out with your clock out! Chris's Digital Realm. IMPORTANT: You should no longer be using my kernels.

The official kernels shipped with Raspbian now include versions of my I2C and SPI drivers and are much newer. I am also no longer involved in Raspberry Pi development. The rest of the page is being kept for historical reasons only. As I have been posting so often about kernels for the Raspberry Pi I thought I had best create a central page on my blog that people can link to and always get the latest version. 1. You shouldn’t be using 3.2 any longer. Note that the source is still available on GitHub if you really want to use it, but you’ll have to build your own kernels. Recent change history: 3.2.23 r1 Imported 3.2.22 and 3.2.23 kernel patches; enabled some more modules by request; imported some extra patches from the official kernel; compiled with Linaro GCC 2012.04 (thanks to crosstool-ng); fixed a minor sched_clock warning that looked nastier than it was. R-Pi NAS.
Back to RPi Guides.

Raspberry Pi Network Attached Storage This project configures your Raspberry Pi to share files with any other computer on your local network. You can add a large hard disk to the RPi and use this to store your important files/photos/videos in a central location. The files on your RPi can be easily accessed from any type of computer which is connected to your network, for example a Windows PC, a Linux PC, A Mac, a smartphone, etc. In a classroom, each student can have access to a private area, and also a public area for sharing files. Warning: Make sure that you store your important files in more than one location. Note: There are two major classes of Network Attached Storage Low-power NAS. This project does not require any coding or compilation. You need to... The RPi is configured as a Samba server and can expose its files to any Samba client. How2SetUp a Raspberry Pi Windows file server - Simon The Pi Man. Ok this instruction sheet will allow you to setup a Raspberry Pi computer to act as a (NAS)Network Addressed Storage server so it will be possible for you to access files from any/all your windows PC's in your house using the Raspberry Pi to share the files on a disk drive attached to one of the usb ports on the Raspberry Pi. 1.

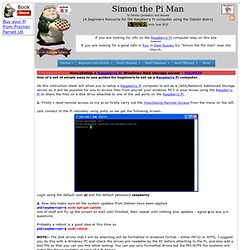
Firstly I need remote access to my pi so firstly carry out the How2SetUp Remote Access from the menu on the left. Lets connect to the Pi remotely using putty so we get the following screen. Login using the default user pi and the default password raspberry. 2. Probably a reboot is a good idea at this time so pi@raspberrypi~$ sudo reboot NOTE:- The disk drives that I will be attaching will be formatted in windows format - either FAT32 or NTFS, I suggest you do this with a Windows PC and check the drives are readable by the PC before attaching to the Pi, and also add a test file so that you can see this while testing.
Creating a LAMP server (web server - Linux Apache Mysql PHP) on the Raspberry Pi - Linux tutorial from PenguinTutor. This provides details of how to configure a Raspberry Pi as a webserver.

This is similar to the guide to using Xubuntu as a LAMP webserver, but adds some of the things that need to be handled differently for the Raspberry Pi. It is termed a LAMP server which is one of the most common configuration for webservers which standard for: Linux – operating system Apache – webserver (http) software Mysql – database server PHP or Perl – programming languages This setup is probably overkill for most uses of the Raspberry Pi, but it is the setup that most users will be familiar with and is a good way to learn about setting up a webserver. I’ll be looking at setting up a lightweight setup in future.