
Shadow Box Photo Display for Photographers. Need help turning your post-vacation keepsake clutter into a divine display?

Our resident do-it-yourself expert, Ashley Campbell, has just what you’ve been looking for: As spring break and summer approach many families begin planning vacations and time to just enjoy being together. In my family unpacking from a trip often includes trying to find places to store or display random keepsakes we’ve picked up along the way. A shadow box is a great way to show off those little items in an clean and classy way. Filling your shadow box with too many pictures or items and result in framed collection of clutter. Supplies: 12×12 Shadow Box 12×12 print a select few of your keepsakes double sided tape craft supplies (clothespins, masking tape, decorative labels, hot glue gun, etc.) Step 1: Create your background using the Alphabet Frames templates. Step 2: Remove the label inside the shadow box and attach your 12×12 print using the double sided tape.
How to Make Crayon Monogram. Love Cartography: Heart Maps. Zine?p=1210 from leethal.net. If you’ve been following my blog, you know how I made 60 of these painted frames with song lyrics for our wedding decorations /favors… Well, a lot of wedding guests loved them and took one home, but we had a ton left at the end of the night, which we boxed back up and took home with us… So we now have 30 of them hanging on our big white living room wall!

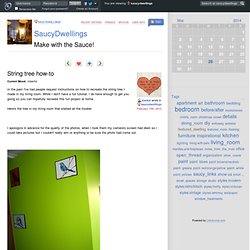
Yay!! There are several duplicate lyrics, some of which I already changed out to engagement photos, but once we get our wedding photos I’ll switch out some more lyrics with photos (but just a few, because we love the look of the lyrics!) : So, hey, you want to know how to make these yourself? I made 2 different types of painted frames: textured frames that were just plain spray painted, and smooth(ish) frames that were painted with lace used as stencils. I did them in batches of 6-10 at a time – sprayed 1 coat over them all, then went back with a 2nd coat over them all. For the lace stenciled frames, there are a couple extra steps. Saucydwellings: String tree how-to. In the past I've had people request instructions on how to recreate the string tree I made in my living room.

While I don't have a full tutorial, I do have enough to get you going so you can hopefully recreate this fun project at home. Here's the tree in my living room that started all the trouble: I apologize in advance for the quality of the photos, when I took them my camera's screen had died- so I could take pictures but I couldn't really aim or anything or be sure the photo had come out.
Start by putting pushpins into the wall in the general shape of the tree you're hoping to create. I generally have a photo of a tree printed out to give me a basic guide as to the shape I'm going for. Any good drawing teacher will tell you that the rules of trees are thus: Don't be too symmetrical or regular with the branches, trees are not ladders.Generally odd numbers of things look better than evenDon't try to make it too perfect.
Kate’s uncommon valentine. Valentine’s day is right around the corner, and i’ve decided to make something for my boyfriend that is a little unconventional and can last beyond the holiday. i used some vintage jewelry pieces (read: ugly eighties earrings), and some other knick-knacks I have collected over the years. for a personal touch i also included a few souvenirs from our times together (you are either smiling or gagging right now, i know).

I recommend using a monochromatic palette for this project because I think the image come across more clearly, but if you have some pieces you don’t want to mess with then I encourage you to lay out your image first before you paint anything. the great part is that you can do any shape you wish, or even play around with text. happy crafting, and happy valentine’s day! -kate CLICK HERE for the full project instructions!