
Recycled Slipper Tutorial. I am going to show you one slipper.
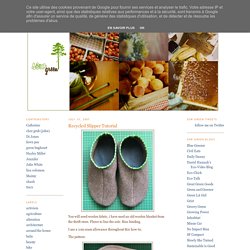
Once finished you will make the other by reversing the pattern pieces, we don't want two of the same do we? From the woolen blanket cut out one sole and one of each top piece. From the fleece cut out one sole: Baste the fleece and woolen soles together: Bleach Pen Tshirts-STASH. DIY Shift Dress. Lesson Plan: World's Easiest Skirt.
My sewing skills are pretty much limited to making my machine go forwards and backwards with a straight stitch.
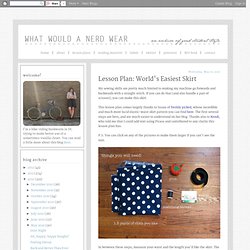
If you can do that (and also handle a pair of scissors), you can make this skirt. This lesson plan comes largely thanks to Susan of freshly picked, whose incredible and much more lucid elastic-waist skirt pattern you can find here. The first several steps are hers, and are much easier to understand on her blog.
Thanks also to Kendi, who told me that I could add text using Picasa and contributed to any clarity this lesson plan has. P.S. In between these steps, measure your waist and the length you'd like the skirt. And remember to wash, dry, and iron your fabric before you begin, since fabric often shrinks! I like to fold my cloth and lay the pattern on top of it so I cut two pieces at once. You can only find the pocket pattern on freshly picked--you can find it here (thank you, Susan!)
This is where this pattern deviates from Susan's. Whew, this was long! Welcome to Modern Sewing Patterns. Skirts :. #5135 Red skirt. Difficulty: * Recommended fabrics: natural or combined.

You will need: crepe satin; 1 zipper; 1 button. Attention! Fabric consumption varies depending on the size of garment. First of all, print out paper patterns and lay them out at the width of fabric/ knit you plan to use, to see how much fabric you will need. When sewing the garment, pay attention to notches- they must coincide. Cutting: Handmade Summer Skirts. DIY Stitched Hat. If I had a nickel for every time my mom has warned “the sun is not your friend,” I could retire tomorrow.
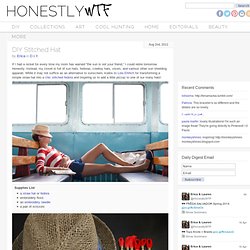
Honestly. Instead, my closet is full of sun hats, fedoras, cowboy hats, visors, and various other sun shielding apparati. While it may not suffice as an alternative to sunscreen, kudos to Lola Ehrlich for transforming a simple straw hat into a chic stitched fedora and inspiring us to add a little pizzaz to one of our many hats! Supplies List Start by cutting the ribbon or band off the hat. Pull the thread through the back side of the hat, leaving an inch of slack. Using the brim as a guide, start stitching along the edge of the hat. Pick another color and stitch several rows along the band of the hat. Give it some character by adding a little something along the band . . . why not? Your stitched fedora is finished! (top photo from here, rest of images by Honestly…WTF) Tube or circle scarf. Tutorial: how to sew a reversible scalloped hem skirt.
So the plan is to post a tutorial every month.

And now that I’ve put that out there, I will be sure to jinx myself. Such is life. Today, we shall make this DIY reversible scalloped skirt: To make your scalloped hem skirt, you will need: Plain fabric, printed fabric, matching thread, elastic, sewing machine. Cut two of the following: NOTE: The length of the back pieces should match that of the curved length (along the sides) of your front pieces. Use a bowl or anything round to make your scallops. One is plain and the other is printed. Okidokes, let’s sew! Make a Custom Pair of Tap Pants. By Haley Pierson-Cox For me, summer in NYC means two things: 1) I will eventually wear a light skirt into the subway when my hands are full, and 2) on that day, when I step onto the stairs of the station, a gust of wind will come barreling up from below, lifting my skirt and showing my backside to anyone who cares to look. This year, on the very first nice day, my skirt flew up not once, but twice.
Flip-Flop Refashion: Part 1 (Braided Straps) Summer is great.
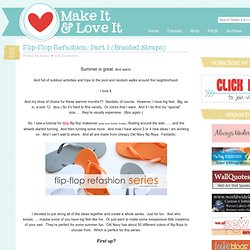
And warm. And full of outdoor activities and trips to the pool and random walks around the neighborhood. I love it. And my shoe of choice for these warmer months?? Sandals, of course. So, I saw a tutorial for this flip-flop makeover (great work Mother Huddle), floating around the web…….and the wheels started turning. I decided to just string all of the ideas together and create a whole series.
First up? A quick and easy flip flop…….made with some braided knit fabric scraps, using the 5 strand braiding technique, shown here. These soft braided straps streeeeeetch the perfect amount, right around the back of my heel……..keeping the flip-flop snug and in place. Upcycled Sweater Boots.