
Rigging. Consuming. Photoshop plug-in for SL “Fake Bake” with RGB Theta plugin « Random Ramblings, Tip & Tricks. In February of 2010 the official Second Life Forums flicked a switch and moved over to a new fomat.
I have edited the links to point to the archives, hopefully you can still follow along. :) Somewhere deep down in the official forum archives you can find this absolute GEM of a filter for Photoshop. Blender Tutorials for Second Life & Opensim. Sculptris (virtual clay!) Avatar-Workbench: Tiny Avatar « Elephants Dream. Blender for that uh... D word that I hate - book / e-book companion website. Blending is what we do. Blender Newbies 3D Video Tutorials (Learn to Create 3D Graphics with Blender!)
BlenderNation. Blender tutorials, tips, tricks and articles! Bt - blender tutes. Getting Started with Blender Blender Tutorials Downloads Videos & Education – Blender Cookie. Second Life » Sculpt Blender. In this tutorial, you will learn how to add an alpha channel to your sculpt map to protect it from theft by screenshot and how to add a watermark to the alpha channel to let people easily tell that you made it.
Many people don’t like to include modify permissions on their merchandise to protect themselves against theft, however, there is a way to protect your sculpties from theft and STILL include modify permissions. The easiest way to steal an object’s sculpt map is the screenshot method. The thief opens up the edit window, clicks on the sculpt map, and then takes a screenshot. He’s then free to crop the sculpt map from the screenshot and re-upload it into Second Life. However, there’s a cure. The Theory Any builders will probably be familiar with Alpha Channels in Second Life. Only in theory? Well … it really depends on your image editing software and the file format you choose to save in. Application-Specific Guides PhotoshopPhotoshop ElementsPaintShop ProThe GIMP Watermarking. Advance Blender Tutorials for Second Life and Opensim.
Avatar Size vs Hip Height, Leg Length (Poser animations) Heyas; what is the "trick" for doing proper height animations for different sized avatars?
I have created a 'tiny' avatar, and to test that it is the proper size, i created several versions of the T pose, lowering the character into the ground at the knees, waist, palms, and eyes. the regular t pose stood on the ground fine, but then the following poses sank lower and lower further from the mark. aha, i thought, perhaps the hip has to stay the same height as the default, and i move the ground up to the shorter avatar's feet? But when i did that, sinking into the ground at the knees barely moved it down at all, and the waist wasn't there yet, but the palms and eyes were sunken too low again. anybody have an idea what might be going on?
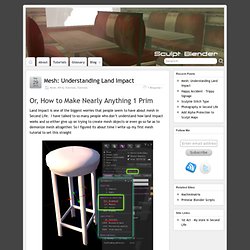
Thanks! Pixologic. Shiny Life » Sculpty Maker and Sculpty Rezzer. Understanding the sculpt map format. Understanding the sculpt map format is one of the most important things a sculptie maker can know.
This knowledge makes choosing the basic sculpt type easier and also allows many advanced techniques to be used in the modelling process. It will also help you to understand what the Primstar scripts are doing to make things quicker for you. Don't worry if you don't understand all of this the first time you read it. I'll be mentioning the concepts here in different contexts throughout the manual.
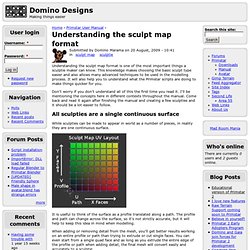
Come back and read it again after finishing the manual and creating a few sculpties and it should be a lot easier to follow. Primstar - Blender Scripts for Second Life Sculpties. Blender trail « sculpties. BlenderSL's Channel. Learn to Make Second Life Sculpties in Blender » Sculpt Blender. Sculpted Prims: Sculpt Maps and Textures. Sculpted prim. A sculpted prim(itive) (or sculpty, sculptie, or just sculpt) is a Second Life 3D parametric object whose 3D shape is determined by a texture.
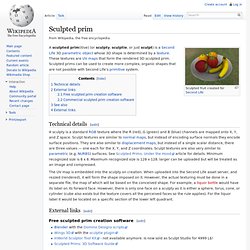
These textures are UV maps that form the rendered 3D sculpted prim. Sculpted prims can be used to create more complex, organic shapes that are not possible with Second Life's primitive system. Technical details[edit] A sculpty is a standard RGB texture where the R (red), G (green) and B (blue) channels are mapped onto X, Y, and Z space. Blender Tutorials Downloads Videos & Education – Blender Cookie. Sculpt Studio Instructions. This is a rough dissection of Sculpt Studio into its most basic components to give users a better understanding of how it works.
It will hopefully allow the almost-overwhelming number of tools to be more intuitive. EDIT: If you understand how the studio creates sculpts and want a closer look at the different tools, try Fleur’s tutorial. Otherwise, grab your tutorial supplies here! (it’s set to buy for L$0). Look for the photo of the pink balloon and touch it! Terms Sculptie – a prim whose shape is determined by a texture … also known as sculpty, sculpted prim, and sculpti 1. NOTE: “Oblong” maps rearrange the slices into more or less than 32 slices. 3.
SL Animation for Blender Newbs. Here’s a little tutorial to help non-Blender-savvy people get started using the animation exporter.
(Really, I’m writing this for one specific friend that I wanted to help out. But I figure, if I’m going to write it out for her, I might as well share it with everybody!) Okay, first, the bad news: Blender is an incredibly complex piece of software, and its UI is very different from anything you’ve used before (and confusing even for experts). Inside Blender are all the tools that someone would need to make an entire 3D animated movie like Toy Story or The Incredibles (or Big Buck Bunny, which actually was made in Blender).
Studio Plugin : Export to Second Life at Daikon Forge. DAZ 3D Hexagon: Sculpted Prims in Second Life. Creating Animated Sculpts with Zbrush. (13 June: I've updated the workflow for SubTool Master, so you may wish to look at it again.
The short version is each subtool needs a different name) Well, I decided to try to have a go at another tutorial. I do apologize as always for my lack of experience with this sort of thing—I’m hardly a Natalia Zelmanov or Vlad Bjornson. Speaking of the latter gentleman in question, I understand that he is working on a tutorial regarding creating multipart objects in Zbrush, then assembling them inworld using 2K Suisei’s newest version of his excellent “Sculpty Maker”, which is possibly the most user friendly importer I have seen to date in Second Life. Sculpted Prim Exporter for AC3D - Documentation.
Shiny Life » Video: Creating Sculpted Prims with ZBrush 3. Amanda Levitsky - How to Make Sculpted Prims with Blender. If you don't see the images on this page, try this link where Ender Snook has kindly mirrored this page.
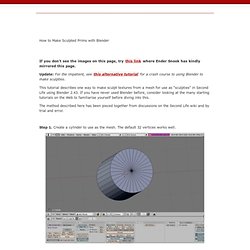
Update: For the impatient, see this alternative tutorial for a crash course to using Blender to make sculpties. This tutorial describes one way to make sculpt textures from a mesh for use as "sculpties" in Second Life using Blender 2.43. If you have never used Blender before, consider looking at the many starting tutorials on the Web to familiarise yourself before diving into this. The method described here has been pieced together from discussions on the Second Life wiki and by trial and error. Step 1. Step 2. Explanation: The UV mapping for a sculpt texture must be a regular grid and must fill the entire texture exactly from edge to edge.
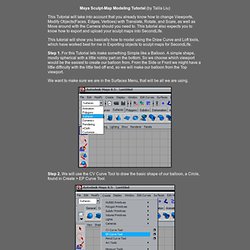
Step 3. Explanation: The seams tell Blender how your mesh should be sliced up and "unrolled", as we will see later when the UV mapping is created by unwrapping the mesh. Step 4. Step 5. Step 6. Step 7. Step 8. Maya Sculpt-Map Modeling Tutorial (by Talila Liu) Maya Sculpt-Map Modeling Tutorial (by Talila Liu) This Tutorial will take into account that you already know how to change Viewports, Modify Objects(Faces, Edges, Vertices) with Translate, Rotate, and Scale, as well as Move around with the Camera should you need to.
Sculpted Prims Tutorial Part 2 (Wings 3D) - Mermaid Diaries: Natalia Zelmanov's Second Life Adventures: Day 265. In Part 1 of this tutorial series, we talked about how to create sculpted prims (sculpties) from sculpt maps. We installed and created a sculpt map of a mushroom using Wings 3D. In this part 2, we will talk about Wings 3D in detail, particularly features specific to sculpties.
Blender export template Tutorial (blender to sculptie_ Www.skidzpartz.com - Skidz Partz.