
A DO. FOR YOU. Photo: angela+ithyle/thebeautydepartment.com post designed by kristin ess Some days you just don’t wanna.

For those days, we made you this! Seems like we’ve been seeing pictures of this lovely look everywhere. It’s definitely an easy, gorgeous spring/summer ‘do. Here’s how to get this very uncomplicated knotted ponytail: -light holding styling mousse -comb -small clear elastic -large bobbypin 1) Apply a light holding styling mousse all over from roots to ends for texture and seperation. 2) Separate the hair over your shoulder into two pieces. 3,4) Using your girl scout skills, tie hair into a simple knot. 5.) 6) I like to throw a bobby pin in there for extra security. 7) Back comb the ponytail a little for texture and then comb through it with your fingers to settle it.
Tip: Once the steps are complete, tug on it and mess it up a bit. Xxkristin. BRUSH UP. A CLEAN CANVAS. Photos: justin coit + thebeautydepartment.com post designed by kristin ess Lots of requests for a very basic blow out.

Here’s your step by step! I’ll do one for curly hair and one for fine hair as well. These are the basics steps for anyone with wavy and/or thick hair like Lauren’s. Tools: Blow dryer with the nozzle, leave-in conditioner or detangler, protective serum or frizz taming serum, medium to large round brush, clips. 1. 2. 3. 4. 5. 6. 7. 8. Xx Kristin Tags: basic blow dry, blow, blow dry, blowdry, how to, kristin ess, lauren conrad, out, the beauty department, thebeautydepartment.com, tutorial Related posts:
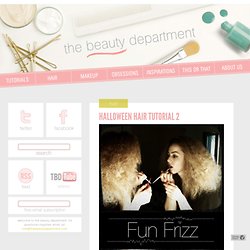
HALLOWEEN HAIR TUTORIAL 2. Photos by kristin ess, post created by kristin ess Lots and lots of request rolled in for a Halloween hair tutorial on creating frizz.

Clearly this look can go with SO many costumes– 70′s glam, a lioness, a gypsy, a witch, a dead person, zombie, ghost (spray with white hair powder!) , and countless others… I snagged my gorgeous friend Nora for this tutorial. She has smooth fine hair and you can see how BIG it gets. If you have curly hair or thick hair you’ll get even MORE volume. TOOLS: paddle brush, sectioning clips, U-pins, light holding hairspray or thermal styling spray, temperature-controlled flat iron. Start with clean, blow dried hair. PS, I love my friends because they do things like this for me… Xx Kristin Ess Tags: 70's, costume, curls, DIY, dress up, frizzy, hair, halloween, how to, kristin ess, lioness, the beauty department, thebeautydepartment.com, tutorial Related posts:
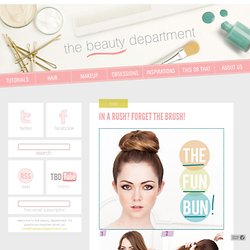
A NEW TWIST. IN A RUSH? FORGET THE BRUSH! Photos: Angela Kohler + thebeautydepartment.com post designed by kristin ess In a world where we can’t stop running late, the fun bun is probably the quickest way from A to Chic.

This look comes in über-handy when you wake up late and you’re rushing out the door (or even if you have plenty of time). It’s such a high-brow/low-brow look. Meaning it can be paired with anything from jeans and a tank to a chiffon tiered dress. It’s amazing for the summer because some days when it’s really hot outside, all we want is to get that hair off our neck + shoulders! Step 1: If your hair is straight, use a 1″ curling iron to curl everything under. Step 2: Flip your hair over and gather everything into a ponytail on top of you head, securing it with an elastic ponytail holder. Step 3: On the last time around with the ponytail holder, only pull the ponytail through half way. Step 4: Take the loop you’ve created and spread it out. Step 5: Take the tail end and wrap it around the ponytail base.