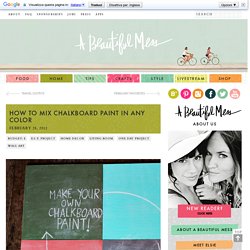

How To Mix Chalkboard Paint in Any Color. We love using chalkboards as backdrops for displays and parties (like this one here!).

So we were super excited to learn that you can create your own custom colors-and it's really easy! We first learned how from Martha Stewart whose tutorial you can read here. She recommends that you use latex paint, but we tried it out with acrylic paints with much success. Here's how you too can create your own chalkboard paint... Supplies: 1/2 cup acrylic paint (choose any color you like, or mix colors together to make the perfect shade!) 1. 2. Once your chalkboard has fully dried be sure to slate the surface before using it for the first time. How to Make Leaf Skeletons. I wanted to share with you a project from one of my readers who shares with us how to make leaf skeletons.

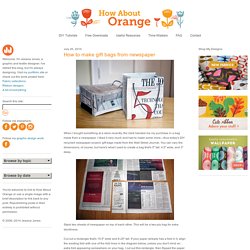
I LOVE this! I have several leafs in various forms displayed in my home and knew I needed to make some of her leaf skeletons to add to my decor. I love how a pattern of leaves can enhance the beauty in your home. How to make gift bags from newspaper. When I bought something at a store recently, the clerk handed me my purchase in a bag made from a newspaper.

I liked it very much and had to make some more—thus today's DIY recycled newspaper project: gift bags made from the Wall Street Journal. You can vary the dimensions, of course, but here's what I used to create a bag that's 5" tall, 4.5" wide, and 3" deep. Stack two sheets of newspaper on top of each other. This will be a two-ply bag for extra sturdiness. Cut out a rectangle that's 15.5" wide and 8.25" tall. Fold a flap 1.25" down from the top. Cut two pieces of cardstock or chipboard to 4.25" x 1", then glue them on the widest two panels just under the top fold. Put glue on the outside of the 0.5" tab and bring the left-most panel over to form the body of the bag, aligning the cut edge of the panel with the folded edge of the flap. Upend the bag so the 2" flap is now up. Put glue on both flaps and fold them inward to form the bottom of the bag.
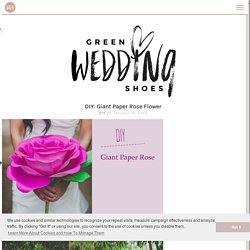
Giant Paper Rose Flower. If you loved the beautiful DIY wedding this morning and Nata’s gorgeous paper flower bouquets, you are in luck as Nata is sharing how she crafted them with us!

She was inspired by a template created by Morgan Levine on Martha Stewart (as was I in the flowers I created for this styled shoot). I just love that this basic idea has inspired different brides to create their own version of giant paper flowers – you might remember these equally awesome giant paper flowers from this wedding I shared last year. :) Thanks so much Nata for sharing how you created your giant pink paper rose + special thanks to Studio Castillero for the photos of the DIY + her wedding! Materials (to make one giant rose) Step 1: Cut the petals Cut 5-6 teardrop petals and 15-6 heart-shaped petals from the petal colored crepe paper. IMPORTANT: Crepe paper is directional so it matters which way you’re cutting the paper. Repeat until all of your petals are cut Step 2: Cut the leaves + calyx Step 3: Make the rose stem. Paper Flowers. Button flowers {tutorial} Today’s flower is the simplest of them all {perfect for a mid-week spurt of creativity}.

I saw this project in the April 2008 issue of FamilyFun magazine {yep, I still have the tear out in a binder}. I didn’t changed much from the original how-to, other than using silver wire instead of florists’ green. These are super easy and a great craft to do with kids. Here is what you’ll need: :: buttons in various sizes {I went monochromatic, but you can be as crazy as you want} :: 26 gauge wire {or whatever you have that is easily bendable} :: scissors or wire cutters STEP ONE: select your buttons Choose three buttons in varying sizes and stack them up STEP TWO: cut wire to desired length {mine are approximately 6 inches} STEP THREE: thread wire through holes in buttons STEP FOUR: loop the wire up through the hole and down the opposite button hole {oh good heavens, don’t judge my hands} Thread the wire back through the bottom button STEP FIVE: twist the wire to secure Aren’t they so sweet?
Home - Creature Comforts - daily inspiration, style, diy projects + freebies. Oh craft fails!

There have been so many in my life lately. In fact, today’s project came out of the aftermath of a particularly disappointing project gone wrong. What started as a hopeful bunting morphed into a heap of wonderful wooden gift bows, and since several of you asked me about them over on Instagram, I thought I’d share how I made them so you can make some too! I initially hesitated to share this project because I used real wood veneer (on the pricey side) for my first bows.