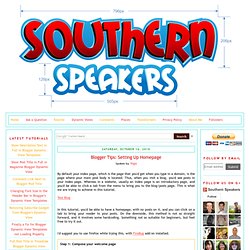

Blogger Tips: Setting Up Homepage. By default your index page, which is the page that you'd get when you type in a domain, is the page where your main post body is located.

Thus, when you visit a blog, you'd see posts in your index page. Whereas in a website, usually an index page is an introductory page, and you'd be able to click a tab from the menu to bring you to the blog/posts page. This is what we are trying to achieve in this tutorial. Test Blog In this tutorial, you'd be able to have a homepage, with no posts on it, and you can click on a tab to bring your reader to your posts. I'd suggest you to use firefox while trying this. with FireBug add on installed. Step 1: Compose your welcome page Go create a new post, and start composing your welcome page.
Next, we wanna add this code to the main page. Step 2: Display homepage only in the main page and remove posts from main page. It's time to get your gadget out - Firebug! Now that we have known our IDs, it's coding time. Step 3: Customize Menu/Navigation Bar. Flexible CSS typographic scale. When designing using text, no matter if it’s for print or the Web, one vital thing to do is to ensure that the design stays harmonious in every aspect.

The best way to do so is quite possibly using a so called typographic scale, which means giving text portions precise, regular and linear dimensions, based on the hierarchical relationships they hold with other text elements. This has been long known, of course, and we’re not bringing anything new to the cause. But being the Web one of our domains, we felt like managing the typographic scale in CSS could be done better, and in an easier, sort of automatic, way. Our goal was to create a base-level CSS that could set a well thought series of values for the typographic scale, hence establishing a vertical rhythm, with absolutely no reference to pixels.
Instead, we wanted it to graciously adapt itself when varying the font size declaration of the document’s body. The scale would degrade as follows, from the biggest element to the smallest: Floral 3D Text Effect. Floral 3D Text EffectReviewed by Siva Kumar on May 4Rating: Preview of Final Results Floral 3D Text Effect Photoshop Tutorial IMPORTANT: When ever you create any effects, use action palette to store the functions because again if you need the same effect so it will be easy for you to get the same effect.

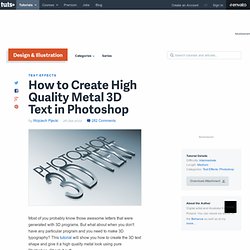
Step 1 – Create the 3D text As we start we need 3d text effect I’m taking help of illustrator to create 3D text. Step 2 – Create a new Document Choose File > New or press Ctrl/Command + N to create a new document. Step 3 – Bring the 3D text to Photoshop You can save the image as .png format to get transparency or you can directly copy (Ctrl/Command + C) the 3D text from illustrator & paste (Ctrl/Command + V) in Photoshop. How to Create High Quality Metal 3D Text in Photoshop. Most of you probably know those awesome letters that were generated with 3D programs.

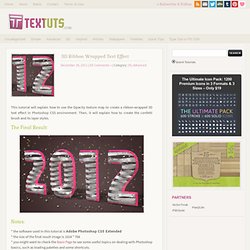
But what about when you don't have any particular program and you need to make 3D typography? This tutorial will show you how to create the 3D text shape and give it a high quality metal look using pure Photoshop. Check it out! Editor's note: This tutorial was originally published on Psdtuts in December of 2008. Step 1 Let's start with a new document of 1500 pixel by 1500 pixel, and 300px/inch resolution. Step 2 So now, right-click on the "3D TEXT_first" layer and select Rasterize Type. Tip: If you fail by distorting, and some text edges look fuzzy, use Filter > Sharpen > Unsharp Mask, and increase the Amount. Awesome 3D Text Effect. 3D Ribbon Wrapped Text Effect. This tutorial will explain how to use the Opacity texture map to create a ribbon-wrapped 3D text effect in Photoshop CS5 environment.

Then, it will explain how to create the confetti brush and its layer styles. The Final Result: Notes: * the software used in this tutorial is Adobe Photoshop CS5 Extended * the size of the final result image is 1024 * 768 * you might want to check the Basix Page to see some useful topics on dealing with Photoshop basics, such as loading palettes and some shortcuts. Happy New Year! To all textuts‘ readers, followers, subscribers, and fans. Hope 2012 will be an awesome year for each and everyone of you. Don’t forget to send me any notes, suggestions or ideas through the contact form.
Best regards,Rose Enabling OpenGL The Repoussé will not work unless OpenGL is enabled. Also, go to Edit -> Preferences -> 3D, and make sure OpenGL (under Interactive Rendering) is enabled. Step 1: - Create the text in white color. The Ultimate Collection Of Photoshop Custom Shapes - Smashing Magazine - StumbleUpon. Tutorial Magazine / photoshop / effects - StumbleUpon. Photoshop Crash Course.