
Turn any hard drive into networked storage with Raspberry Pi - CNET. Networked hard drives are super convenient.

You can access files no matter what computer you're on -- and even remotely. But they're expensive. Unless you use the Raspberry Pi. If you happen to have a few of hard drives laying around you can put them to good use with a Raspberry Pi by creating your own, very cheap NAS setup. My current setup is two 4TB hard drives and one 128GB hard drive, connected to my network and accessible from anywhere using the Raspberry Pi. Here's how. What you will need For starters, you need an external storage drive, such as an HDD, SSD or a flash drive. You also need a Raspberry Pi. In my Raspberry Pi NAS, I currently have one powered 4TB HDD, one non-powered 4TB HDD and a 128GB flash drive mounted without issue.
Additionally, you need a microSD card -- 8GB is recommended -- and the OpenMediaVault OS image, which you can download here. Installing the OS To install the operating system, we will use the same method used for installing any OS without NOOBS. Setup Mac. ARM Pi Media Server Installer Images Download Page. I have been practicing bash scripting and forked Igor’s micro server installer.

Tons of media server related software has been added to make setting up your Linux home media server very convenient. It works on Ubuntu 14.04 and later so Debian Wheezy and Jessie are supported too. The HTPC Guides Media Server Installer works on 32-bit and 64-bit systems as well as ARM CPU architectures. I request that you do not release images including the installer without my permission.
Officially released Media Server Installer images for ARM architectures are available here: Raspberry Pi, Banana Pi and Orange Pi PC and Orange Pi Plus. What is the HTPC Guides Installer? I like to automate things and make life convenient and efficient. The Pi Images This section contains download links for all of the prepared Debian images I’ve made for the Pi devices. Every image is headless meaning it is meant to be used without a monitor.
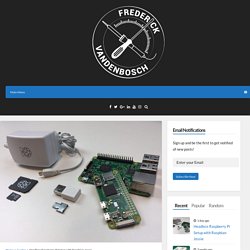
You download the image zip, unpack the img and write it to your SD card. sudo -i. Looking forUpdated 2017 Raspberry Pi 3 usenet information : usenet. Headless Raspberry Pi Setup with Raspbian Jessie – Frederick Vandenbosch. The goal of this procedure is to describe a generic way of setting up a Raspberry Pi without having to attach a screen or keyboard to it.

Before starting, you’ll need the following hardware: a Raspberry Pia 8GB microSD card with SD adaptera 5V/2A microUSB power supplyoptionally, a USB WiFi dongle, depending on the model Raspberry Pi On the software side, following bits are required: Etcher from resin.io, available for Windows, Linux and OSXthe latest Raspbian Jessie (or Lite) image from the official website Insert the microSD card in your computer, using the SD card adapter and run the Etcher software.
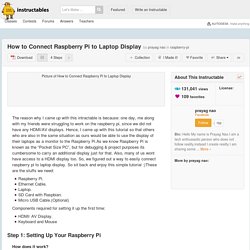
Step 1: Select the downloaded Raspbian image (no need to unzip!) How to Connect Raspberry Pi to Laptop Display: 4 Steps. This step explains how you can share your laptop internet with the raspberry pi via Ethernet cable.In Windows : For sharing internet to multiple users over Ethernet, go to Network and Sharing Center.

Then click on the WiFi network: Click on Properties (shown below), then go to Sharing and click on “Allow other network users to connect”. Make sure that networking connection is changed to “Local Area Connection”: Note : Doing this will provide a dynamic IP to the Ethernet port of your laptop and other Devices connected to your laptop. Now, for checking the IP assigned to your laptop, Click on the new local area connection link created: As shown above, the IP assigned to my laptop is 192.168.137.1. Ping on broadcast address of your IP. Stop the ping after 5 seconds. Check the reply from device: arp –a. Minimising power consumption – Raspberry Pi Projects. Disabling the HDMI port Make sure you can get SSH access once this is done first so you have the ability to turn it back on again should you need to!!!

Sudo nano /etc/rc.local Add this: # Disable the HDMI port (to save power) /usr/bin/tvservice -o This will disable the port once the RPi has booted (its still active during the power on startup process). If you want to temporarily re-enable it you can use this (in our test it re-enabled the screen but it was then just blank so not much help, but maybe there's another command to kick it back into life?)