
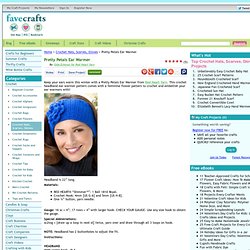
MrWolf.pdf. Mausica's Magical Menagerie: Seahorse Crochet Pattern. Mausica's Magical Menagerie: Clam Pattern. Monterey Sea Otter. Animal Amigurumi Patterns / Chi-hua-hua Free Pattern! Animal Amigurumi Patterns / Amigurumi Otter! Pretty Petals Ear Warmer. There are currently no images from other crafters. close Terms & Conditions You must enter into this Agreement if you want to submit digital images or other content to Prime Publishing through Sharing Customer Images (the "Service").
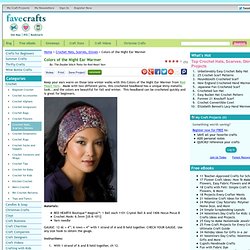
As used in this Agreement, "we" or "Prime Publishing" means Prime Publishing, LLC. and "you" means the individual or entity submitting materials to Prime Publishing. Any individual or entity that wants to use the Service must accept the terms of this Agreement without change. 1) Eligibility. 2) Definitions. 3) License Grant for Materials. 4) Removal of Materials. 5) License for Name, Trademarks and Likenesses. 6) Specifications and Guidelines. 7) Representations, Warranties and Indemnities. 8) Restrictions. 9) No Obligation. 10) Changes to Agreement. 11) Prime Publishing Intellectual Property. 12) Communications. Colors of the Night Ear Warmer. There are currently no images from other crafters. close Terms & Conditions.
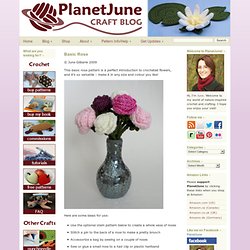
Crocheted Leaves - for the Naked Branch - Basic Rose. © June Gilbank 2009 This basic rose pattern is a perfect introduction to crocheted flowers, and it’s so versatile – make it in any size and colour you like!
Here are some ideas for use: Koala Bear Amigurumi. I found a Koala Amigurumi Pattern in the Woman’s Day website and I have some off-white and gray organic cotton yarns on hand, so I made a pair of these small little stuffed koalas for my kids in reverse color.
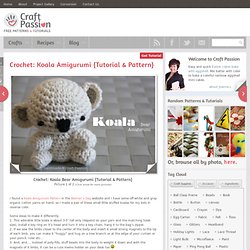
Some ideas to make it differently: 1. This adorable little koala is about 3-5″ tall only (depend on your yarn and the matching hook size), install a key ring on it’s head and turn it into a key chain, hang it to the bag’s zipper. 2. If we sew the limbs closer to the center of the body and insert 4 small strong magnets to the tip of each limb, you can make it “huggy” and hug on a tree branch or at the edge of your curtain or your pencil, ruler etc… 3. And, and…. instead of poly-fills, stuff beads into the body to weight it down and with the magnets of it limbs, it can be a cute memo holder on your desk too 4. Find the appropriate positions for the ears, approx at the center of the vertical cross section of the head, middle of the height.
Padma pattern by Dawn Toussaint. Cardinal. I have always thought about making one of these.
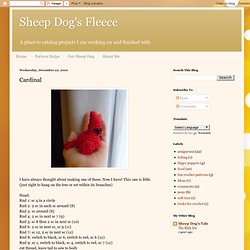
Now I have! This one is little. Do it Yarns. Amigurumi Snail. Dog Sweater Tutorial. This is my collar finished- 5+1 beginning chain- 11 inches long.
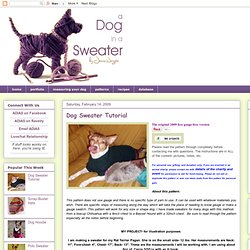
***An easy way to tell you have an even number of rows (without counting over and over) is to compare the two ends. As long as the last two rows on each end look the same, it is even. In other words, you will have either a roof peak or vee formed by the last two stitches (due to the BLOsc). 2 Roofpeaks or 2 Vees= even number of rows! Joining the collar Fold collar in half, matching end. Illustrating beginning to sl st through both layers. Fastening Off. Fastening off neatly can make the difference between a really nice finish and a messy look.
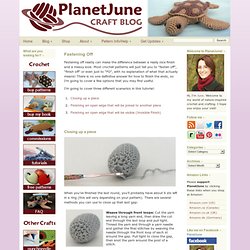
Most crochet patterns will just tell you to “fasten off”, “finish off” or even just to “FO”, with no explanation of what that actually means! There is no one definitive answer for how to finish the ends, so I’m going to cover a few options that you may find useful. Joining Amigurumi. When making amigurumi, you will often need to join an open-ended crocheted piece (e.g. the top of a leg or tail or a muzzle) to a closed crocheted piece (e.g. the body or head).
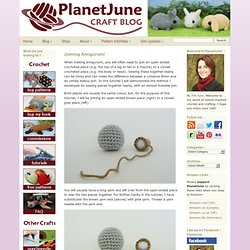
Sewing these together neatly can be tricky and can make the difference between a cohesive finish and an untidy messy join. In this tutorial I will demonstrate the method I developed for sewing pieces together neatly, with an almost invisible join. Both pieces are usually the same colour, but, for the purpose of this tutorial, I will be joining an open-ended brown piece (right) to a closed grey piece (left): You will usually have a long yarn end left over from the open-ended piece to sew the two pieces together.
For further clarity in the tutorial, I have substituted the brown yarn end (above) with pink yarn. Hold the two pieces together in their final position, with the yarn end towards you. The ultimate finish for amigurumi. Would you prefer to see the video tutorial demonstrating this method?

If not, read on: I’ve written before about how there are several ways you can finish off a closed piece in amigurumi, and there’s no one ‘best’ method for closing that remaining hole to give the neatest finish. I’d like to officially change my opinion on that point! Here are my previous results: Since I wrote that post, I’ve been doing more experimenting, and I think I’ve finally found the definitive method to give the best possible finish to a closed piece in amigurumi.