

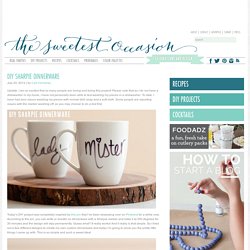
DIY Sharpie Dinnerware. Update: I am so excited that so many people are loving and trying this project!
Flip-Flop Refashion: Part 1 (Braided Straps. Summer is great.

And warm. And full of outdoor activities and trips to the pool and random walks around the neighborhood. I love it. Re-purposing: Tshirts into 5-strand-braided-headbands. I was walking through Target a few weeks ago and noticed this little knit fabric headband that was not just braided together…….but woven.
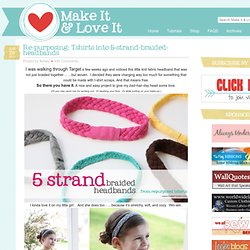
I decided they were charging way too much for something that could be made with t-shirt scraps. And that means free. So there you have it. DIY backpack. Supplies: 1 yard of durable fabric I used faux leather for the bottom... 1/2 a yard for the liner. drawstring, anything for closure I always have my hands full with my little boys on each hand.
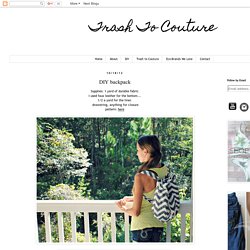
I love backpacks and wanted to create one that would be functional and fit my style. You will need to piece the front/back part together by taping them. Press seams of pocket 1/4 inch. Sew the top 1/4 inch over. place the pocket in the middle of the front piece. Top stitch around leaving top flap open. You can make your own straps or purchase it from the fabric/craft store. 2 yards should be enough. For the straps I cut 2 strips 3in. by 28in. long and sewed them right sides together. Lucky Penny Charms Tutorial. Posted on July 18, 2012 by Christina Feeling lucky because you’ve snagged the best guy in the universe?
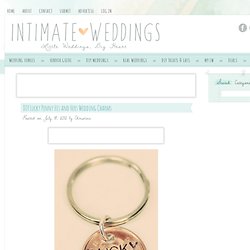
Make lucky penny charms for you and your sweetie to commemorate the year of your marriage. Use a penny with your wedding year, and create a key chain charm or a pendant. Junk in the Trunk. I am so sorry for being so late at getting this posted today. My family has beenenjoying vacation and yesterday took the kids to Silverwood, a theme park in the northwest. They had a blast, let me just tell you.
Tutorials. Ten minute no-sew recycled t-shirt bag! Tutorial time!

I got a gig teaching a recycled t-shirt project at the library a few months ago, with a request for a recycled tee bag – the only bags I’d made from tees in the past had required sturdy sewing, and I didn’t want hand-sewing to be the only thing holding the bottom closed in a class version of the bags, so I started brainstorming about some kind of hand-sewing-friendly or no-sew bag idea…. and here’s what I came up with! The simplest version of these bags is great for smaller tees, or the more light-weight kind of girl-tees – just turn the bottom of the shirt into a drawstring and tie it closed! As you can see, even with a not huge tee, this will still leave a significant hole in the bottom of your bag, but for purposes like grocery shopping, this size hole shouldn’t really matter… But to make smaller holes, just make more than one of them! Zipper Card Pouch.
Have you ever had too many cards that your wallet can handle?
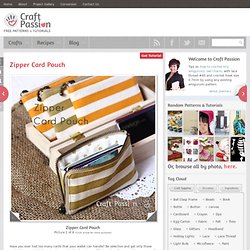
Be selective and get only those cards that you might be using in a particular shopping mall but end up they were the wrong one? Or, may be just forgot to “update” the cards in the wallet on your next trip? Can’t find the cards you thought you have already put into your wallet? Sounds familiar….. Tie One On: DIY Swimsuits. DIY Chainmail Necklace. You’ll need: Start by separating the jump rings into two halves: 175 open and 175 closed.
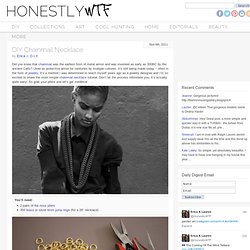
Thread three closed jump rings onto an open jump ring. Close the ring. Spread the three rings apart, with the rings looking exactly as shown below. The bottom ring will be the end of the necklace and the top two rings, which are spread open over the middle ring, will be where the chain mail begins. Keeping the rings in place with your forefinger and thumb, take an open jump ring and hook it through the front side of the two rings. Add 2 closed rings to the open ring and close. Spread the two rings apart in the same way as the first set of rings. Add 2 closed rings and close. To add an optional fourth row, lay the necklace flat and hook an open ring through first and second closed rings on the right side. Fuzzy Wuzzy Was a Camera Case. My DIY. DIY Spirit Fingers | Sequin & Beaded Rings inspired by Ralph Rucci Spring RTW 2014 After seeing these AMAZING bedazzled fingers created by Max Kibardin for the Ralph Rucci RTW Spring 2014 runway collection, I just had to recreate… DIY Dolce & Gabbana Bejeweled Gold Headband {Crown} I am LOVING everything Dolce & Gabbana is doing right now.
Their gold crowns parading down the runways as if belonging to royalty, beaded… DIY. As a bit of a novice photographer, I'm always searching the internets for new ways to improve my photo-taking abilities, especially when it comes to creating light.

While I've been staying at my parents house, it's become especially difficult, as their decorating scheme generally consists of what I like to refer to as "50 Shades of Brown. " (They're rocking a very outdoorsy log cabin style, which is beautiful, but lends to some seriously yellow photos.) With the upcoming opening of my new shop, I've know that I wanted to create something that would both address my lighting issues as well as serve as a very generic backdrop for product and blog photos.
With natural light normally being out of the question, and the DIY girl (a.k.a. tightwad,) that I am, I just knew that I could whip something up to suit my needs. Guitar-shaped bag for my boyfriend's PSP (WITH TUTORIAL. and so many pics!!) My boyfriend saw a guitar-shaped sling bag and he got crazy over it. so i offered to make him one. however, he said that it should be small, just perfect for his PSP slim. well.you've probably seen bigger and leather versions of this. what i made was veddy small. just a bit bigger than a paperback. DIY Découpage Floral Bag.
When H&M asked us to DIY a boho-inspired item for their summer issue, découpage was the first thing that came to mind. Honestly, does it get any better than customizing a simple handbag with a brilliant floral print? However you create it, it’ll be satisfying to know that you’ve designed yourself a one of a kind bag! You’ll need:a handbagcotton fabric with a large floral patternpainter’s tapeMod Podgecraft paint2 small plastic dishes2 brushesscissors Start by taping off the edges and hardware of the handbag. Squeeze a dollop of colored craft paint into a small disposable container. Allow the first layer to dry completely. 1181-1340220830-6.jpg (500×1221) Revamp old T-shirt into Cute Bra Strap! DIY CHAIN CAMERA STRAP. Bloglovin.