
Ripped and Torn Edges and Stuff. Photoshop allows you to create that ripped, torn and distressed effect that has been seen around lately.

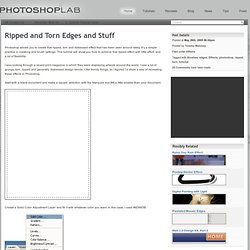
It’s a simple practice in masking and brush settings. This tutorial will show you how to achieve that ripped effect with little effort, and a lot of flexibility. I was looking through a recent print magazine in which they were displaying artwork around the world. I saw a lot of grungy, torn, ripped and generally distressed design trends. I like trendy things, so I figured I’d show a way of recreating these effects in Photoshop. Start with a blank document and make a square selection with the Marquee tool [M] a little smaller than your document. Create a Solid Color Adjustment Layer and fill it with whatever color you want. Now choose the Brush tool [B]. Press [D] to set your colors back to default. Click on “Shape Dynamics” and change the settings similar to mine: NOTE: I use a Wacom Tablet (www.wacom.com ) so my brush tip shape preview probably looks different than yours.
27 Best Photoshop Web Layout Design Tutorials to Design Decent Web Layouts at DzineBlog. Learn how to earn $125 or more per hour as a freelancer - Click Here Looking for hosting?.

We recommend MediaTemple for web hosting. Use Code MTLOVESDESIGN for 20% off For beginner web designers – design tutorials really help to understand the basic knowledge about web design! , Here is a collection of 27 layout design tutorials that will help you with designing a decent looking website. Design a cool Photography Portfolio Design A Grungy Website Design In Photoshop Design a High End Webdesign From Scratch Design Your Own Personal Portfolio Page In Photoshop Design a cool Portfolio Web Layout Urban Layout Design in Photoshop. Show me the light – Digital Art Tutorial « Abstract. In this photoshop tutorial I will show you how to use stock images to make a beautiful digital artwork with nicely colored lights.

All you need for this tutorial is my Colors in Motion textures pack and a model. I found the model on deviantArt. You can download the picture here. If you want to use another stock image, try the gallery if ISO Stock, you will find very good stock images there. For this tutorial I will use the girl that you see on the preview. Video walk-through Many people requested a video of this tutorial so I had to record it. Step 1 Open the girl model in photoshop and using the Pen Tool (P), trace the contour but make sure you have the paths selected. Create a new document 1500×2026 pixels and paste the girl, name this layer model. Step 2 Now we are going to make some adjustments to the color and the contrast and add some shadows. Make some color adjustments and increase the contrast of the girl.
Levels settings to increase contrast. Saturation settings to increase color. Make up. Adobe Photoshop Tutorials.
Examples.