
DIY Mod Podged Halloween blocks. Halloween cupcake candy pedestal. The life of a Man Podger is not easy – you have to come up with cute projects all day and then craft all night.
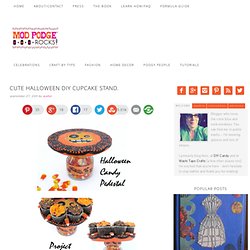
Meanwhile, Mod Podge Amy is breathing over your shoulder, telling you to work faster . . . Hahaha! Just kidding guys. I don’t know if you’ve seen all of the projects from Man Podgers Walter and David, but they are so unique – there hasn’t been one I haven’t loved. Just like this cupcake candy pedestal from Walter. This project is so adaptable and easy to create for any season. My favorite time of the year is Halloween! Some of the basic supplies and tools you will need for this project: • Mod Podge • FolkArt Paint (I used Pumpkin and Licorice) • Round plaque 7″ x 7″ x 3/4″ • One glass jelly jar with a metal lid • Pencil • Mod Podge Tools • Cordless Drill • Paper Doilies • Industrial Glue • Tape Measure or Ruler • Awl • Philips head screwdriver • Scissors and/or craft knife Step 1: Prime and Paint • Prime (optional), let dry.
Aqua and gold Valentine's Day window clings. One of the first projects I made for My Aqua Valentine is a valentine craft for kids - heart window clings!
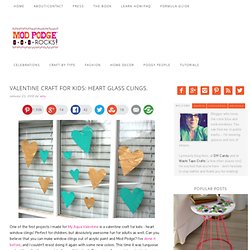
Perfect for children, but absolutely awesome fun for adults as well. Can you believe that you can make window clings out of acrylic paint and Mod Podge? I’ve done it before, and I couldn’t resist doing it again with some new colors. This time it was turquoise and gold, perfectly appropriate for my Valentine’s Day series. Are you interested in keeping your children busy for hours, making and then playing with clings? Gather These Supplies. Tin can jack o' lantern. How to decoupage a tiny tin. Green craft - recycled tins. Are you a nut lover?
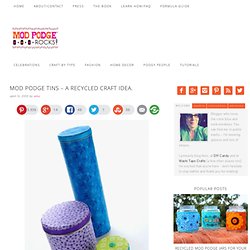
Hahaha! Weird question, I know. But the reason I ask is because my family loves nuts, and we always have containers left over when we’ve eaten them all. Lazy susan from a planter saucer. Man Podger David had a great idea to turn a simple planter into a DIY lazy susan for summer parties.
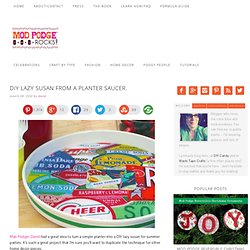
It’s such a great project that I’m sure you’ll want to duplicate the technique for other home decor pieces. ————– So, you know me, always wandering around Home Depot looking for things to make into other things. Spring is coming, along with outdoor parties and when I saw some big, metal planter saucers (you know, the kind you put under a pot to catch water and protect the floor) on sale I thought “hmmmmmm . . . lazy susan?” It turned out to be easy and pretty fun! Supplies -Metal planter saucer -Mod Podge -Foam brush -Envirotex Lite (to make it all waterproof and stuff) -Plastic straw (not pictured) -Stirring sticks -Plastic cup -Lazy Susan mechanism (also from Home Depot) -Sandpaper (not pictured) -Glue – I used E-6000 -Spray paint (optional) -Painters tape (optional) and just gave it a couple of coats of spray paint. Next up, I attached the turntable using the E-6000.
And there you go. Using Mod Podge to make glass clings. I really think you are going to like this post.
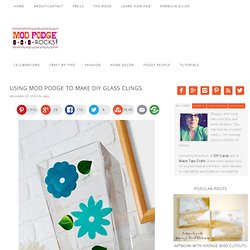
I’m not just fancying myself, I really do. It was a fun to use Mod Podge for something other than gluing down – I actually made Mod Podge DIY glass clings that you can put on any vase or in any window. The supplies are so minimal, I had everything laying around the house. Can you say budget crafting at its finest? Chalkboard doily message board. How did this DIY chalkboard message board come about?
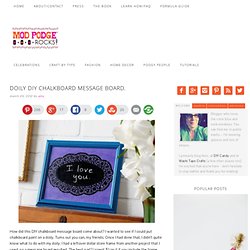
I wanted to see if I could put chalkboard paint on a doily. Turns out you can, my friends. Painted and Podged acorns. Scissors & Spatulas {and everything in between}Scissors & Spatulas {and everything in between} You must have a handbag for all seasons and occasions!
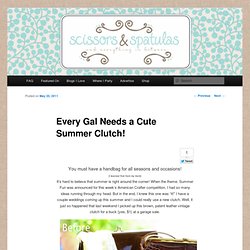
{I learned that from my mom} It’s hard to believe that summer is right around the corner! When the theme, Summer Fun was announced for this week’s American Crafter competition, I had so many ideas running through my head. DIY ombre trash bin. Hi there!
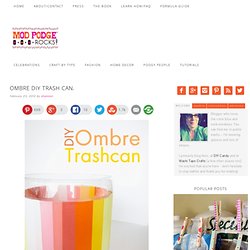
I’m Shannon from Madigan Made and I’m so excited that Amy invited me to share my ombre DIY trash can with you today. But I guess every crafter generates a certain amount of trash as they create. It is unavoidable. What helps me corral my trail of scraps is to have a little garbage can next to me on my craft table. Mod Podge coasters from Martha Shmartha. A rather large gift box covered in pattern pieces. I decoupaged this pattern piece box for my friend’s mother – her 60th birthday present!
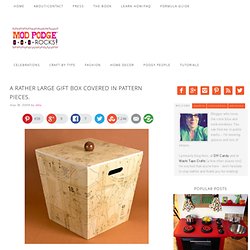
She loves sewing, and so we decided this would be the perfect gift for her since she has (now had) a lack of places to store her fabric and patterns. And how else to cover the box except with patterns? Don’t be too shocked, but I actually took photos of the process. Trust me, it was difficult to stop crafting and snap the camera! Upcycled jewelry box with Envirotex Lite. I recently made a Goodwill run and scored a load of goodies for $15.
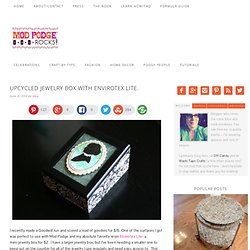
One of the surfaces I got was perfect to use with Mod Podge and my absolute favorite resin Envirotex Lite: a mini-jewelry box for $2. I have a larger jewelry box, but I’ve been needing a smaller one to keep out on the counter for all of the jewelry I use regularly and need easy access to. This upcycled jewelry box was a relatively easy project and I had everything on hand. Here’s how I made my new favorite decoupage piece. Gather These Supplies Old jewelry boxEnvirotex Lite – I used about 3 oz. totalMixing Cup SetMod Podge Hard Coat Scrapbook paper – I used 2 sheets of Fancy Pants Designs, It’s the Little Things FolkArt Metallic paint – Sequin Black Basic Grey Woolies felt stickers – Curio Painter’s tape Paintbrush Pencil Ruler Craft glue Craft knife and mat or scissors Here she is – ready to be re-done.
Mod Podge fabric covered books. Erin Bassett is a crafter and artist that you should definitely know about. Her mixed media is so pretty, and she’s a great teacher as well. Wall Art for Sienna's Room. First off, let me just say, I really love photos printed onto a canvas. Really. I knew I wanted a set of them in Sienna's room, but as most of you know, we are still students so our decorating budget didn't exactly cover printing four 8"x10" photos onto a canvas. It's pretty darn expensive for just one let alone FOUR!!! I had seen a few ideas online about getting pictures printed out, then just mod-podging the picture onto the canvas, and sanding the sides a bit, which I liked, but I still really wanted that "printed on canvas" texture on the picture itself.
Then, while looking around online one day, I found out that you can actually print from your computer onto tissue paper! Thus, my idea was born. MAGIC Decal Transfer Tutorial with Free Printables! How To Make Image Covered Coasters – Guest Post By Sara Elizabeth. How to Mod Podge Photos on Canvas {mod podge. Mod Podge Tin Foil Nightstand {paper textures.