
RoboticsBrno/ESP32-Arduino-Servo-Library: Generate RC servo signal on a selected pin. ESP32 + MPU9250: 3D Orientation Visualisation. ESP32 Servo Motor Web Server with Arduino IDE. In this tutorial we’re going to show you how to build a web server with the ESP32 that controls the shaft’s position of a servo motor using a slider.
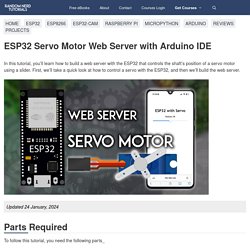
First, we’ll take a quick look on how to control a servo with the ESP32, and then we’ll build the web server. Watch the Video Tutorial and Project Demo This guide is available in video format (watch below) and in written format (continue reading). Parts Required For this tutorial we’ll use the following parts: You can use the preceding links or go directly to MakerAdvisor.com/tools to find all the parts for your projects at the best price! Connecting the Servo Motor to the ESP32 Servo motors have three wires: power, ground, and signal. When using a small servo like the S0009 as shown in the figure below, you can power it directly from the ESP32. But if you’re using more than one servo or other type, you’ll probably need to power up your servos using an external power supply.
WiFi Controlled Car with a Self Hosted HTML/JS Joystick Using a Wemos D1 Mini/ESP8266. Here’s a video of the car in action: Gallery of all the pictures I took.
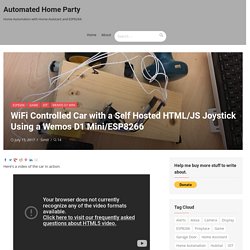
The most recent project I decided to work on was a line following robot. However, as I was testing it to make sure the direction code was working, I decided to develop something that I can control from my smartphone. It turned out much better than I was expecting, so I figured I should make a blog post about it. As you can clearly see, I pieced together the parts for my car.
Part List: Programmer131/nodemcuCar: modified version of. Arduino capacitive proximity sensor. Overview In this post I explain a capacitive proximity / touch sensor for Arduino based on a square wave generator rather than charge time measurement as the popular CapSense library.
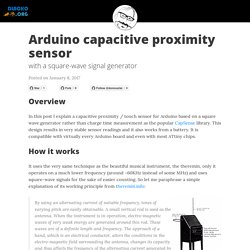
This design results in very stable sensor readings and it also works from a battery. It is compatible with virtually every Arduino board and even with most ATtiny chips. How it works It uses the very same technique as the beautiful musical instrument, the theremin, only it operates on a much lower frequency (around ~60KHz instead of some MHz) and uses square-wave signals for the sake of easier counting.
By using an alternating current of suitable frequency, tones of varying pitch are easily obtainable. In summary, stable, ~60KHz square-waves are generated by an RC oscillator. Welcome to Learn ESP32 with Arduino IDE. ESP8266 Arduino WiFi Web Server LED on off control. Comunicaciones Bluetooth en Processing Android con Ketai. Hobbyking IOS & Android 4CH WiFi Receiver - Kamami. ESP32 #80: ESPNOW with ESP32 and ESP8285 - hmong.video. A Beginner's Guide to the ESP8266.
A common use for IoT devices like the ESP8266 is monitoring sensors.
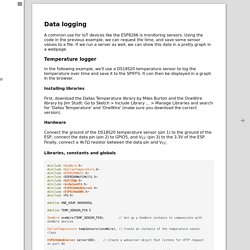
Using the code in the previous example, we can request the time, and save some sensor values to a file. If we run a server as well, we can show this data in a pretty graph in a webpage. Connect the ground of the DS18S20 temperature sensor (pin 1) to the ground of the ESP, connect the data pin (pin 2) to GPIO5, and VCC (pin 3) to the 3.3V of the ESP. Finally, connect a 4k7Ω resistor between the data pin and VCC.
The only new things here are the OneWire and DallasTemperature libraries, to get the temperature from the sensor. In the setup, there's not much new either, we just start the temperature sensor, and check if we can communicate with it. Getting the temperature from the sensor may take some time (up to 750ms). Loop The loop looks a lot more complex, but it's actually pretty simple. There's two things going on: How to Get Started With ESP8285 Module ? AdWords We use AdWords to deploy digital advertising on sites supported by AdWords. Ads are based on both AdWords data and behavioral data that we collect while you’re on our sites.
The data we collect may include pages you’ve visited, trials you’ve initiated, videos you’ve played, purchases you’ve made, and your IP address or device ID. This information may be combined with data that AdWords has collected from you. We use the data that we provide to AdWords to better customize your digital advertising experience and present you with more relevant ads. LiveRamp We use LiveRamp to deploy digital advertising on sites supported by LiveRamp. Doubleclick We use Doubleclick to deploy digital advertising on sites supported by Doubleclick. RocketFuel We use RocketFuel to deploy digital advertising on sites supported by RocketFuel. Twitter We use Twitter to deploy digital advertising on sites supported by Twitter. Facebook. ESP8266 WiFi RC car - RoboRemo. Control Your RC Car With Your Android Tablet. Intro Inspired by different internet pages (www.roboremo.com), I designed a solution allowing me to drive my RC car with my Android tablet.
Useless, but so fun. The solution consists of three main elements: An ESP8266 on which runs a TCP server for controlling the steering servo and electronic speed controller (ESC)Roboremo: an android app for easily designing M2M interface composed of slider, buttons, graphicsA RC car. Slow ...Flyer ! Nano Stick Indoor Flyer by MicronWings. How to make Micro Actuator Servo for Micro RC Planes?
Instructables. Wi Fi Module ESP8266 – 4.Control from anywhere in the World–Internet of Things.