
WebMart|威瑪創意市集. 23 款免費的 WordPress 電子商務外掛WebMart|威瑪創意市集. WordPress 作為一個開放源碼的易用和高度個性化的 CMS 平台,在電子商務應用方面給我們提供了許多不錯的外掛,借助這些外掛,我們可以設計出一個功能十分齊全而强勁的電子商務網站。

在此類外掛當中,有不少雖然是免費的,但却非常好用,安裝好後也無需過多的設定。 這裡就分享 23 款免費的 WordPress 電子商務外掛,以供下載使用。 WP e-Commerce WP e-Commerce 是 WordPress 相當知名的電子商務外掛。 擁有非常高的知名度和評價,已被下載超過 190 萬次,在電子商務領域有著無與倫比的豐富經驗。 WooCommerce WooCommerce 是由經驗豐富的民間各個階層人士所建立的,提供了優質的電子商務主題和擴展性,以進一步提高你商店企業級的質量和功能。 MarketPress – WordPress eCommerce MarketPress 是一款百分之百兼容於 WordPress 多站台和 BuddyPress 的外掛程式 – 你可以用它來開始經營自己的 Etsy 或 eBay 商店風格網站。 eShop eShop 是一個簡單無障礙的 WordPress 購物車外掛程式,小小的程式中擠滿了各種功能,其中包括:各種運輸方案,各種折扣方案,上傳下載的產品,基本統計,下載銷售數據等… WordPress Simple Paypal Shopping Cart WordPress Simple Paypal Shopping Cart 很容易使用的 WordPress 購物車外掛,是屬於電子商務輕量級的解決方案。 TheCartPress, eCommerce Shopping Cart. MUKI space* - Simple, Personal and Life Style. MUKI space* - Simple, Personal and Life Style. Wordpress Themes.
Colorlib - How To Start A Blog From Scratch Using WordPress. 將 Google 搜尋框整合至 WordPress « MUKI space* WordPress 雖然是個非常強大的 CMS,但我覺得「搜尋」是他所有功能裡面最雞肋的,內建的搜尋功能無法結合多組字串,也沒有支援高亮或是進階搜尋等,其實不是很方便。
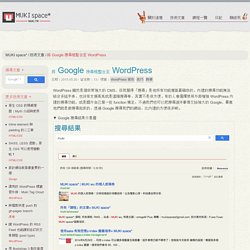
有的人會選擇使用外掛增強 WordPress 內建的搜尋功能,或是額外自己寫一些 function 補足,不過我們也可以把搜尋這件事情交給強大的 Google,畢竟他們就是做搜尋起家的,透過 Google 搜尋我們的網站,比內建的方便很多喲。 ▼ Google 搜尋結果示意圖 實際呈現結果,可以參考我的搜尋頁面: 我最近也使用 Google Search 替換了內建的搜尋,使用方法很簡單,操作也是中文說明很好入手。 不過要整合至 WordPress 還是有需要注意的部分,為了以後使用方便,特地將幾個重要的步驟記起來,也供大家參考使用。 使用 Google 自訂搜尋 Google 自訂搜尋改版後,總算將新舊控制台合併起來了,步驟也簡單許多,跟著以下的說明開始做吧! 步驟一 到新版 Google 自訂搜尋,新增你的網站資料。 「要搜尋的網站」欄位:填入你的 WordPress 位置「語言」:繁體中文「搜尋引擎的名稱」:填入你的網站名稱 最後按下藍色的「建立」按鈕,即可新建完成。 步驟二 在左側選單,點選「編輯搜尋引擎」,在下拉選單找到剛剛新增的搜尋引擎設定。 版面配置:請使用「2 頁」,它會讓搜尋框跟搜尋結果分開顯示。 ▼ 不太清楚怎麼選擇的話,可以參考我的設定圖片,照著選就好囉! 步驟三(重要!) 終於到重頭戲了! 指定要顯示搜尋結果的目標網站完整網址:這邊請填上你的 WordPress 網址,就是你的搜尋結果網址。
最後記得按下「儲存」喔。 ▼ 可參考以下截圖的設定. WordPress無痛起步 - WordPress專家教你如何快速架站. Justfont網頁字型進階使用技巧. Step1 After registered as a member, please click the 'Add a project'(1).
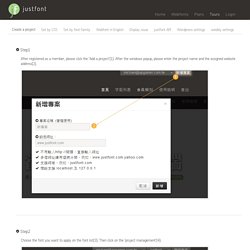
After the windows popup, please enter the project name and the assigned website address(2). Step2 Choose the font you want to apply on the font list(3). Then click on the 'project management'(4). Step3 We suggested you can set the webfont service by CSS, it will provide more performance in display. Please create a project first, and go to the project management page to choose the font you want to apply(1). Please refer the content about 'How to set the webfont by CSS' Click the 'JS' button(3). Add the Javascript code in the start of your original code for getting more performance. Step4 Add the CSS label in your html code(6).
Step5 After those procedure finished, the display will be successful! Please create a project first, and go to the project management page to choose the font you want to apply(1). Setting css like: .content { font-family: "xingothic-tc"; font-weight: "400"; Caution! Font-weight: "400"; .jf-loading : Loading. @keyframes-CSS. The @keyframes CSS at-rule controls the intermediate steps in a CSS animation sequence by defining styles for keyframes (or waypoints) along the animation sequence.
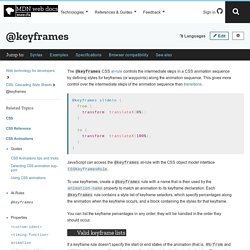
This gives more control over the intermediate steps of the animation sequence than transitions. JavaScript can access the @keyframes at-rule with the CSS object model interface CSSKeyframesRule. To use keyframes, create a @keyframes rule with a name that is then used by the animation-name property to match an animation to its keyframe declaration. Each @keyframes rule contains a style list of keyframe selectors, which specify percentages along the animation when the keyframe occurs, and a block containing the styles for that keyframe. You can list the keyframe percentages in any order; they will be handled in the order they should occur. Valid keyframe lists Properties that can't be animated in keyframe rules are ignored, but supported properties will still be animated.
Resolving duplicates ! Syntax Values from to Formal syntax Examples. Animate.css- Wordpress css編輯. Gravatar -WORDPRESS大頭貼. Managed WordPress Hosting Without the Hassle. Customizing the Login Form. The Login Form is your gateway to using and configuring the WordPress publishing platform.
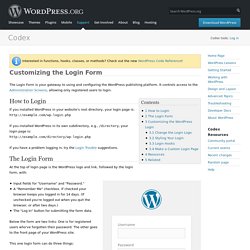
It controls access to the Administration Screens, allowing only registered users to login. How to Login If you installed WordPress in your website's root directory, your login page is: If you installed WordPress in its own subdirectory, e.g., /directory, your login page is: If you have a problem logging in, try the Login Trouble suggestions. The Login Form At the top of login page is the WordPress logo and link, followed by the login form, with: Input fields for "Username" and "Password. " Below the form are two links: One is for registered users who've forgotten their password. This one login form can do three things: Log into a site (by filling in a valid Username and Password).