
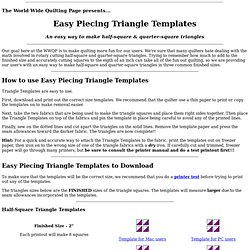
Shoo Fly Block. WWQP Quilt Coloring Book - Shoo Fly. Easy Piecing Triangle Templates. The World Wide Quilting Page presents...
An easy way to make half-square & quarter-square triangles Our goal here at the WWQP is to make quilting more fun for our users. We're sure that many quilters hate dealing with the math involved in rotary cutting half-square and quarter-square triangles. Trying to remember how much to add to the finished size and accurately cutting squares to the eigth of an inch can take all of the fun out quilting, so we are providing our user's with an easy way to make half-square and quarter-square triangles in three common finished sizes. How to use Easy Piecing Triangle Templates Triangle Templates are easy to use. First, download and print out the correct size templates. Next, take the two fabrics that are being used to make the triangle squares and place them right sides together.
Finally, sew on the dotted lines and cut apart the triangles on the solid lines. Template4inRightTrianglePC.gif 472×472 pixels. Templates4inSquarePC.gif 433×433 pixels. Speed Piecing Basics. Rotary Cutting. The WWQP How-To's Equipment Rotary cutting offers the quilter the ability to cut a large number of fabric pieces quickly and accurately.
The basic equipment needed for rotary cutting is a rotary cutter, a special mat designed for use with rotary cutters, and a heavy plastic ruler. Rotary cutters come in two sizes. The large size rotary is recommended for all rotary cutting. Safe Rotary Cutting Rotary cutters are extremely sharp and caution should be used when rotary cutting. Preparing the Fabric for Rotary Cutting All fabric should be pressed before cutting. Once the ruler has been placed, the quilter should carefully place his/her left hand on the ruler to hold it in place being careful not to shift the postion of the ruler.
Rotary Cutting Basic Shapes Strips - Take the finished width of the strip and add 1/2" for seam allowances. Squares - Take the finished size of the square and add 1/2" for seam allowances. Crazy about quilting - allsorts. Finally!
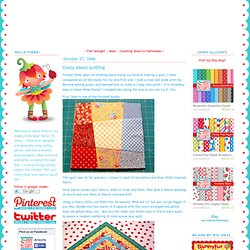
After years of thinking about trying my hand at making a quilt, I have completed all of the blocks for my very first one! I took a class last week with my Bernina sewing posse, and learned how to make a "crazy nine patch. " It is incredibly easy to make these blocks! I snapped pics along the way so you can try it, too. First, here is one of the finished blocks: This quilt uses 36 fat quarters.
Batting Guide from Amy of Happythings. By Amy of Happythings Types of Batting Cotton 100% cotton battings are soft, usually supple (drapable), and usually thin (low-loft) but it seems these days they can be found with many variations.Cotton breathes – so your quilt will too.If not preshrunk, cotton tends to shrink.
When you wash your quilt for the first time, the batting will shrink and create that wrinkly, quilty look that you either love or hate. (I love.)Since normal cotton fibers will tend to shift around in your quilt over time if not properly anchored with stitches, the batting manufacturers tell you that your quilting “lines” must be close together (usually 2-3” maximum) to prevent this bunching/shifting. There are manufacturers of new types of cotton batts that claim otherwise and say you can quilt them further apart (up to 8”.) Cotton batting is supposed to look flatter. Binding & Quilting Resource Links. October 11 ~ Crayon Box Quilt Tutorial + Winter Peach Giveaway. Check in every day for your chance to win something special in our Baby Shower!
Rae from Made by Rae and our Sew,Mama,Sew! Editorial Board created this fabulous Crayon Box Quilt tutorial for our Baby Shower celebration. It will be the hit of any baby shower! Rae has a binding tutorial at Made by Rae to help you complete your Crayon Box Quilt too, so be sure to check it out. Rae will also be back next week with another fun baby-related tutorial too. From Rae: I had always thought it would take forever to cut out all of the pieces for a quilt with lots of triangles. Materials: ‘Fit for a Princess!’ Picnic Quilt ~ Fat Quarterly Tutorial. Katy Jones from the Fat Quarterly team and i’m a ginger monkey has a new Picnic Quilt tutorial for you today to add to our Digital Delivery Sewing fun!
Fat Quarterly, the e-zine (electronic magazine) “for modern sewists, by modern sewists,” is available for purchase at Sew,Mama,Sew! We’re offering four issues at 20% off today as part of our Digital Delivery Sewing specials. (The latest Solids issue is available at full price.) Also, our recent Summer Picnic Mix Fat Quarter Pack curated by the Fat Quarterly team is sold out but if you hurry you can still purchase their Evening Breeze Mix Fat Quarter Pack! Wonky Cross Block Sew-Along. Elizabeth Hartman from Oh, Fransson!
Shares her last installment our Block Sew-Along series. We’ve had a Triangle Block, Spiderweb Block, Dresden Plate Block and today Elizabeth shows you how to sew Wonky Cross Blocks. Don’t don’t forget about the great quilting resources at Oh, Fransson! (Quilt Making Basics, Quilt Patterns, Quilt-Alongs and much more!). Elizabeth also has a variety of quilting and sewing patterns for you to purchase. Spiderweb Block Sew-Along. Simple Triangle Block Sew-Along. Join us for our Simple Triangle Block Sew-Along!
Every Monday throughout Quilting Month II Elizabeth Hartman from Oh, Fransson! Will show you how to create a new block. Join us and sew along for one week or every week! Turn your block into a pillow or make a whole quilt! Elizabeth is using prints from her Guest Fat Quarter Pack in each of her blocks this month. Dresden Plate Block Sew-Along. Elizabeth is back with our Week Three Sew-Along.
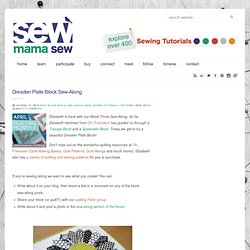
So far Elizabeth Hartman from Oh, Fransson! Has guided us through a Triangle Block and a Spiderweb Block. Today we get to try a beautiful Dresden Plate Block! Don’t miss out on the wonderful quilting resources at Oh, Fransson! Sew What : Kissing Booth Quilt. Hi there!
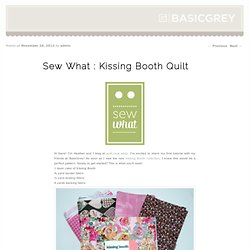
I’m Heather and I blog at quilt.cook.keep. I’m excited to share my first tutorial with my friends at BasicGrey! As soon as I saw the new Kissing Booth collection, I knew this would be a perfect pattern. Ready to get started? This is what you’ll need: 1 layer cake of Kissing Booth ¾ yard border fabric ½ yard binding fabric 4 yards backing fabric First, separate your layer cake into a light pile and a dark pile. Next, alternate your layers light, dark, light, dark and stack them up neatly. Untitled. Qa-block-31. BasicGrey-Christmas-Cogs-Quilt. Houndstooth-Heart-Mini-Pattern. Qa-block-16. LA_QA-Block. Qa-block-07.pdf. Depression Block.