

Easy T-Shirt DIY: Cut Out Back. I love a great t-shirt DIY and this one is extremely simple!
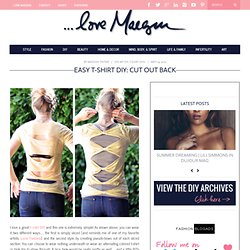
As shown above, you can wear it two different ways… the first is simply sliced {and reminds me of one of my favorite artists, Lucio Fontana} and the second style, by creating pseudo-bows out of each sliced section. You can choose to wear nothing underneath or wear an alternating colored t-shirt or tank top to show through. A lace tank would be really pretty as well… and a little 80′s Madonna-esque. What You’ll Need… * A crew neck t-shirt. Steps… * Carefully cut out your “crew neck”. * Flip your shirt over and lay it flat. . * You can measure it out, or if you have a steady hand, carefully cut 4 straight and parallel lines or slits down your back. NOTE: To get your cut edges to curl a little, use your hands to carefully stretch out your slits. Creative Guest: Watermark Tee by Sweet Verbana. Hello U-Create readers!

Tribal Pattern Stencil: a tutorial. Let me start off by saying thank you so much for all of your support in response to my confession.
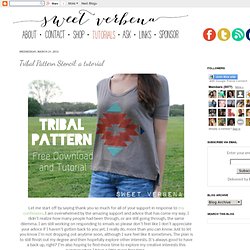
I am overwhelmed by the amazing support and advice that has come my way. I didn't realize how many people had been through, or are still going through, the same dilemma. Bracelets: a tutorial. This project is inspired by one of my first pins.
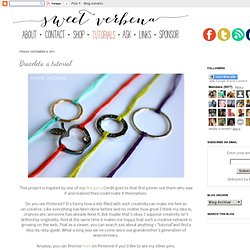
Credit goes to that first pinner out there who saw it and realized they could make it themselves. Do you use Pinterest? It's funny how a site filled with such creativity can make me feel so un-creative. Like everything has been done before and no matter how great I think my idea is, chances are, someone has already done it. But maybe that's okay. Anyway, you can find me here on Pinterest if you'd like to see my other pins. Materials: Embroidery Floss Beads (optional) Hollow Charms like these: Tutorial: Cut 2 18" lengths of thread. Then take the ends of the string and pull it through the loop. The 15 Best Family-Friendly DIY Halloween Costumes for Adults. After getting a great response from my awesome readers on my posts featuring the Cutest DIY Kids' Halloween Costumes and Cutest Handmade Kids' Halloween Costumes on Etsy, I decided to pull together the best DIY adult costumes for you...

But then when I started searching, I realized what "adult Halloween costumes" usually means... trust me, it was hard to find wholesome grown-up costumes, especially for us ladies. T-Shirt Refashion: Jersey Necklace. Sometimes I feel like I ride on the coattails of creative people.

Back in January as I was surfing my favorite blogs, I came across this post on Ultra Vroom about cardigans and fabric necklaces. I instantly fell in love and had to have a fabric necklace for my very own. I week or so later I remembered the large stash of white jersey hanging around the basement and hap-hazardly made my own version of Annie‘s fabric necklace. The DIY: FISHTAIL FRIENDSHIP (BRACELET) If you know how to do a fishtail braid to your hair, then you pretty much know how to make this bracelet.
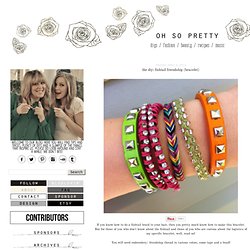
But for those of you who don't know about the fishtail and those of you who are curious about the logistics of my specific bracelet, well, read on! You will need embroidery/ friendship thread in various colors, some tape and a bead! I used 9 strands of thread in 9 different colors. You could do this with only 2 different colors or whatever color variety you want. My strands were about 3 feet long each. I twisted this top part so it doesn't get all tangled later. Where you twisted the top part, tie it around your finger. Then tie a knot. I'm now taking one of the strands and tying it around the other, almost like a tie. Then pull the end through the loop you've created and pull into a knot. Tape the top down to keep the bracelet stable. Star by grabbing one color from the right side and pulling it to the middle.
Pull the same color from the left side. Flip-Flop Refashion: Part 1 (Braided Straps) Summer is great.
And warm. And full of outdoor activities and trips to the pool and random walks around the neighborhood. The Forge: {she made it} jersey weave sweatshirt. Did you all have a good weekend?
We pretty much got snowed in so during nap time I thought i'd scratch this little diy off my to-do list... This was the inspiration for this diy. i've had it pinned on pinterest for an eternity. so when I came across $3 sweatshirts at wal-mart the other day i felt like it was just meant to be. i resisted grabbing more than two (i am so bad when it comes to good deals) brought them home and gave them both a good wash and dry. the other one is white and i already have something in mind for it...