

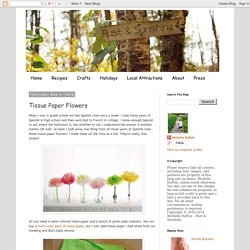
Tissue Paper Flowers. When I was in grade school we had Spanish class once a week.
I took three years of Spanish in high school and then switched to French in college. I know enough Spanish to ask where the bathroom is, but whether or not I understand the answer is another matter. The Pinterest Project: Coconut Sugar Scrub. I'm a girl.
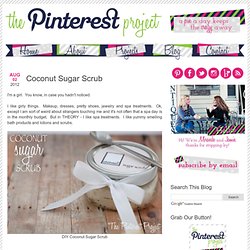
You know, in case you hadn't noticed. I like girly things. Makeup, dresses, pretty shoes, jewelry and spa treatments. Ok, except I am sort of weird about strangers touching me and it's not often that a spa day is in the monthly budget. The Pinterest Project: A DIY Gel Air Freshener. You may know that I live in a house with a few members of the opposite gender.
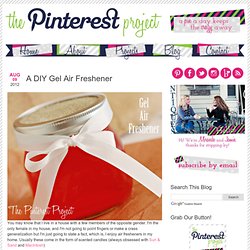
I'm the only female in my house, and I'm not going to point fingers or make a crass generalization but I'm just going to state a fact, which is, I enjoy air fresheners in my home. Usually these come in the form of scented candles (always obsessed with Sun & Sand and MacIntosh) DIY. Oh goodness, I haven't posted anything regarding a DIY post in forever, my apologies! I know most of you come for the giveaways, but there are a handful of you that come for some of my other posts that have nothing to do with reviews or giveaways and I feel horrible that I haven't posted anything sooner. With the holidays finally out of the way and us being caught up on most of our reviews I can finally get back to my normal schedule. Which in this case Tuesdays were always meant to be review and giveaway free. Tutorial: Repurposed Dresser To Bench! Craft: Valentine's Day Wall Art. Babblings and More: Homemade Mod Podge.
Don't forget to vote for us daily!
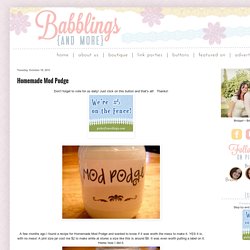
Just click on this button and that's all! Thanks! A few months ago I found a recipe for Homemade Mod Podge and wanted to know if it was worth the mess to make it. YES it is, with no mess! A pint size jar cost me $2 to make while at stores a size like this is around $8. Put a strip of masking/packing tape directly on your jar so that you can take it off later easier. Stick the sticker label on the tape. Tape over the label so that it will be semi-waterproof. Mod Podge in a Pint Jar (matte) Fill jar half way up with white glue (like Elmers) Then fill jar up with water. Shake Well. This is a 50-50 mixture glue/water. The little lovebirds. Happy wednesday.
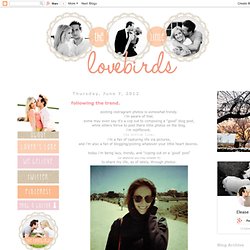
DIY Canvas Prints. I LOVE the look of canvas prints…but, I haven’t been able to persuade my frugal little self to actually pay for them.

Then, along came this idea. It was inspired by my super crafty sister in law. She’s amazing, really. Southern Lovely: Button burlap {heart} I think I must really be into canvases lately, because here is yet another craft involving them. :) I LOVE Valentine decor.
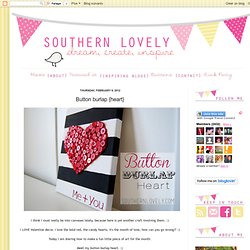
I love the bold red, the candy hearts, it's the month of love, how can you go wrong?! :) {diy} yarn wrapped painted jars. Da na na na na na NA NA! « Corvus tristis: Science, Craft and an Odd Bird. Materials I made something AWESOME, and I started with these three thrift store shirts (which cost me fifty cents, fifty cents and a buck fifty, respectively).
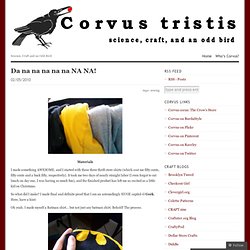
It took me two days of nearly straight labor (I even forgot to eat lunch on day one, I was having so much fun), and the finished product has left me as excited as a little kid on Christmas. How to make roses from maple leaves. Folding Trees & Kusudama Tutorial part 1. The Japanese kusudama is a paper ball made out of multiple identical origami shapes glued together.
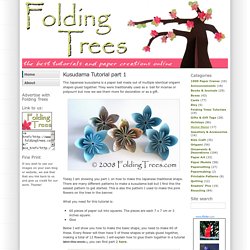
They were traditionally used as a ball for incense or potpourri but now we see them more for decoration or as a gift. Today I am showing you part 1 on how to make the Japanese traditional shape. There are many different patterns to make a kusudama ball but I find this the easiest pattern to get started. This is also the pattern I used to make the pink flowers on the tree in the banner. What you need for this tutorial is: 60 pieces of paper cut into squares. DIY Weddings. Cut 18-gauge cloth-wrapped floral wire to desired length: 12 inches is a good starting length for a bouquet; 6 works well for a boutonniere.

Clockwise from top left:Button: Cut 11/2-inch square of crepe paper. Place thumbnail-size wad of cotton in center; push end of wire into cotton. Wrap paper around cotton; twist ends around wire. Secure with floral tape. (Daisy) Bud: Cut a 3-inch square of crepe paper; fold it into a triangle. Pistil: Cut a 1/2-by-6-inch strip of off-white crepe paper. Floret: Cut 6-by-2-inch strip of crepe paper; fold every 1/2 inch. Triple Button: Cut three 1-inch squares of crepe paper; make three wads of cotton the size of a pinky nail. {Valentines day} pixel-y popup card. I‘ve been scratching my head trying to come up with a card for my hubby {AKA the non-romantic type}. I finally decided to make this pixely popup heart card! They are really minimal (which I love) and take about 20 minutes to make (that includes the card, insert and envelope). You can even make some pixely confetti to put inside the card (if you are a big kid like me!).
Full instructions and printable templates below! Real Weddings: Eliza & Toby’s Victorian Farmhouse Wedding. Most favorited all-time. Repurposed DIY For Everyone! I've heard it from so many different people...and I've said it myself! "I wish I could... " I'd like to showcase some repurposed DIY designs I've collected that I think anyone and everyone could do - and do well! It won't be hard to find the supplies, either. Not only will you feel the elation of creation (hey, that rhymes!) , you'll also be warm and fuzzy in your heart - knowing that you're helping to save the Earth, one repurposed project at a time. spotted at Canadian House & Home. Turn an old book into a keepsake box for tiny treasures/ Such a good idea! Make a Hula Hoop Chandelier. Home » $1 and Free, cheap crafts, Decor, Headline 17 June 2012 23,871 views 7 Comments by rhonda. Fancy Up Your Sterlite Drawers. Sterlite Drawers Revisited: A Follow-Up to Help You Fancy Up.
At the end of May, I shared my post on how to Fancy Up Your Sterlite Drawers and the comments and questions keep rolling in. Apparently, people just LOVE fancy Sterlite Bins. The big question from visitors was "would it work if you used Mod Podge? " I did not have an answer to this question at the time. In fact, I deliberately chose not to use it the first time around because I had my doubts about how well the Mod Podge would seal to the slick plastic surface of the drawers.