
"Flor" de LEDs con energía de zumo de limón - Taringa! Flor de LEDs de energía a base de zumo de limón Materiales: - 8 clavos (Puntillas) Galvanizados - Una toalla de papel cortado en ocho en parches de 1.5 "x 1.5" - Un cable de cobre sin recubrimiento (sin plástico, forro, goma, etc...) - Un corcho - Zumo de limón - Un LED.
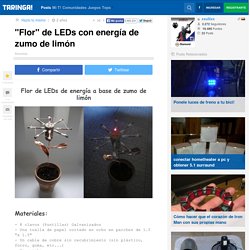
Este proyecto funciona mejor con un LED que tenga baja tensión de paso y baja corriente directa. Como un LED 1.6v 1 mA. Paso #1 Envolver Los "Pétalos" Enrollen el papel en el clavo, y sobre este enrollen el cable de cobre: Dejen un espacio entre el papel y ambos extremos: A fully 3D printable GlaDOS Robotic ceiling arm lamp. Edit: Lets start by thanking everyone for helping me win the UP!
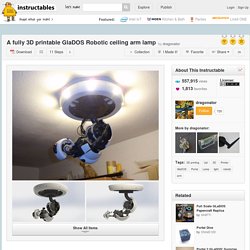
Contest. I won... can you believe it. Without your support this would not have been possible. As promised I have released all of the source files. Now for the sad part. Dragonator out. Building your own CNC router/milling machine. Already at the age of 12 I was dreaming of making a machine which could make things!
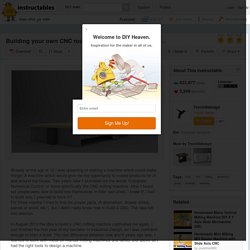
A machine which would give me the opportunity to create products for in and around the house. Two years later I stumbled ont the words 'Computer Numerical Control' or more specifically the CNC milling machine. A tiny Arduino laser cutter. The MicroSlice uses Grbl v0.8 for motion control.
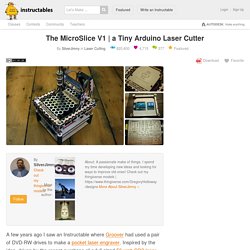
Grbl converts G-Code into commands that the EasyDriver stepper motor controllers understand. We need another program to send the G-Code to Grbl, for this I'll be using Zapmaker's Grbl Controller v3.0. Before you can begin you will need the Arduino IDE, available from the Arduino website. Make sure your Laser Diode is not connected to the power lines while you are configuring your MicroSlice. The Laser will power on & off during the setup & configuration process if it is connected.
How to Make Solar Cells. Edit Article139,527 views 11 Editors Edited 16 days ago Three Methods:Coating the Glass PlatesAssembling the Solar CellActivating and Testing the Solar Cell Solar cells convert the sun's energy into electricity, similar to the way plants convert the sun's energy into food through photosynthesis.
Solar cells work by using the sun's energy to enable electrons in semiconducting materials to move from orbits close to the nuclei of their atoms to higher orbits where they can conduct electricity. Alarma contra caída de niños en piscinas. #TupperElectrónica. Oh No not another flippin' soapbox. A couple of months ago I applied to enter the Red Bull Soapbox Derby at Alexandra Palace and as I sold the Model 'T' at Bonhams last September and the prototype of the '32 sedan is looking a little 'careworn' I thought it would be the perfect opportunity to design and build a new one.
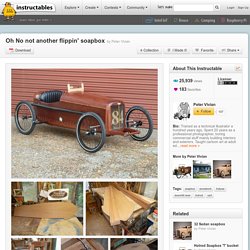
Eventually I decided on a Indianapolis single seat racer from the mid thirties, a bit 'Milleresque'. Construction technique follows the previous models. Plans will be available when I get round to it. All of the solid timber is Sapele and is obtained from recycled patio door cills from a local window company all for £10. Softwood could be used instead stained or painted. Wooden Gear Clock Plans by Clayton Boyer. Build A Western Saloon Kid's Fort With Standard Fence Boards : Materials And Tools. Railway Iron Anvil : I probably shouldn't have done this before I polished it up, but I decided to 1.
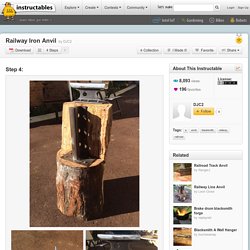
Drill a hole in the anvil 2. How to build a Hydraulic Ram Pump : Test the pump. The video above shows the pump in action, follow the directions, the ones listed below are a summary of what to do, but more detailed descriptions are in the video.Take a hose that doesn't use a thread and attach it to the pump on the 3/4" union side using a hose clamp.

If possible get the hose diameter to be as close to 3/4" as possible to provide a snug fit. Place pump into a moving stream if one is near by if not, you can use a hose as long as it is big enough to provide a snug fit as well and not leak. Before you start it turn the smaller ball valve off and leave the bigger one all the way open.When water enters the pump it will go up to the swing check valve or the "waste valve" and start to spurt out. How To Make Pierce Work Jewelry : That should be it. DIY Flexible Printed Circuits. Get some thin sheets of polyimide which have copper on one or both sides.
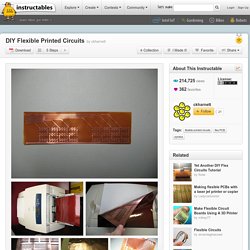
Polyimide is a yellow polymer with a high melting temperature and is sometimes called Kapton. A common type of copper-coated polyimide is DuPont "Pyralux" material. Pyralux sheets come in many different varieties of polyimide thickness, copper thickness and adhesive thickness (the "adhesive" is between the copper and polyimide holding everything together.) Copper thickness is given in oz per square foot, while adhesive and Kapton thickness is given in mil (1 mil =0.001 inch).
Pyralux LF7062 (pictured) has 1/2 oz Cu, 1/2 mil adhesive and 1 mil Kapton. Copper Steampunk Watchamacallit : Assembling of the Watchamacallit. How To Electro-Etch a Solid Metal Plaque. This is a technique that has been used by humans for a very long time.
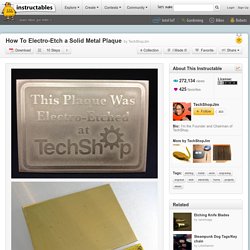
Learn how to create a deep electro-etched metal plaque with household items or items from the hardware store in this Instructable. There are no hazardous chemicals (except dihydrogen monoxide and salts of sodium and chlorine), no dangerous voltages, and no toxic chemicals to dispose of. Be aware that the metal that disappears from your etched metal does end up in the water, so you will need to pay attention to any local laws about disposal of metal particulates. Electric copper etching : Image Transfer.
There are two useful methods of transfering the desired image to the copper plate: Photo exposure or direct toner transfer, which saw as the easier ( but maybe more inaccurate ) method i will describe now. Before continuing, we have to clean the surface of our copper thoroughly, using rubbing alcohol or other good cleaner. No spot of whatever may be left before the transfer. Now we need a negative of the image we want to etch. You need to print that on a as glossy as possible sheet of paper. Fritzing. Etching is a "subtractive" method used for the production of printed circuit boards: acid is used to remove unwanted copper from a prefabricated laminate.
This is done by applying a temporary mask that protects parts of the laminate from the acid and leaves the desired copper layer untouched. You can etch a PCB by yourself, in a lab or even at home, through a simple and inexpensive production process. It makes sense when you wish to produce a single or a very small number of boards and want to avoid manufacturing costs. The etching process is therefore effective for a small workshop. ɷRobotics demystified by edwin wise by QUIASMA.
Make things move by Free publisher. Etching PCBs with Press'n'Peel. These days to make PCB’s you don’t need tons of expensive exposing equipment and bubble tanks, it can be done quite simply on your kitchen floor or in a garage and on a tight budget. There are many instructables already about how to create PCB's with toner and glossy photo paper or magazine pages etc. But what if you want something reliable, that peels straight off without any soaking?
Gifs-que-explican-como-funcionan-las-cosas. Perfactory Micro EDU Price - 3D Printing For You. Garden love seat. Como Hacer un Motor de Solenoide - Muy fácil de hacer. Cómo Hacer una Bobina de tesla (Muy fácil de hacer)