
Wall Art- Spray Painted Sticker Letters on Canvas … This is one of those projects that the end result was not what I had set out to do.

I love projects like this, when veering off the path and trying something crazy, actually produces something pretty cool. I can’t believe I’m saying this but Yes, what you are seeing in the pictures above are spray painted sticker letters. It cracks me up! Who would have ever thought that our kid’s overflowing sticker bins are full of home decorating treasures? Not me! I stumbled across spray painting various sticker letters to a canvas in my failed attempt (short cut) to make subway art.
This project is as easy as it looks and the possibilities are endless. There are a few things that I did to make sure that the stickers basically became permanent on the canvas. I used two coats of primer that I allowed to completely dry in between each coat. For the large foam letters made by EVA that I used for the monogram canvasses, I first hot glued the letters to the canvas since it does not have adhesive. Cheers! Coisinhas*Outras. Coats Crafts Brasil. 5 Minute DIY: Fabric Poppy Flower Gift Toppers.
In the last minute craziness of finishing Gifted Magazine a few weeks ago, I completely forgot to add a note about the cover image (photo by me) and the poppy gift toppers I made for it.
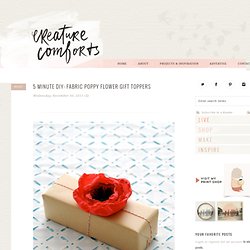
Oops! In any case, today I thought it would be fun to share a simple how-to with you so that you can make your own DIY Fabric Poppy Flower Gift Toppers. Be forewarned that these little blooms are incredibly addicting to make. In fact before I knew it I had made so many of them that my studio looked like the field of poppies from the Wizard of Oz (minus the opium haze of course). Anyhow, I certainly don’t need all of them, so I have listed a few of them in my shop for those of you who might not want to make them, or just don’t have the time to do so. If you’re on board for making your own, here’s what you’ll need: Step 1: Prep your fabric. Step 2: Creating the petals. Step 3: Dress up the middle of your flower. Spring Fling Button Garland. DIY Craft Project: How to craft a twine-ball light garland {As featured on Rock n Roll Bride}
Time for another DIY craft project and today I’ll be showing you exactly how you can make this twine-ball light garland yourself.
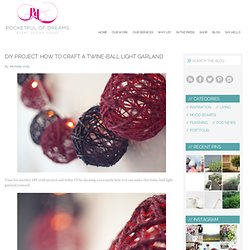
It’s one of those projects that’s a little bit messy and does take quite a bit of time, but it is so much fun. Plus you have a really cool piece of decor at the end of it. Perfect for parties or around the home, you can paint it up in any colour you want to match your design scheme, and when lit, it looks so pretty, casting lots of patterned twinkly light everywhere. Whirl-it lampshade - free DIY tutorial. We really needed a new lamp, and we´ve planned to make one for months.
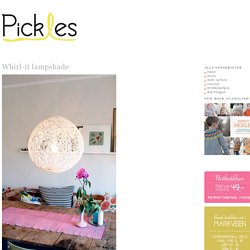
This week we finally got around to it. It takes a bit of different materials, but it´s really easy when you´ve started. We recommend making it outdoors, as it gets quite messy. The result is pretty neat, especially at night when the threads cast shadow on the walls. Whirl-it lampshade - Whirl-it lampshade - free DIY tutorial. We really needed a new lamp, and we´ve planned to make one for months.

This week we finally got around to it. It takes a bit of different materials, but it´s really easy when you´ve started. We recommend making it outdoors, as it gets quite messy. The result is pretty neat, especially at night when the threads cast shadow on the walls. We planned to make the lamp using the yarn Garnstudio Ice, but it ran out really quickly, and we had to improvise by using a thinner yarn to complete it. What we used One big, round balloon. How we did itGather all the materials.Put the yarn into the glue and mix properly.
How to make gift bags from newspaper. When I bought something at a store recently, the clerk handed me my purchase in a bag made from a newspaper.
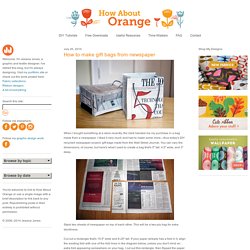
I liked it very much and had to make some more—thus today's DIY recycled newspaper project: gift bags made from the Wall Street Journal. You can vary the dimensions, of course, but here's what I used to create a bag that's 5" tall, 4.5" wide, and 3" deep. Stack two sheets of newspaper on top of each other.
This will be a two-ply bag for extra sturdiness. Cut out a rectangle that's 15.5" wide and 8.25" tall. Fold a flap 1.25" down from the top. Cut two pieces of cardstock or chipboard to 4.25" x 1", then glue them on the widest two panels just under the top fold. Put glue on the outside of the 0.5" tab and bring the left-most panel over to form the body of the bag, aligning the cut edge of the panel with the folded edge of the flap. Upend the bag so the 2" flap is now up. Coleção: Letters. Rolled Flower Gift Toppers. Here is a quick and easy way to add a little charm to your gift packages.
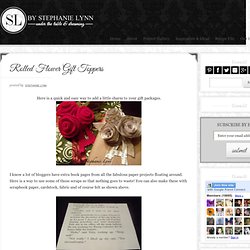
I know a lot of bloggers have extra book pages from all the fabulous paper projects floating around. Here is a way to use some of those scraps so that nothing goes to waste! You can also make these with scrapbook paper, cardstock, fabric and of course felt as shown above.